
Appearance
Tables and receipts
Prepare areas and table types
Open Operations management → Opening Settings → Dining Table Management. Use Table area to create areas such as Main Hall, then Dining Table Specifications to create models with a name, standard guest count and optional remark. A table's area and model are separate selections.
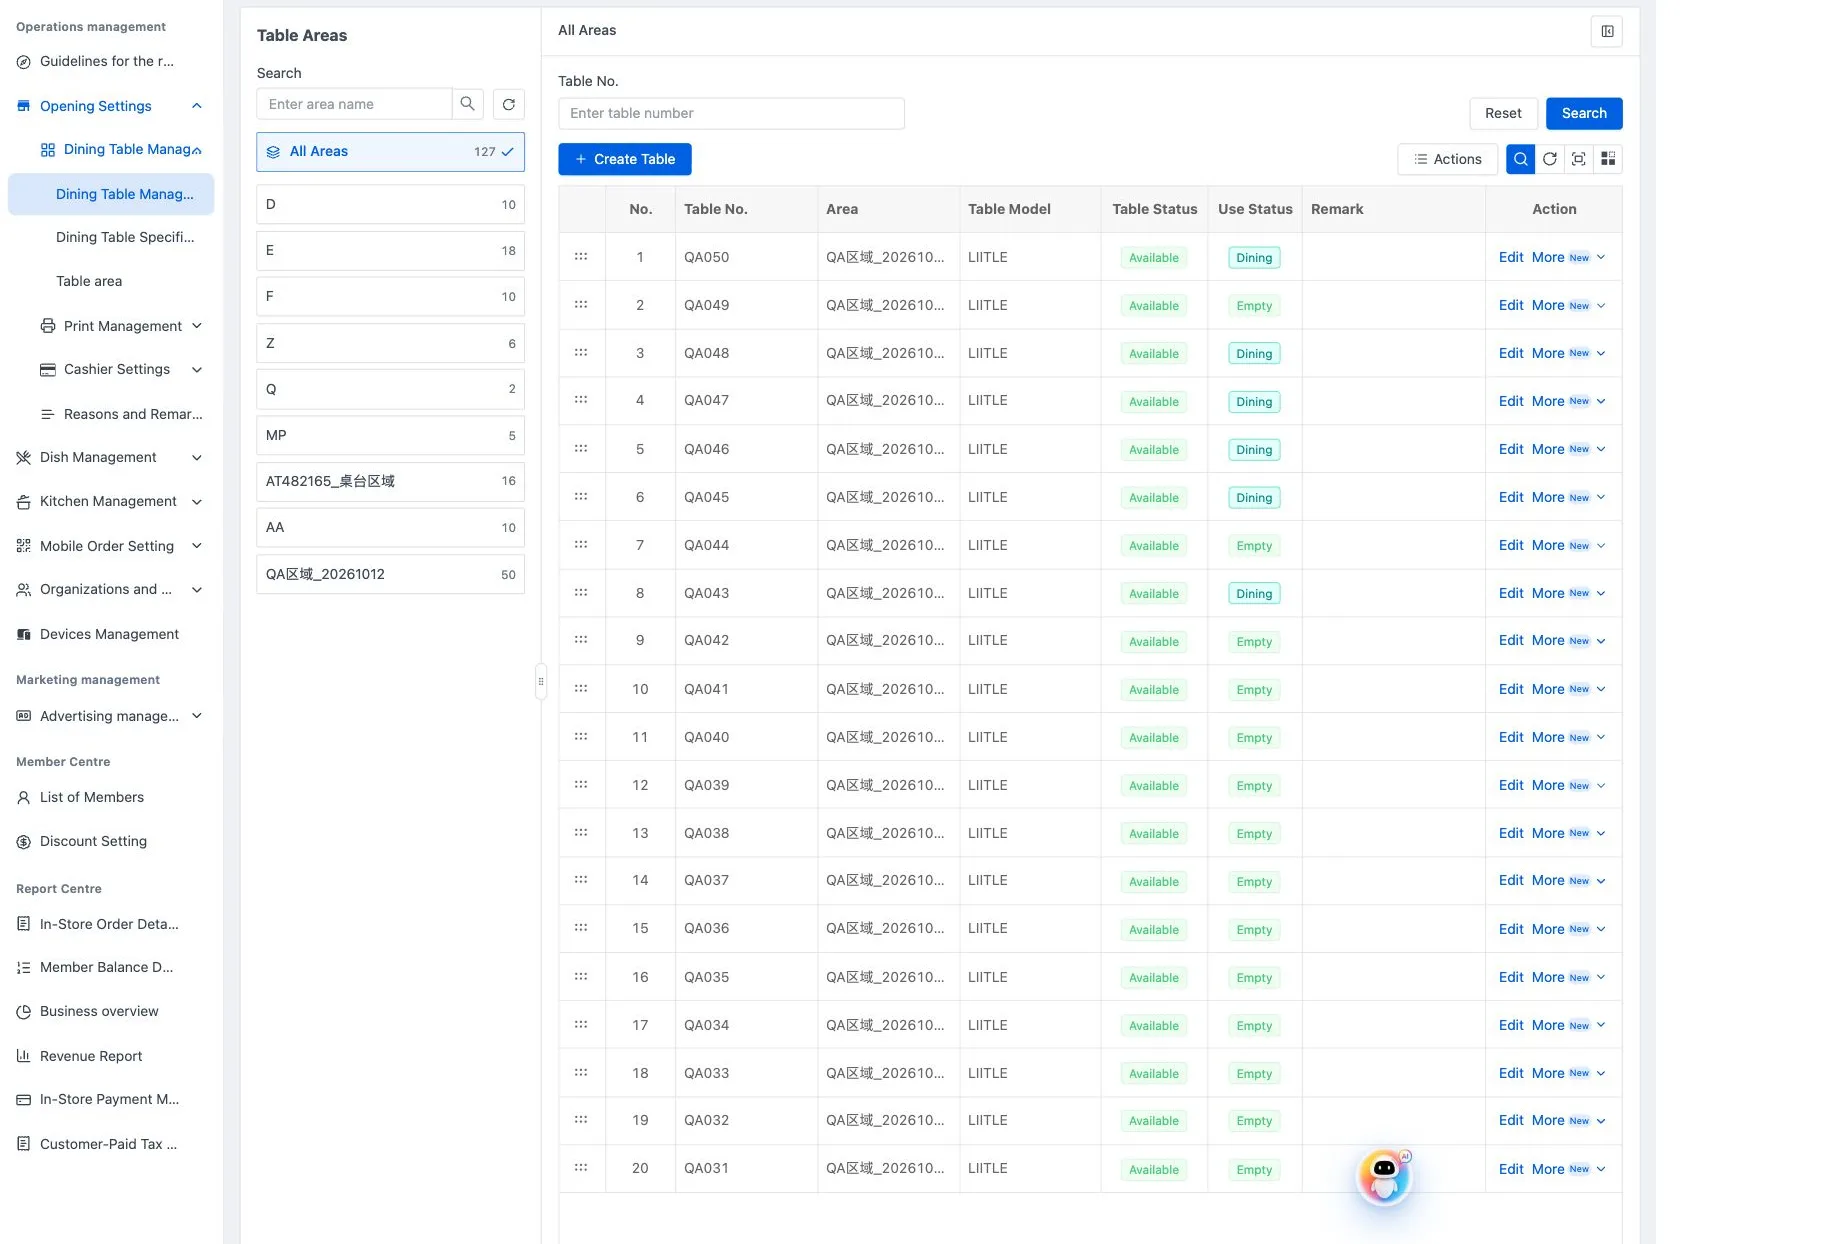
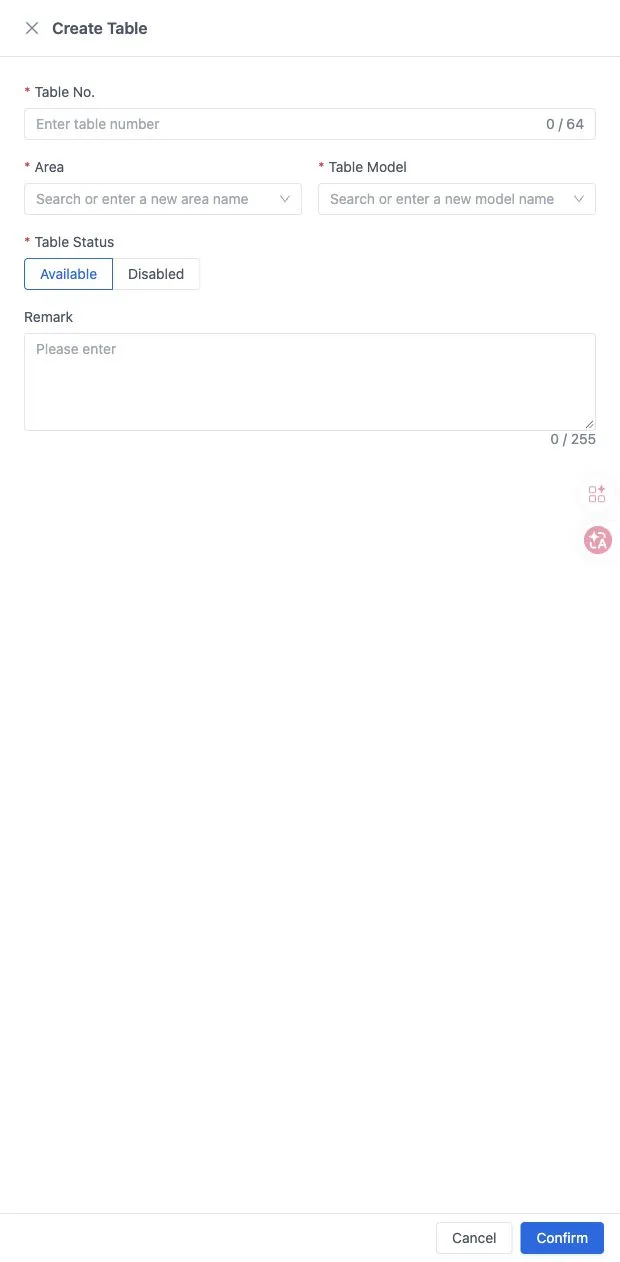
In Dining Table Management, select Create Table. Enter Table No., choose Area and Table Model, set Available or Disabled, and confirm. Check the new row before using it at the POS.
Use Edit for existing tables. Their usage state is updated by POS and QR-ordering activity. A table with an unfinished order cannot be disabled while in use. Disabling a table does not change an existing order.
For several tables, use the batch-create action in Actions. Choose area and model, number-only or text-prefix/suffix numbering, the starting number and quantity. Enter excluded numbers separated by commas or spaces, and review the resulting table numbers after creation.
Download a table QR card
Open a table's More → QR code action. Check the preview and choose whether it includes the table number, store name and area. Optional custom text is limited to 40 characters. Set the QR, text and card-background colors, then download the card for that table.
The window also offers reusable configuration templates and configuration import, export and history. To save the current appearance as a template, use its save-template control, enter a name and save. Select an existing template to reuse its appearance. A configuration file stores card settings; the downloaded QR image is what customers scan.
For multiple tables, choose the batch QR action to enter selection mode. Select tables individually or select the current page, review the selected count, then open the QR action showing that count. Switch the preview table to check the cards and use batch export. Exit selection mode when finished.
Store-wide quick-order and takeaway codes are accessed in Customer ordering.
Set the customer receipt header
Open Operations management → Opening Settings → Print Management → Receipt Header Settings.
- Add a receipt logo and choose Show Table / Pickup Number if required.
- Enter Bill Name.
- Fill Company Name, Company Address, Tax Number and Contact Phone. Select left or center alignment for the tax information.
- Select Save, then print a customer receipt or bill from the POS to check it.
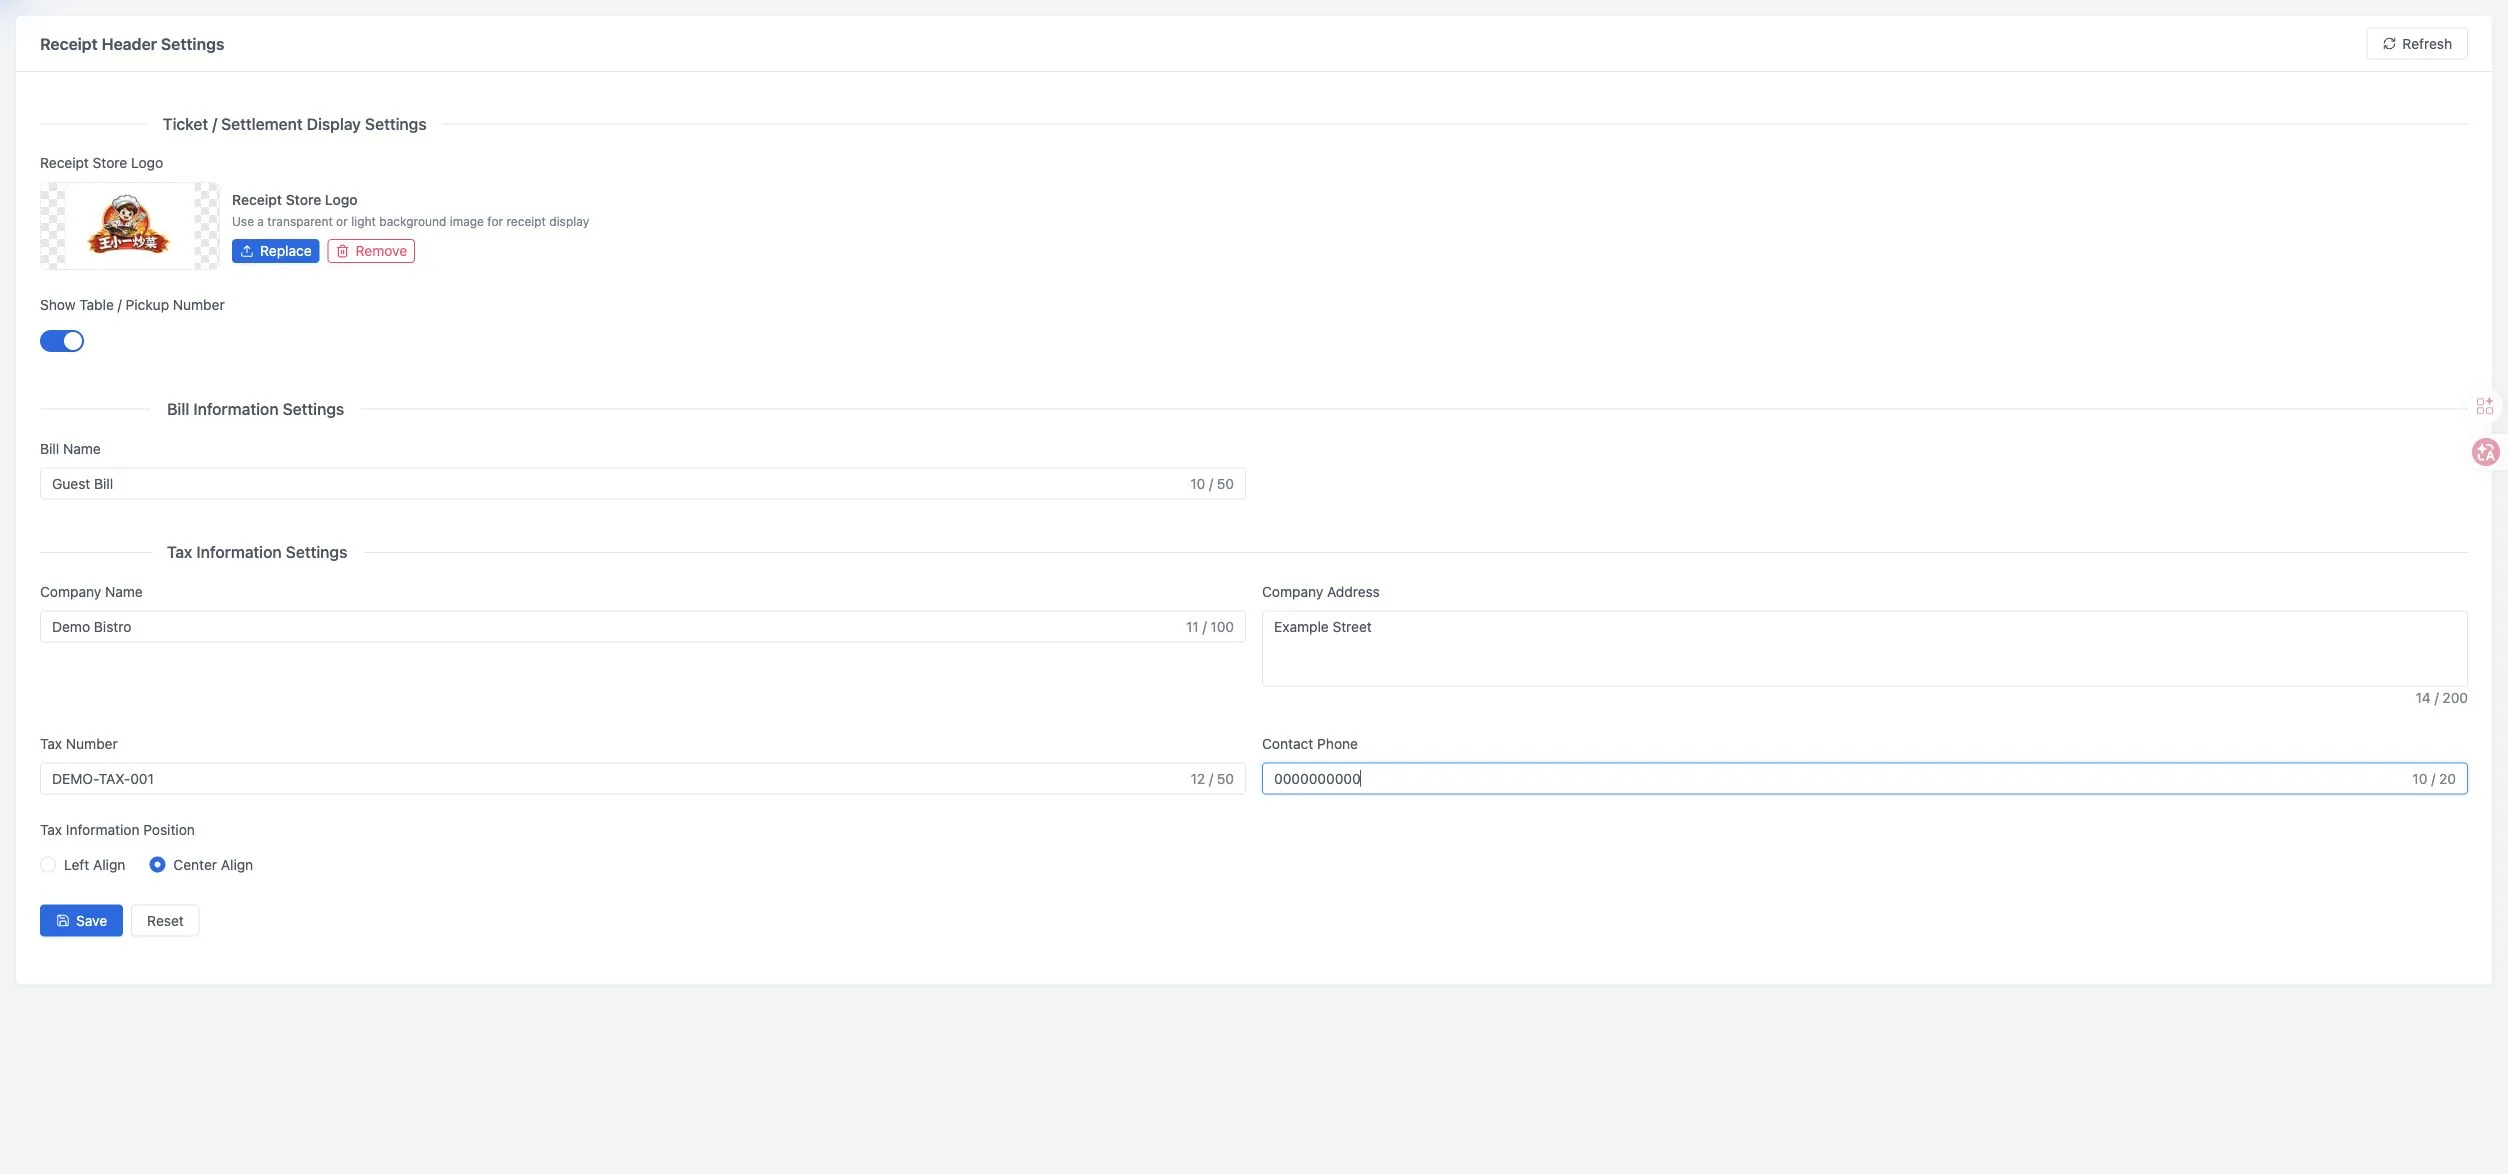
The current layout is fixed. The back office changes the fields provided here; printer binding and copy counts are configured at the POS.
Maintain notes and reasons
Open Operations management → Opening Settings → Reasons and Remarks, choose an operation type and create its text, up to 50 characters. The types cover item and bill notes, discounts, voids, returns, cancellations, refunds, reopening checkout, reversing payments or top-ups, and member cancellation.
Staff select these entries during the corresponding POS operation, or enter their own text using Other. Adding a reason does not execute the operation it describes.
To choose which tables take part in the waitlist, see Set up the seating waitlist.