Seating waitlist
Set up queues by table type, then issue tickets, call numbers and seat guests from the POS. See how guests can get their own tickets and how to configure the CDS waitlist display.
Watch on YouTube
When the dining room is full, staff can issue a number from the POS. Guests can also use a queue kiosk or a POS in self-service mode. The system matches the party size to a table queue using the back-office settings.
Set up queues by table type, then issue tickets, call numbers and seat guests from the POS. See how guests can get their own tickets and how to configure the CDS waitlist display.
Watch on YouTube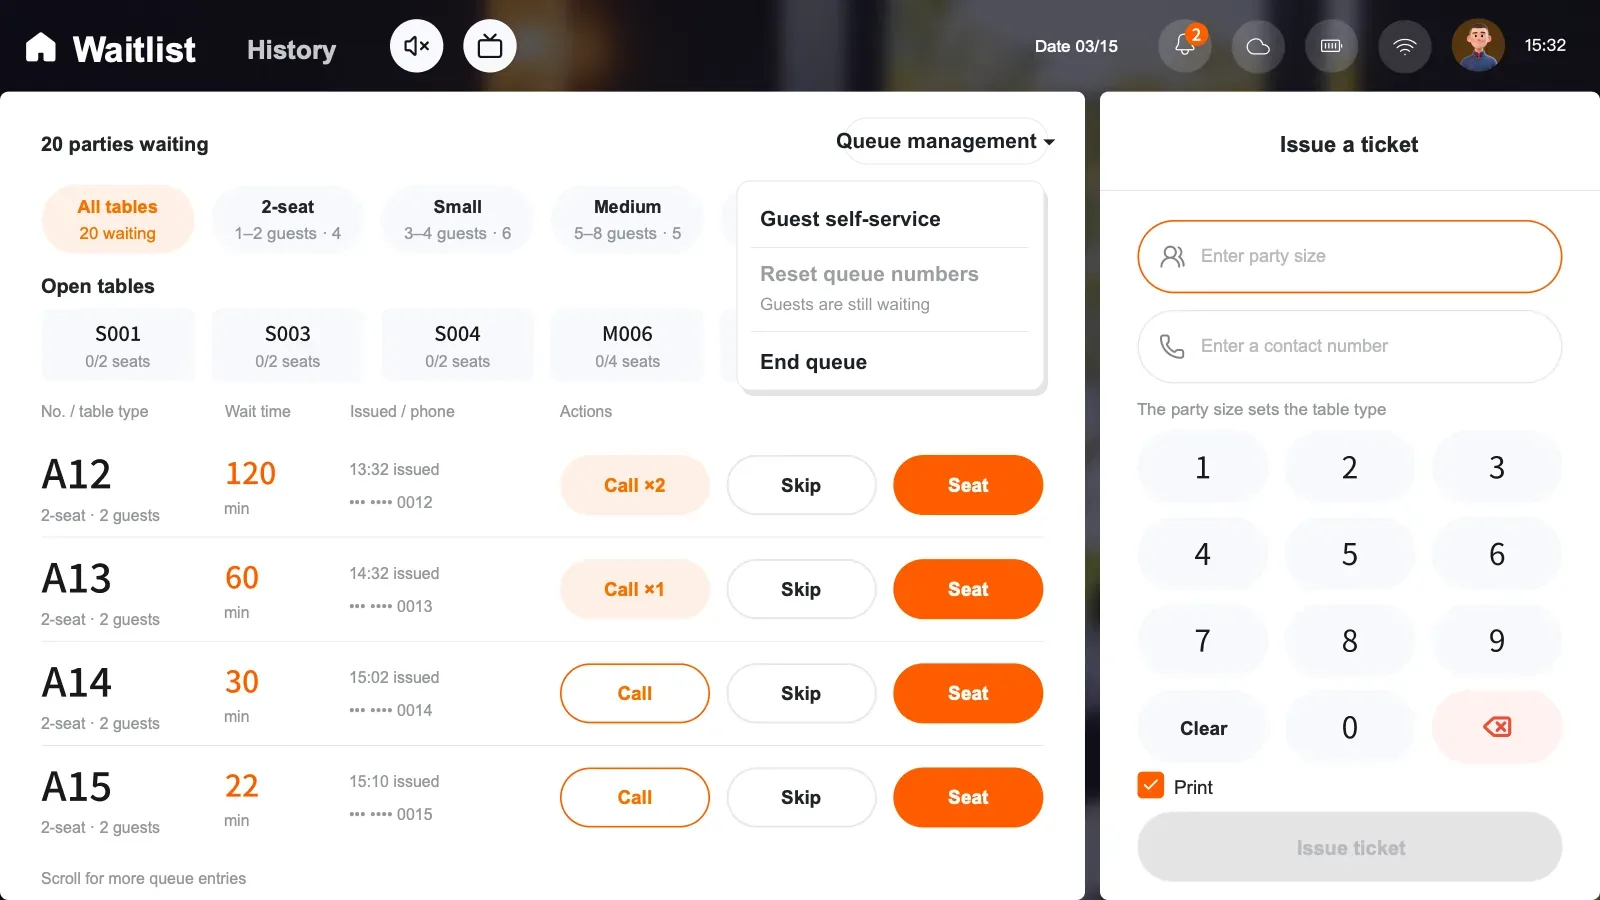
Open the self-service queue screen on the dedicated kiosk. To use the current POS for self-service, go to Waitlist → Queue management → Guest self-service. Guests enter their party size, follow the prompts for a contact number, tap Take a number and collect the printed ticket. Ask guests to keep the ticket and come to the host stand when called.
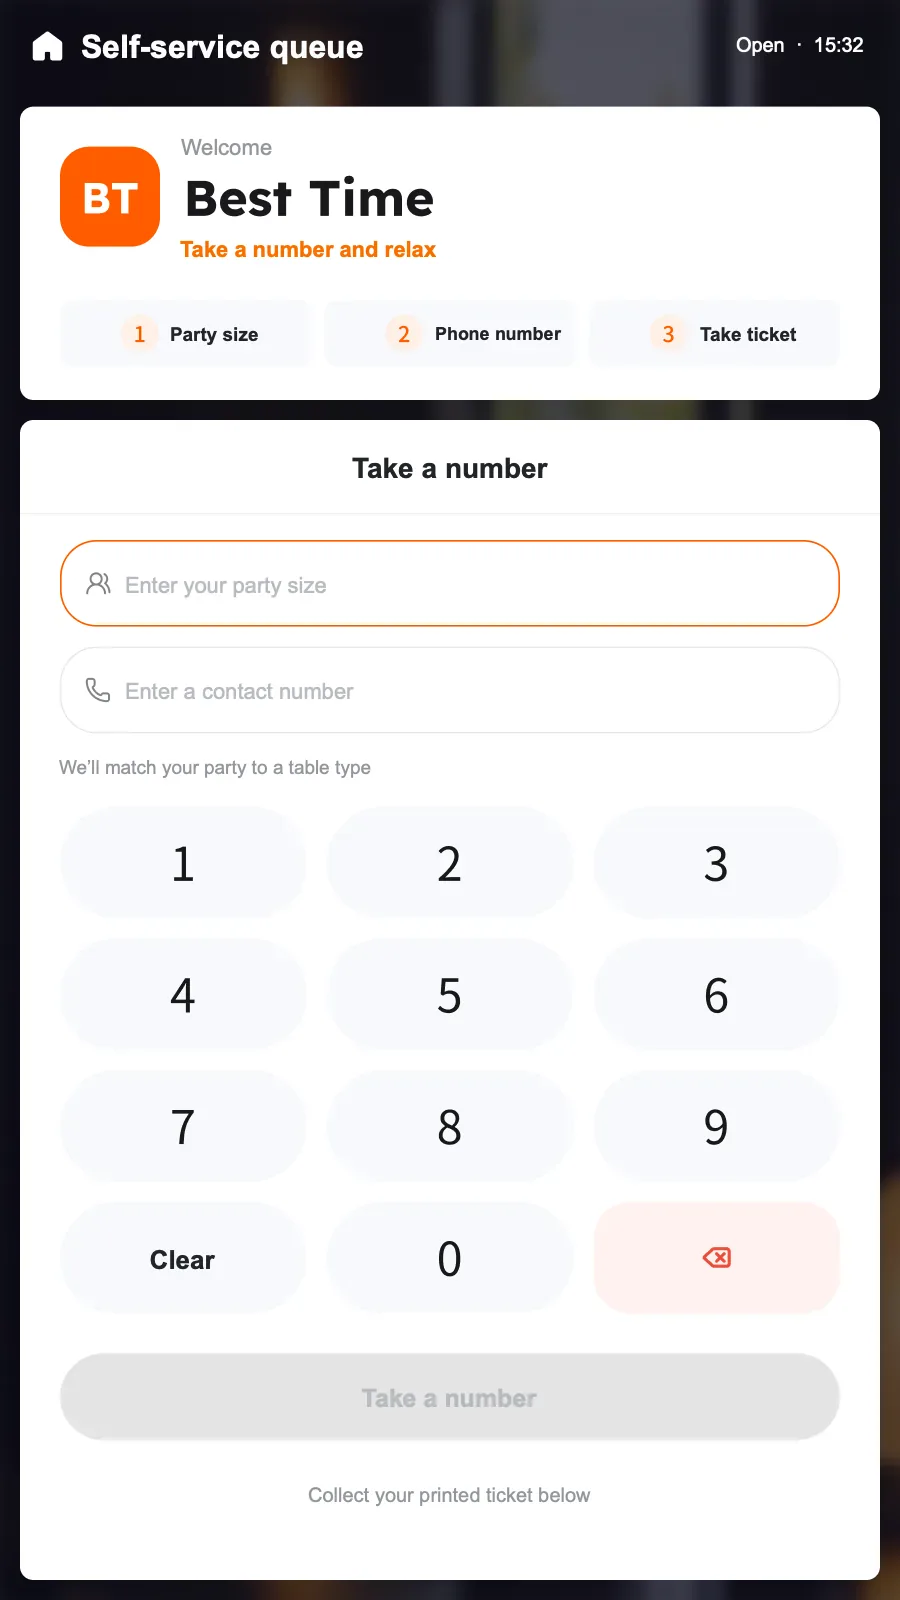
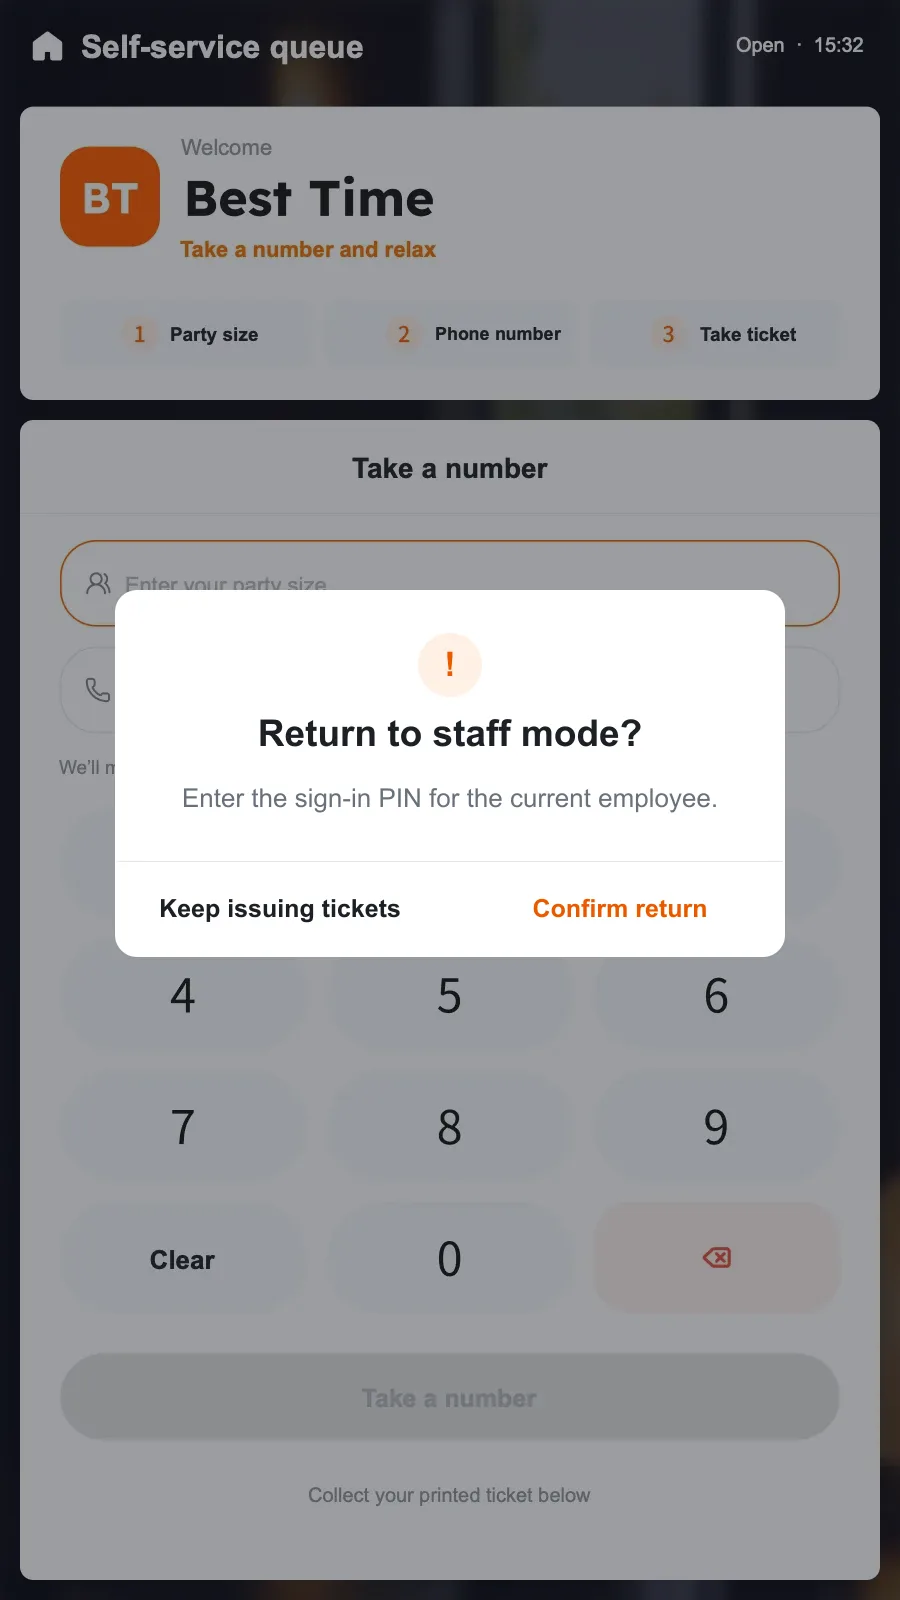
To switch the POS back to staff use, tap the home icon in the upper left of the self-service screen. Confirm the return, then enter the sign-in PIN of the employee who opened self-service mode.
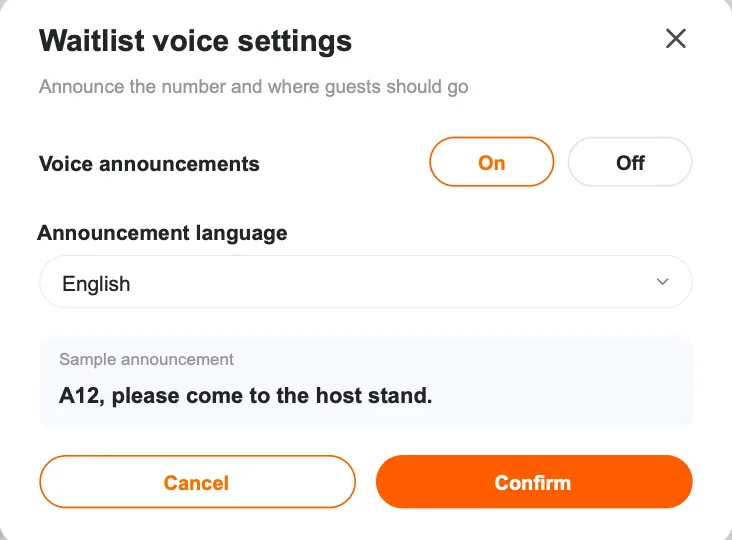
With voice enabled, calling a number plays the number and the seating message. Select the speaker icon on Waitlist to open Waitlist voice settings, turn on announcements and choose a language. See Set up the CDS waitlist display for the guest screen.
To stop taking queue numbers, choose End queue under Queue management. To reset numbering by hand, wait until the queue is empty, then choose Reset queue numbers from the same menu and confirm. Queue history is retained. Administrators manage table types, party sizes, missed turns and daily reset times under Operations management → Opening Settings → Queue Number Settings.