
Appearance
Set up the seating waitlist
Open Operations management → Opening Settings → Queue Number Settings. Link the tables used for seating to their queues, then set the numbering rules, missed-turn policy and guest messages.
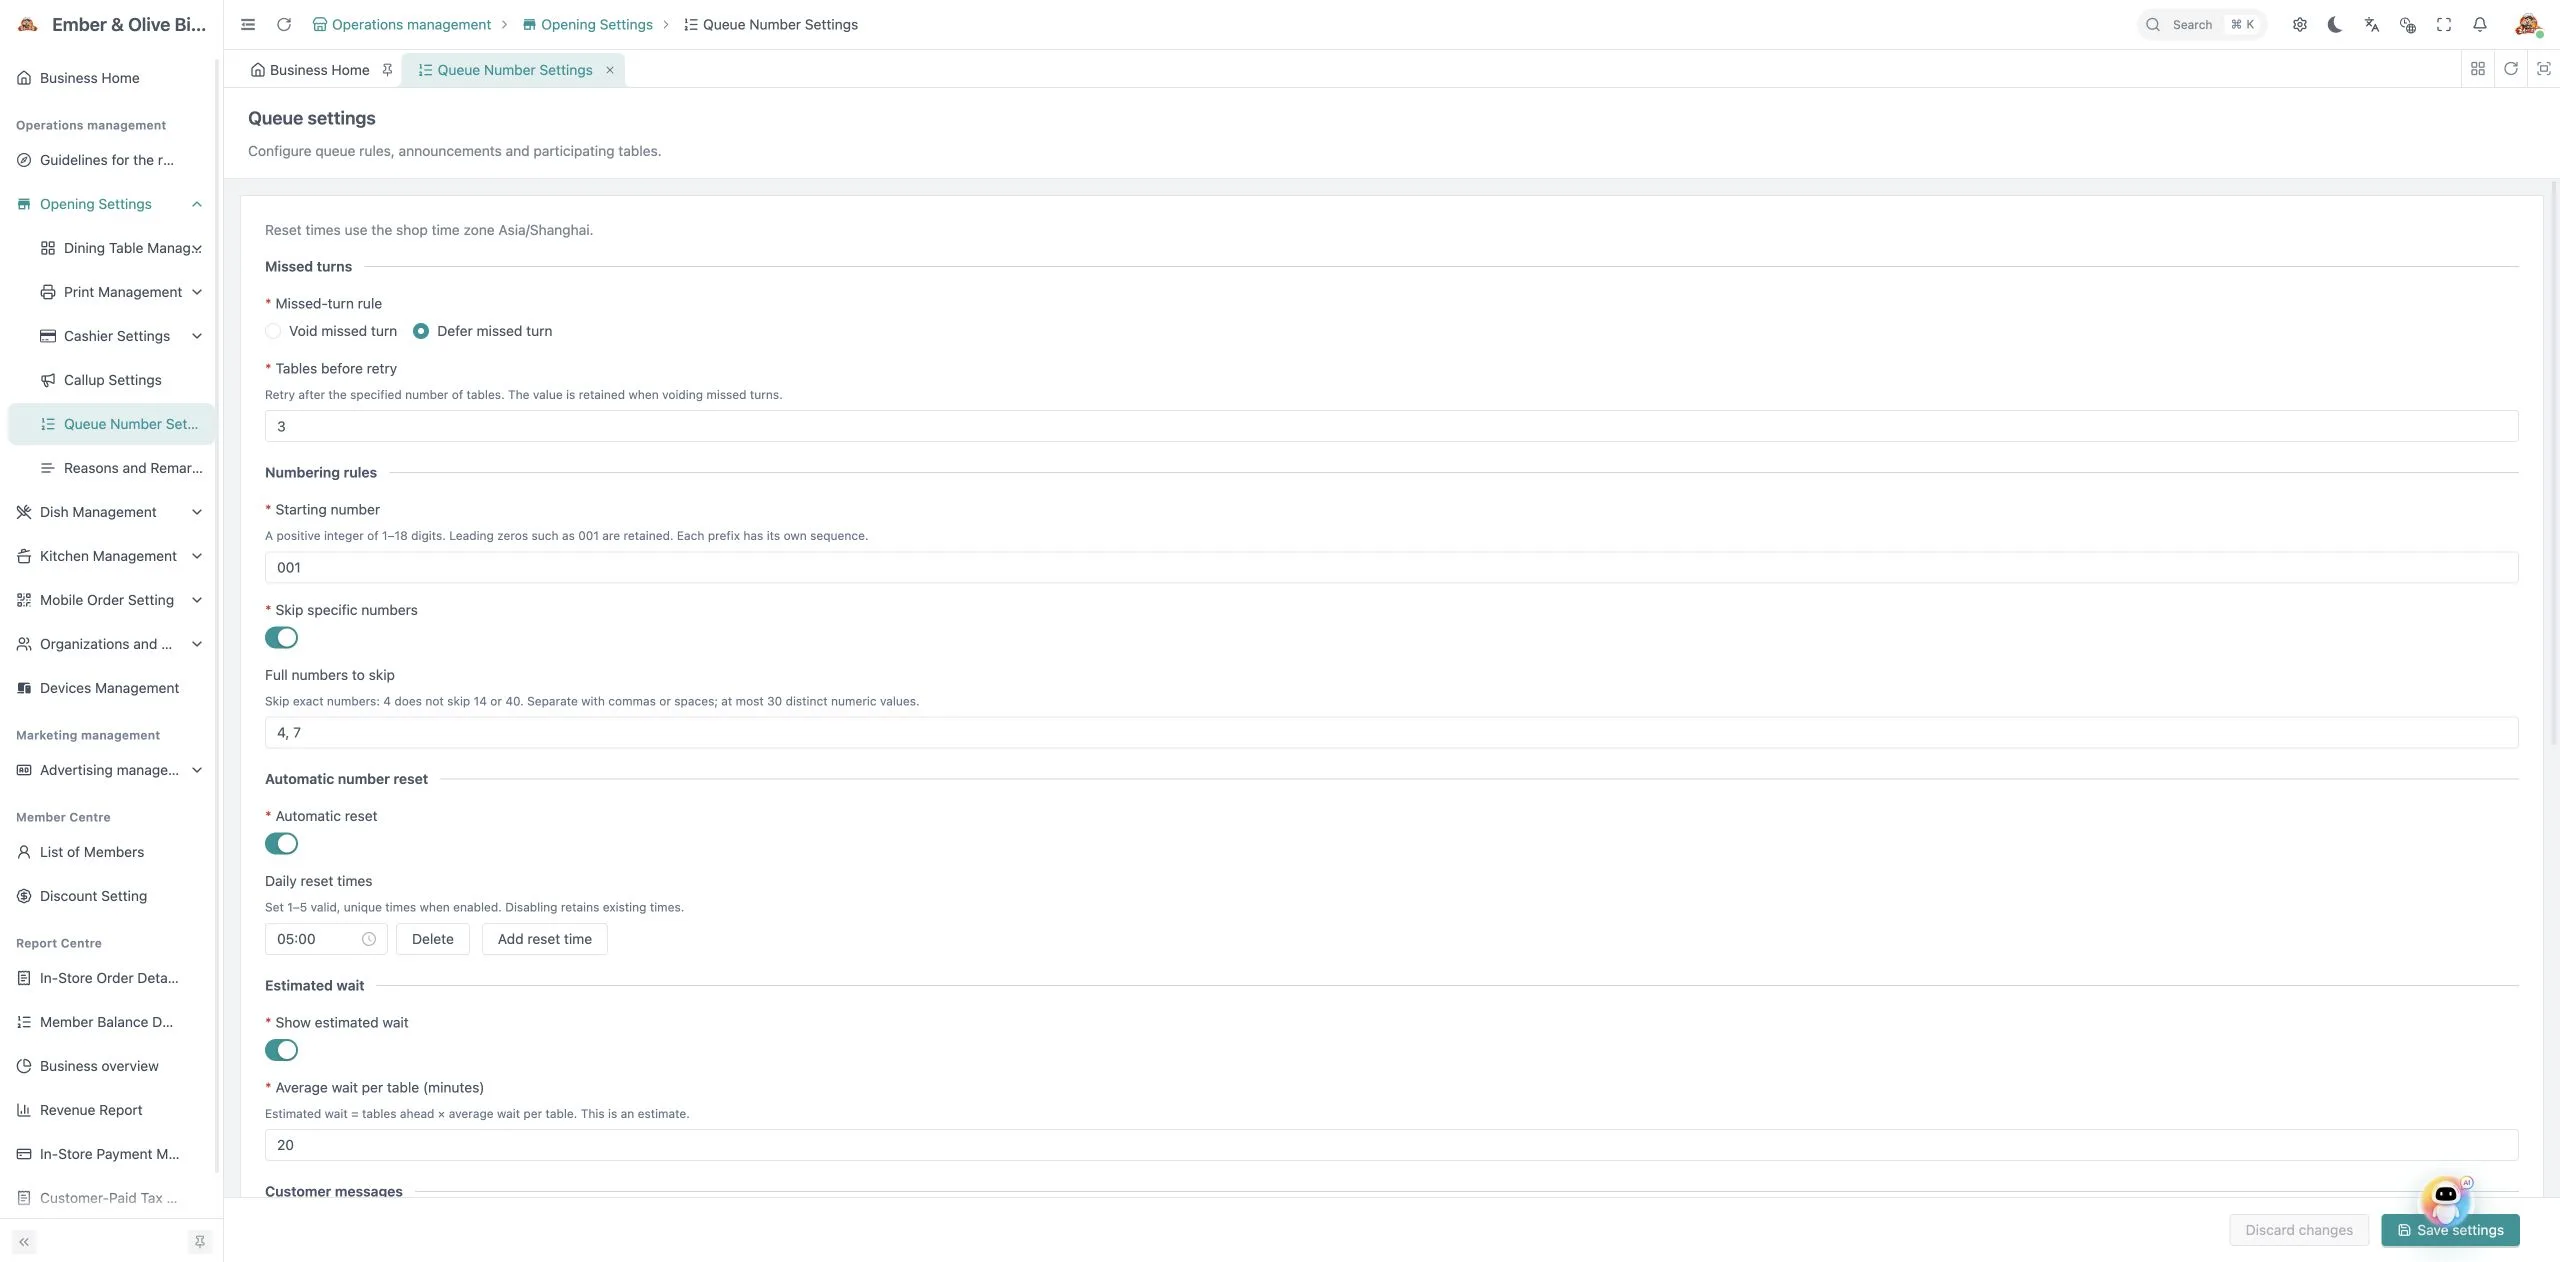
Configure queues by table type
- Create table models and tables under Dining Table Management.
- Under Queue configuration, find the table model and select Edit. Set the Number prefix, Minimum guests and Maximum guests. Use one to six letters for the prefix. Prefixes are saved in uppercase and must be unique within the store.
- Under Select tables, check the tables that belong in this queue and select Add to queue. Use Remove from queue to unlink a selected table. Search by table number or area. Select enabled tables when adding links.
- Select Save queue. Enabled queue tables counts linked and enabled tables. Staff check the POS for tables that are free right now.
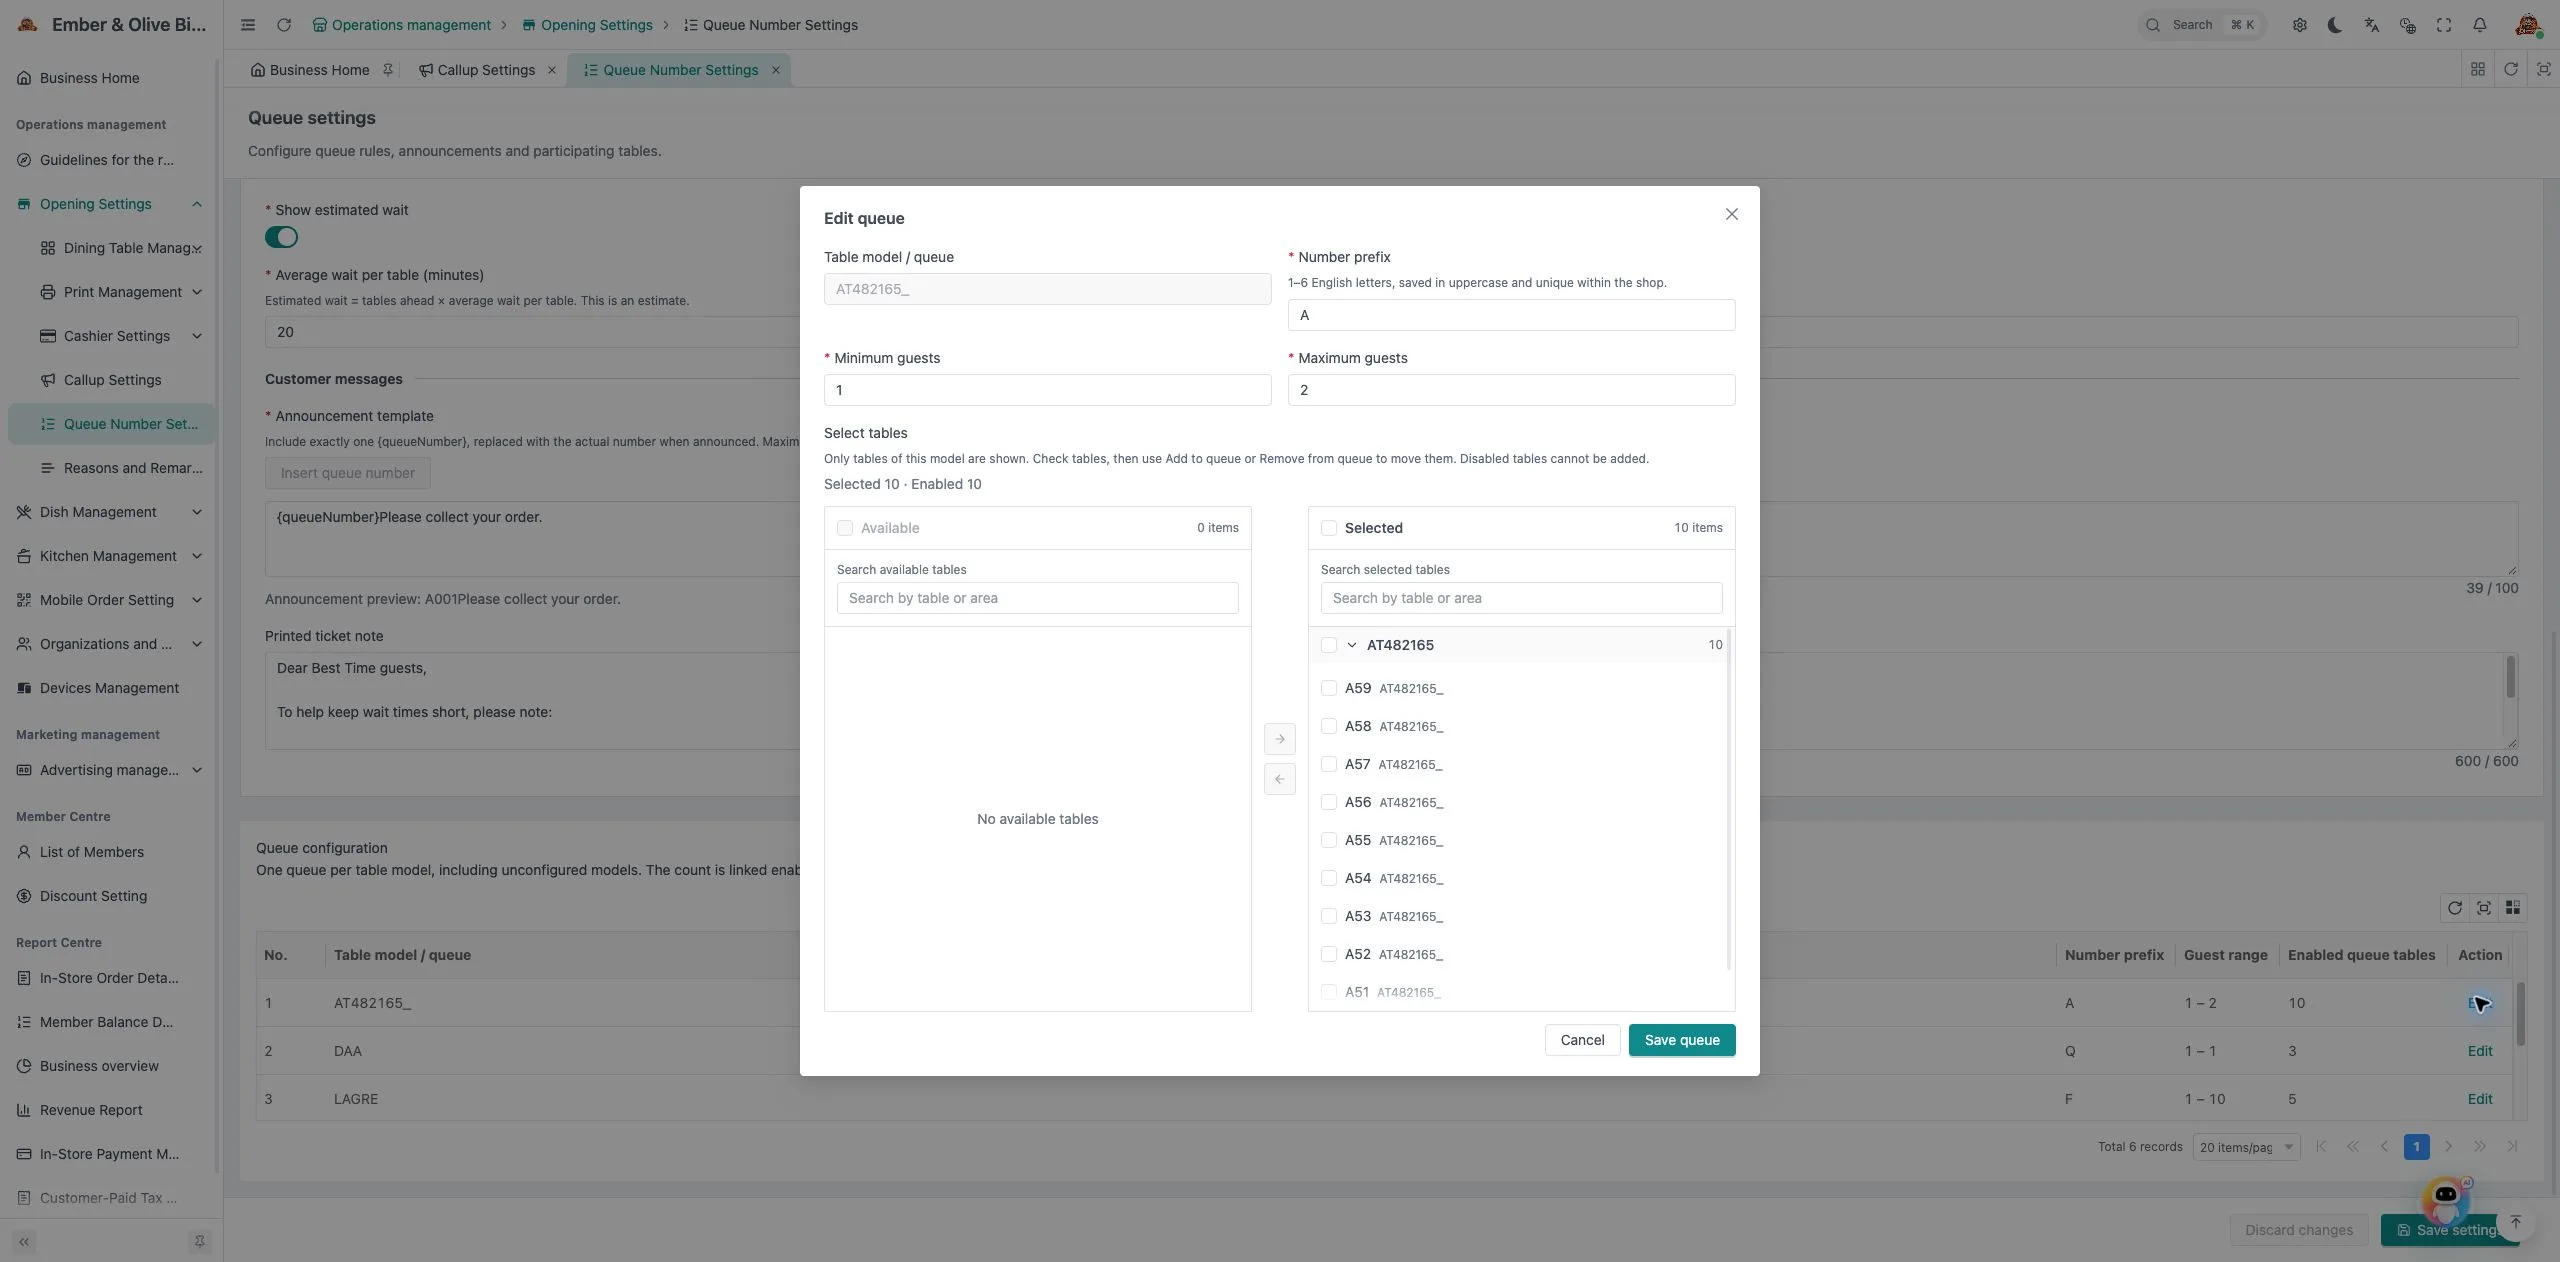
Set numbering and missed-turn rules
| Field | How to use it |
|---|---|
| Missed-turn rule | Choose Void missed turn, or choose Defer missed turn and enter Tables before retry. A deferred number is called again after the specified number of tables. |
| Starting number | Enter a positive integer of 1 to 18 digits. Leading zeroes are kept, as in 001. Each prefix has its own sequence. |
| Skip specific numbers | Turn this on and enter up to 30 distinct values under Full numbers to skip, separated by commas or spaces. Entering 4 skips the exact number 4. |
| Automatic reset | Turn this on and set one to five different Daily reset times. Resets use the store's time zone. |
| Show estimated wait | Turn this on and set Average wait per table (minutes). The estimate multiplies the number of parties ahead by that average. |
Set the announcement and ticket note
Write the seating message under Announcement template and include exactly one {queueNumber}. The system replaces it with the number called. Use up to 100 characters. For example, "{queueNumber}, please come to the host stand." Check the wording in the announcement preview.
Use Printed ticket note for instructions guests should see on the paper ticket, such as where to wait and how missed turns are handled. The note can contain up to 600 characters. Select Save settings and keep the primary POS connected to the internet so it receives the settings.