
Appearance
Store settings
Update store details and hours
Open Operations management → Organizations and Accounts → Store Profiles and select Edit Store Information.
Update the store name, manager, contact details, region, address and store time zone. The merchant identifier is read-only. Set the opening start and end times; upload a logo or storefront photo if needed, up to 2 MB per image. Save, then review the profile.
The store time zone governs its trading hours. Suspending business affects customer QR ordering on mobile; manually operated terminals remain under staff control. Restore trading and check the hours before accepting mobile orders again.
The profile also displays the platform account, authorization dates and remaining time for checking the store's current authorization.
Set the business-day boundary
The Business Cutoff Time setting determines the business day used in reports. It is separate from opening hours.
- In the store profile, select Change Business Cutoff Time.
- Choose the new time and optionally explain the change.
- Review the three-day preview provided on screen.
- Confirm. The new time applies from the next business day.
- Use Change History to review the previous and new cutoff times, the explanation, and the full start and end of each business day.
An order receives its business date when it is placed. A later change to the settlement time does not reassign existing orders. Checkout-time reports use the calendar date of checkout, which may differ when a meal crosses midnight or is settled later.
Read the complete interval in the change history. For example, business date 2026-09-10 can run from 2026-09-10 00:00:00 through 2026-09-10 23:59:59. Orders placed within that interval belong to that business date. Use your store’s recorded intervals when checking its orders.

Choose currency and decimal places
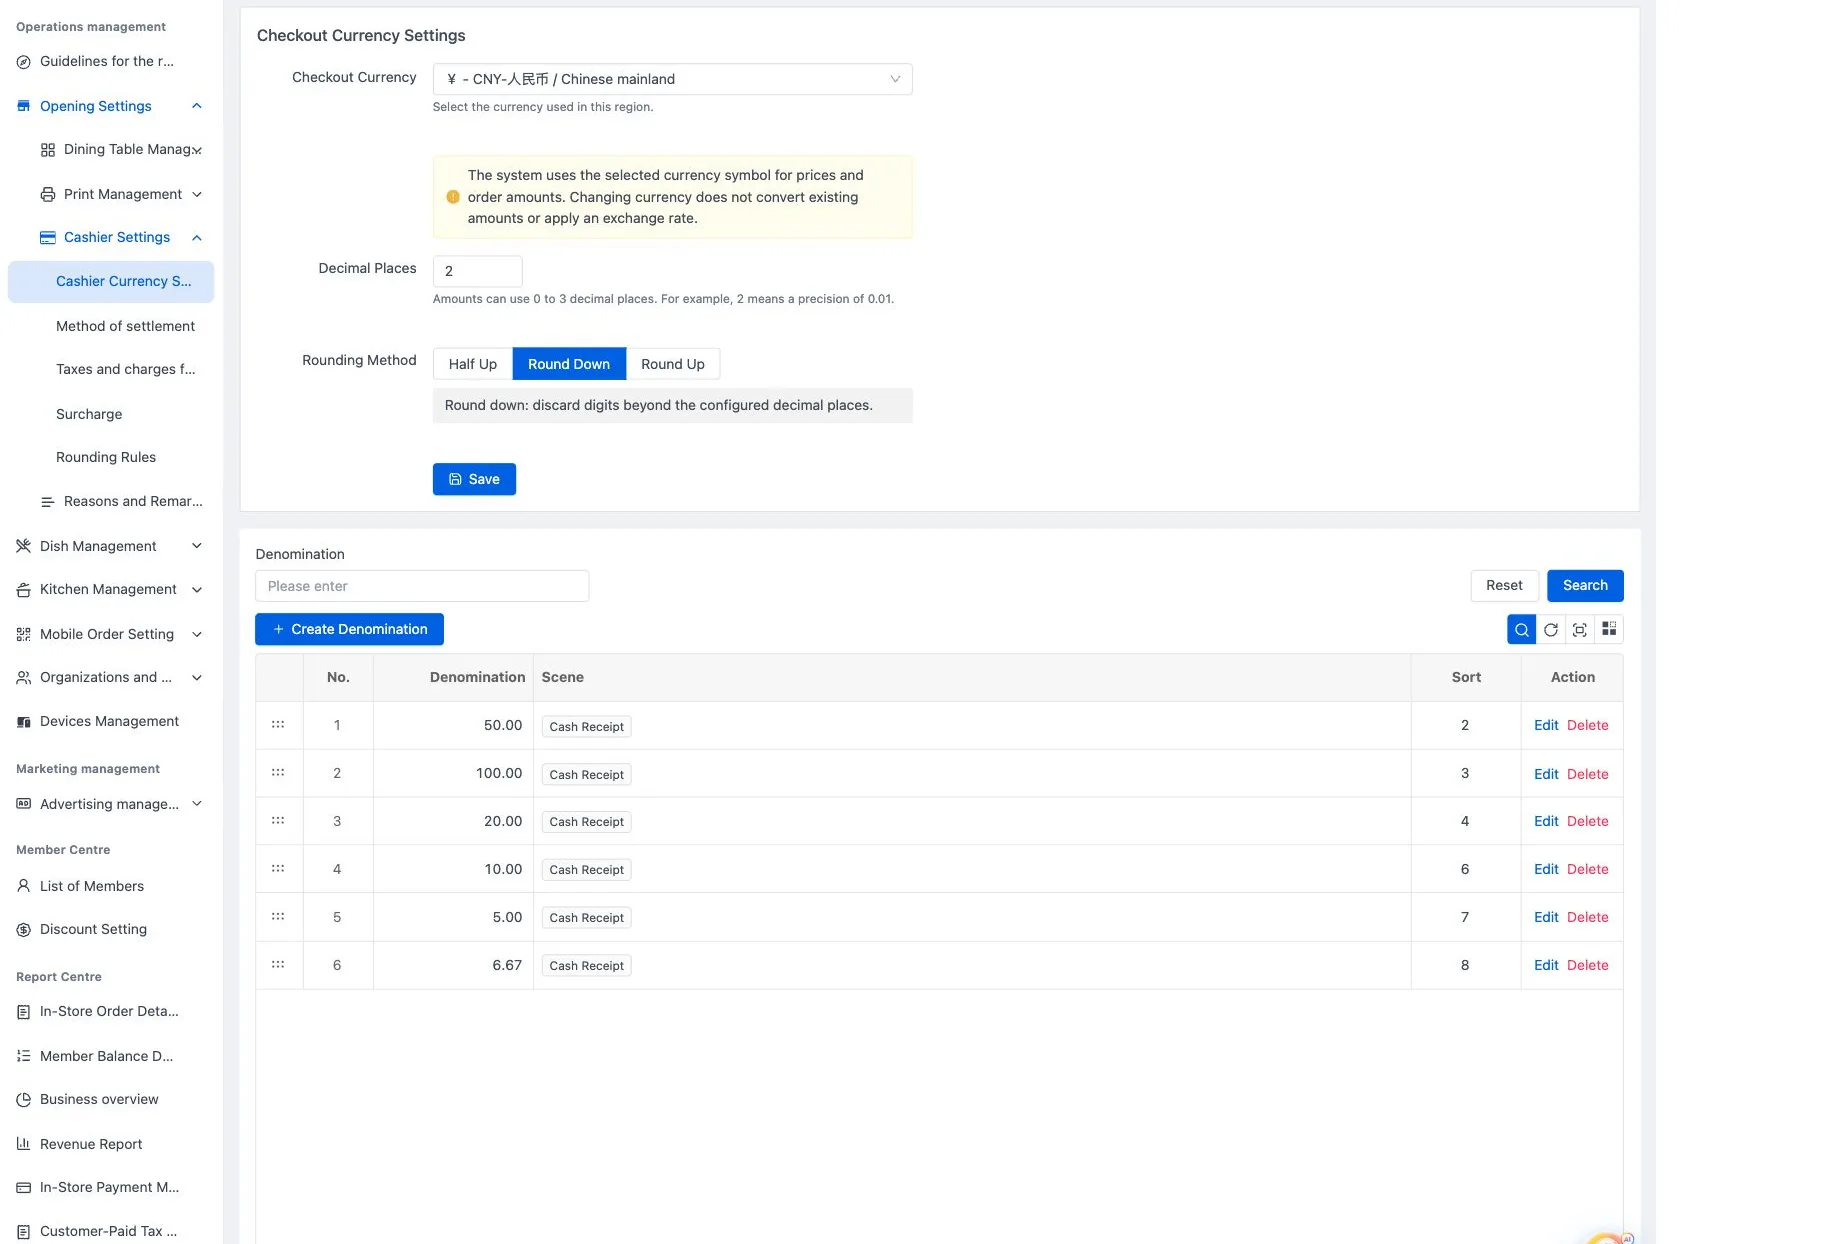
Open Operations management → Opening Settings → Cashier Settings → Cashier Currency Settings.
Select Checkout Currency, set Decimal Places from 0 to 3, and choose Rounding Method: Half Up, Round Down or Round Up. Select Save, then check the amounts displayed at the POS and ordering terminals.
Changing currency does not convert amounts or apply an exchange rate. Decimal settings control display and are used at checkout; changing them does not rewrite existing amounts or historical reports. Set the currency before entering a new store's prices.
Whole-bill rounding is configured separately in Payments and charges.
Maintain cash denominations
In the denomination list, select Create Denomination, enter the amount and choose the cash-receipt or cash-calculator scene. Confirm and review the list. Use the denomination filter to find an existing entry before editing it.