
Appearance
Staff access and devices
Create a role and assign permissions
Open Operations management → Organizations and Accounts → Staff management → Role management.
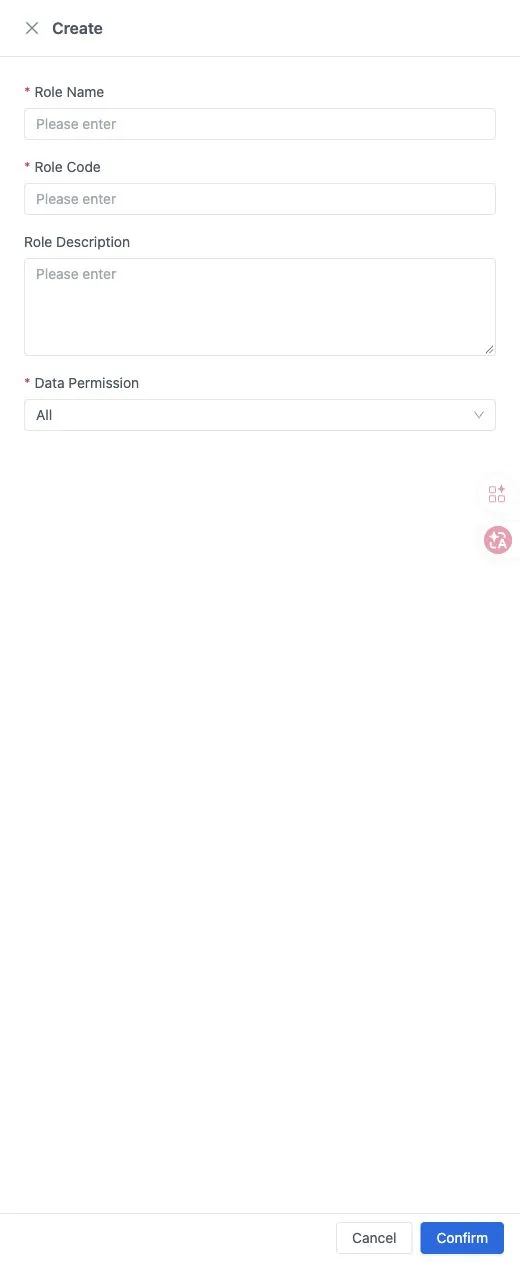
- Select Create. Enter Role Name, Role Code, an optional description and Data Permission, then confirm.
- Open the role's More menu and choose authorization.
- Configure the management and POS ends separately. Find the required directory, page or action and select its permission.
- Save the authorization and check access after the staff member signs in again.
Role Code has no prescribed naming pattern. The panel's left-side modules are navigation; selecting one does not grant access. Use the right-side permission controls and the authorized/unauthorized filters to review your selections.
A page permission and an action permission are distinct. For example, a cashier can work with orders while lacking permission to apply a manual whole-bill discount.
Create a staff account
Open Operations management → Organizations and Accounts → Staff management → Employee Account and select Add Employee. Create the account with a login name, password, staff name and one role. Enter a staff number or leave it for the system to generate. Add contact details and an avatar if needed, set status and confirm.
After creation, open the staff row's More → PIN action to set a six-digit POS PIN. The PIN is separate from the back-office login password.
The assigned role determines the staff member’s visible scope and permitted actions. The account can be used in the back office and POS only where its role permits. Without POS permission, the account cannot sign in there and does not appear in the POS account list.
Use the row edit action to maintain details, role or status. Disabled accounts cannot sign in to the back office and are hidden from the POS. They can be enabled again.
Manager authorization at the POS
A manager with the required permission can enter their six-digit PIN to authorize a restricted cashier action. Grant the manager's role the relevant POS permission in advance. The authorization itself takes place at the POS.
Check devices
Open Operations management → Devices Management. Filter by serial number, type or online status; additional filters include the store. Use ownership details to check assignment and the rename action to give a device a recognizable name.
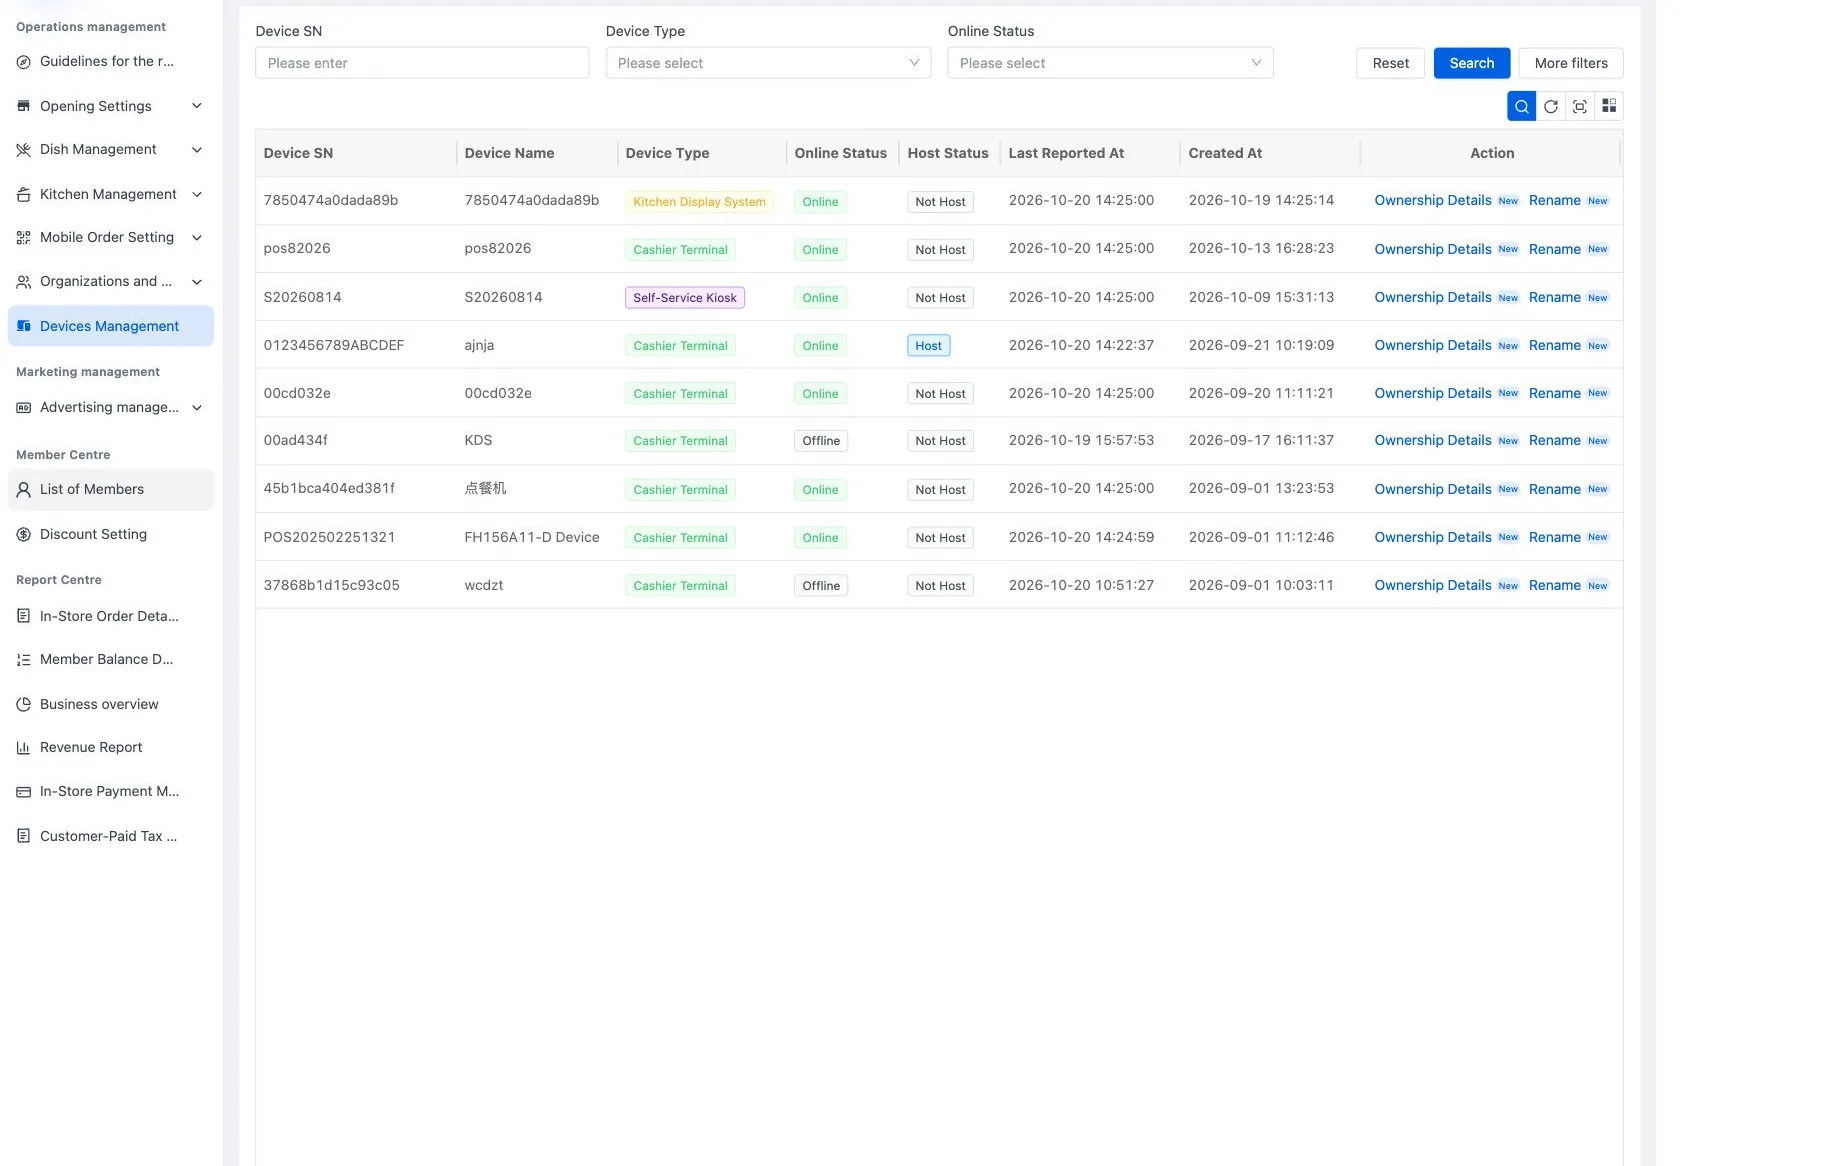
The main POS is online when it can reach the server over the internet. Other devices are online when they share its local network and can be discovered by it. A device name does not replace its serial number for support or activation.
Your provider normally authorizes and binds devices before delivery. If a device is unbound, send its displayed serial number to the provider. Unbinding or deletion leaves it unauthorized and unusable, so arrange replacement with the provider.
For missing staff features, check account status, the assigned role, the correct terminal's permissions and the specific action permission.