Skip to content

Set up the CDS waitlist display ​

Place the CDS where guests in the waiting area can see it. Guests can check their queue number on the screen and come to the host stand when called.

Seating waitlist

Set up queues by table type, then issue tickets, call numbers and seat guests from the POS. See how guests can get their own tickets and how to configure the CDS waitlist display.

Watch on YouTube

Select a screen and layout ​

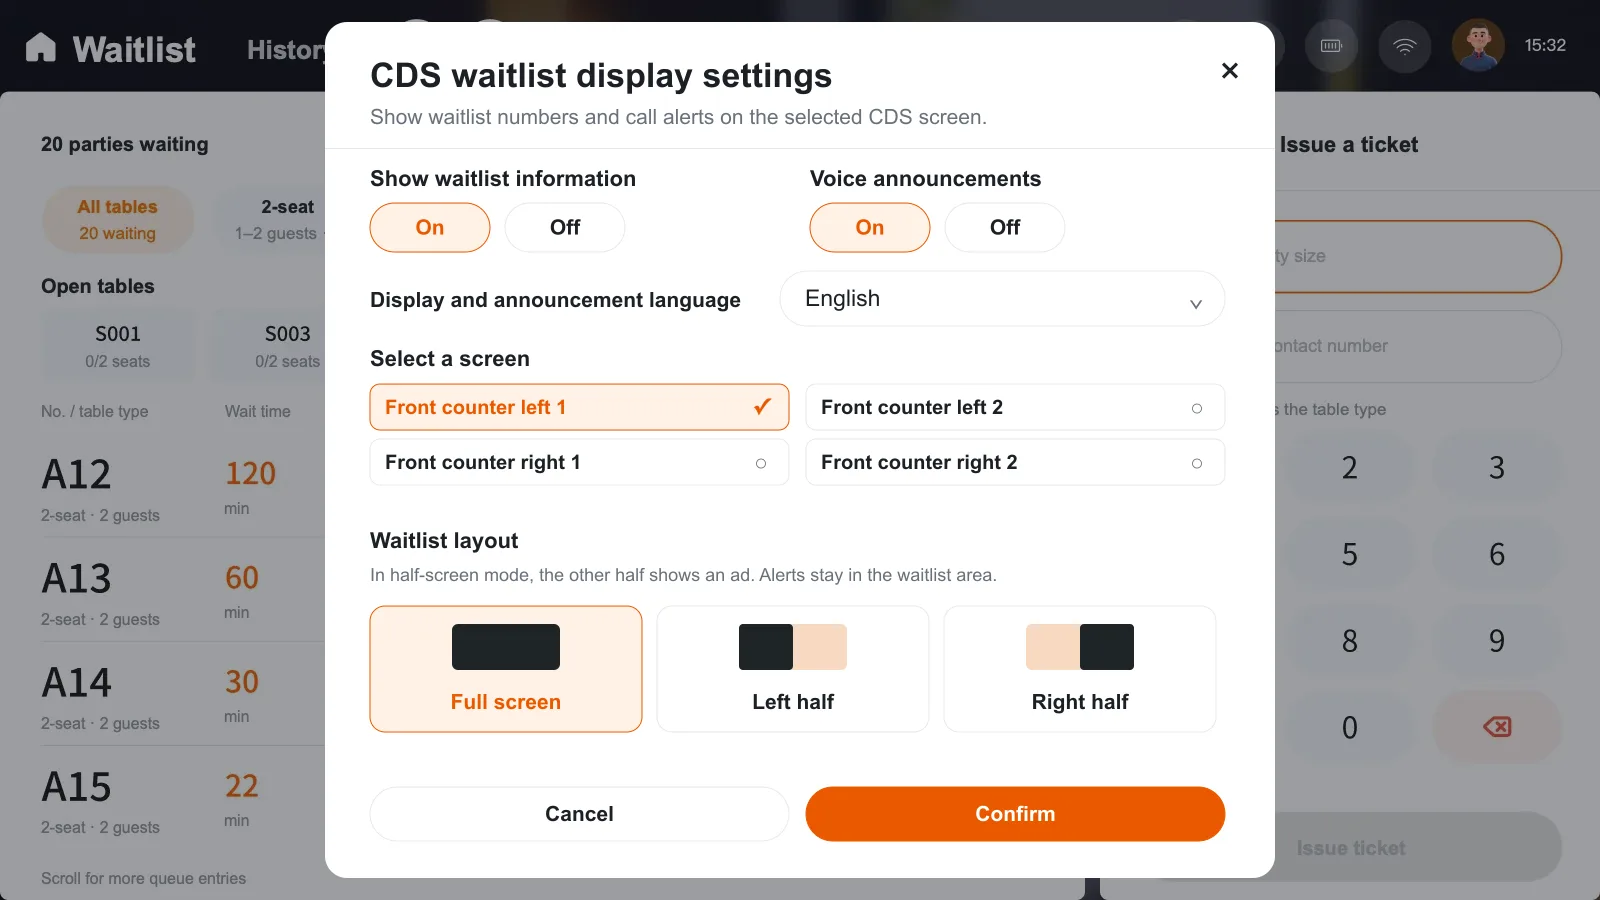
  1. Make sure the CDS is on. On the POS Waitlist, select the screen icon at the top to open CDS waitlist display settings.
  2. Select the waiting-area CDS. Turn on Show waitlist information, enable Voice announcements if needed and choose the Display and announcement language. The display and voice controls can be enabled independently.
  3. Choose Full screen, Left half or Right half, then confirm. A half-screen layout shows an ad on the other side. The enlarged call stays within the waitlist area.

CDS selection, announcement language and layout, localized design illustration

What guests see ​

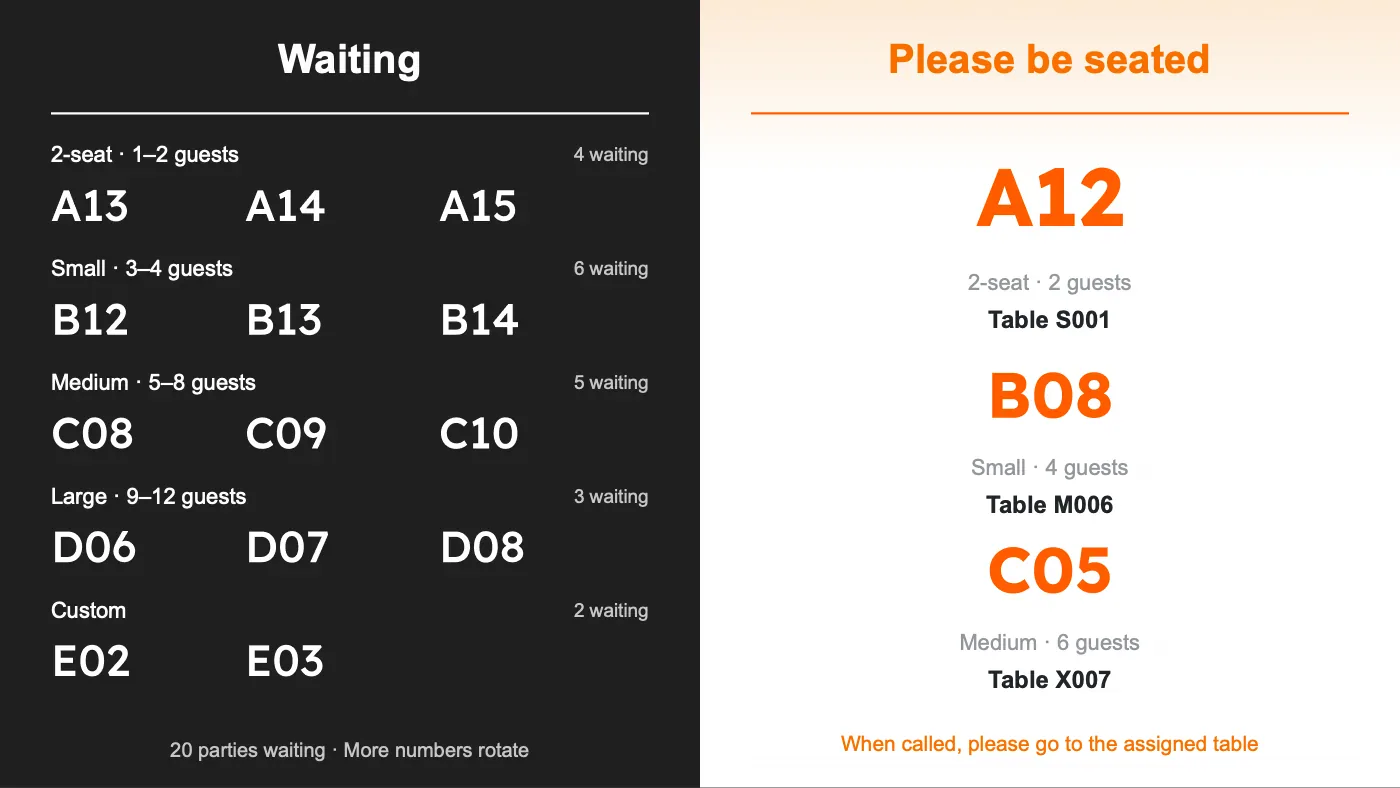
  • Waiting lists guests who are still in line, grouped by table type. Additional numbers rotate into view.
  • Please be seated lists numbers already called. The latest number first appears in a larger pop-up and stays on the list after the pop-up closes. An assigned table number can appear in the list.
  • When staff confirm seating on POS, the number clears from the display.

Full-screen CDS with waiting and called numbers, localized design illustration

If the display stops updating, check that the CDS is on and connected to the store network. On POS, check the selected screen, the waitlist display switch and the current queue number. If the numbers appear without sound, check that announcements are enabled on the POS or CDS that should play them.

Open waitlist display settings from Waitlist. For food that is ready to collect, see Set up the CDS pickup screen.

Contents · Previous

LuckyPOS documentation center