
Appearance
Detailed Guide
Power On and Network Connection
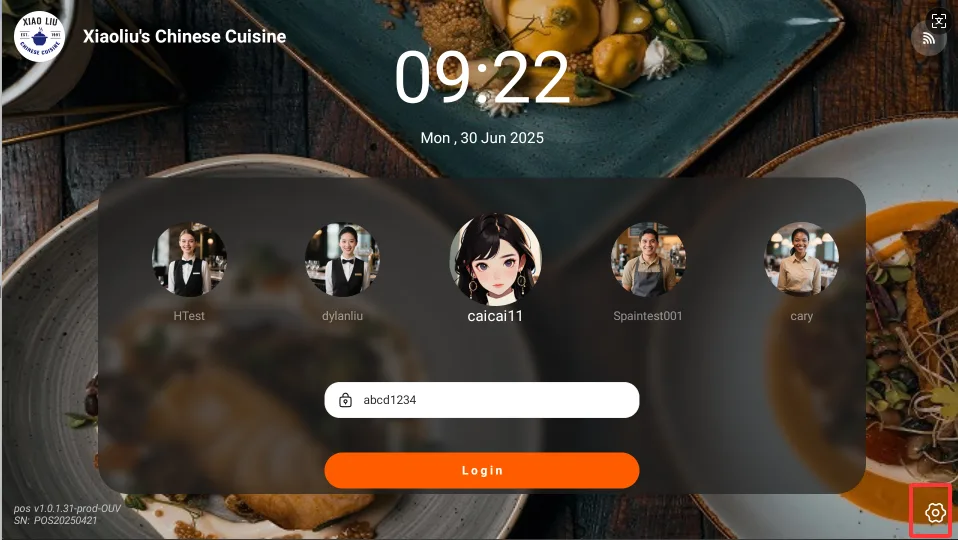
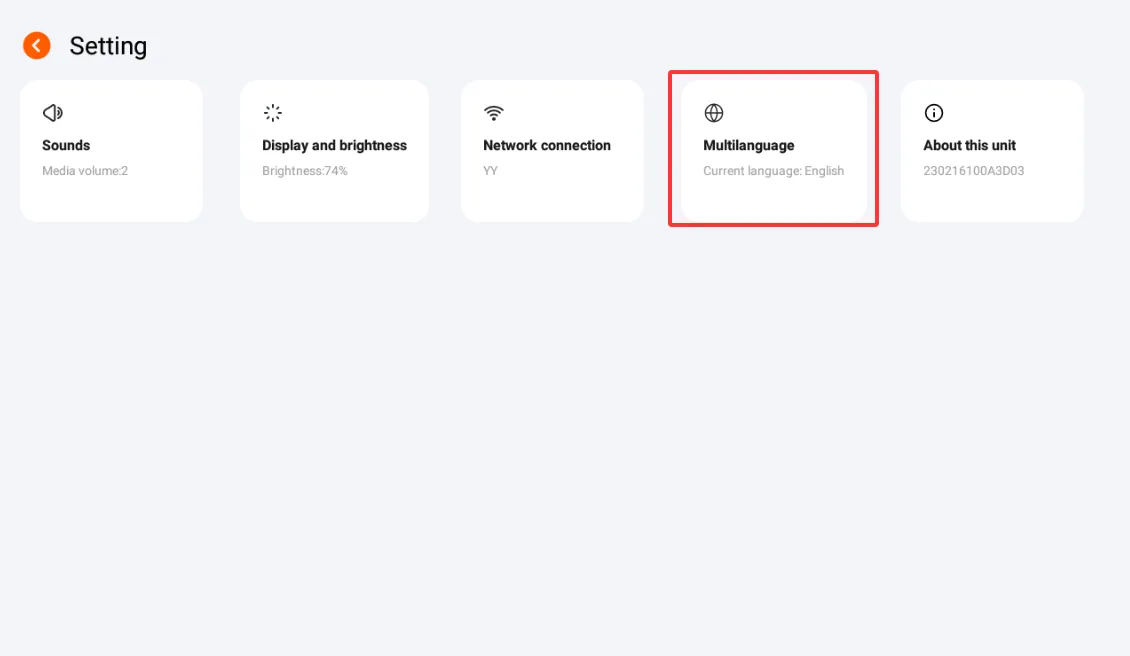
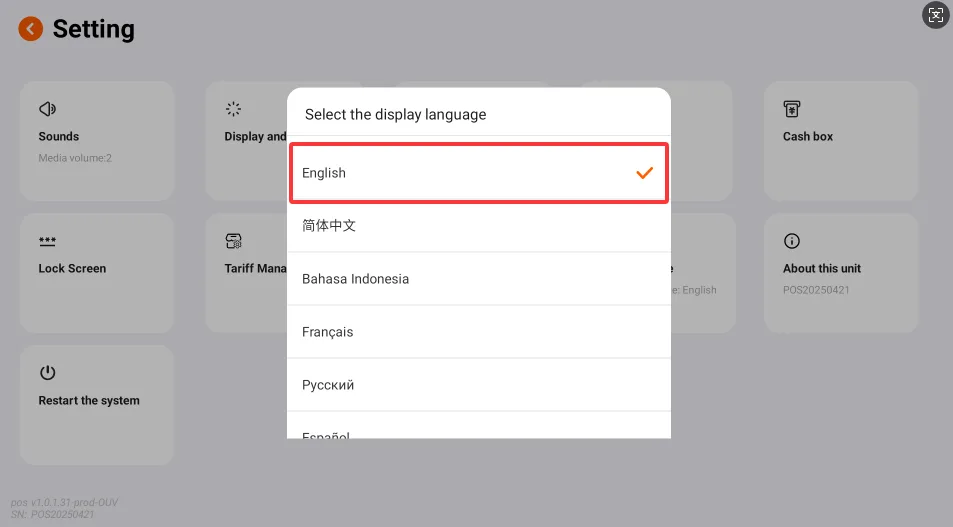
- Open settings from the lower-right corner, find the language option, and choose the display language as needed.
- If the device has no network connection after startup, tap the red network message at the top of the screen. In the network dialog, select an available WLAN connection.
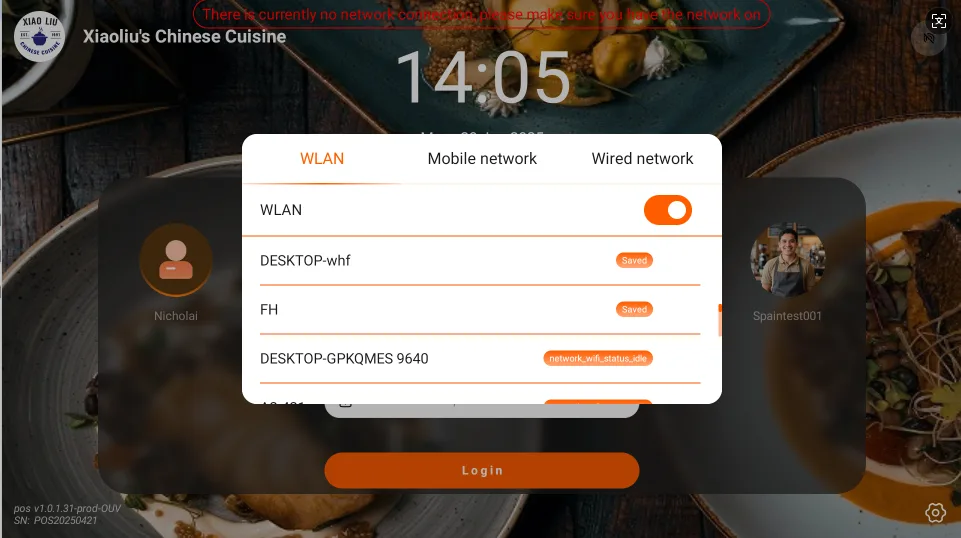
- Mobile Network enables SIM-card data access when the device hardware supports it.
Sign In
- The waiter on duty enters their account and password.
Note
For waiter account creation, see Store Management System.
- If multiple accounts are available, swipe the account you want to use to the center of the page, enter the password, and tap Login. After verification succeeds, the system opens the home page.
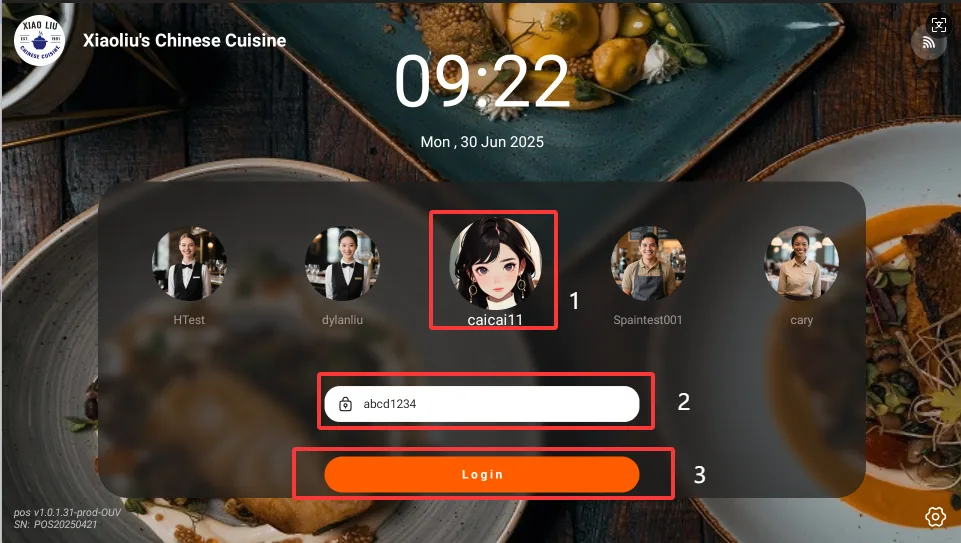
Table Operations
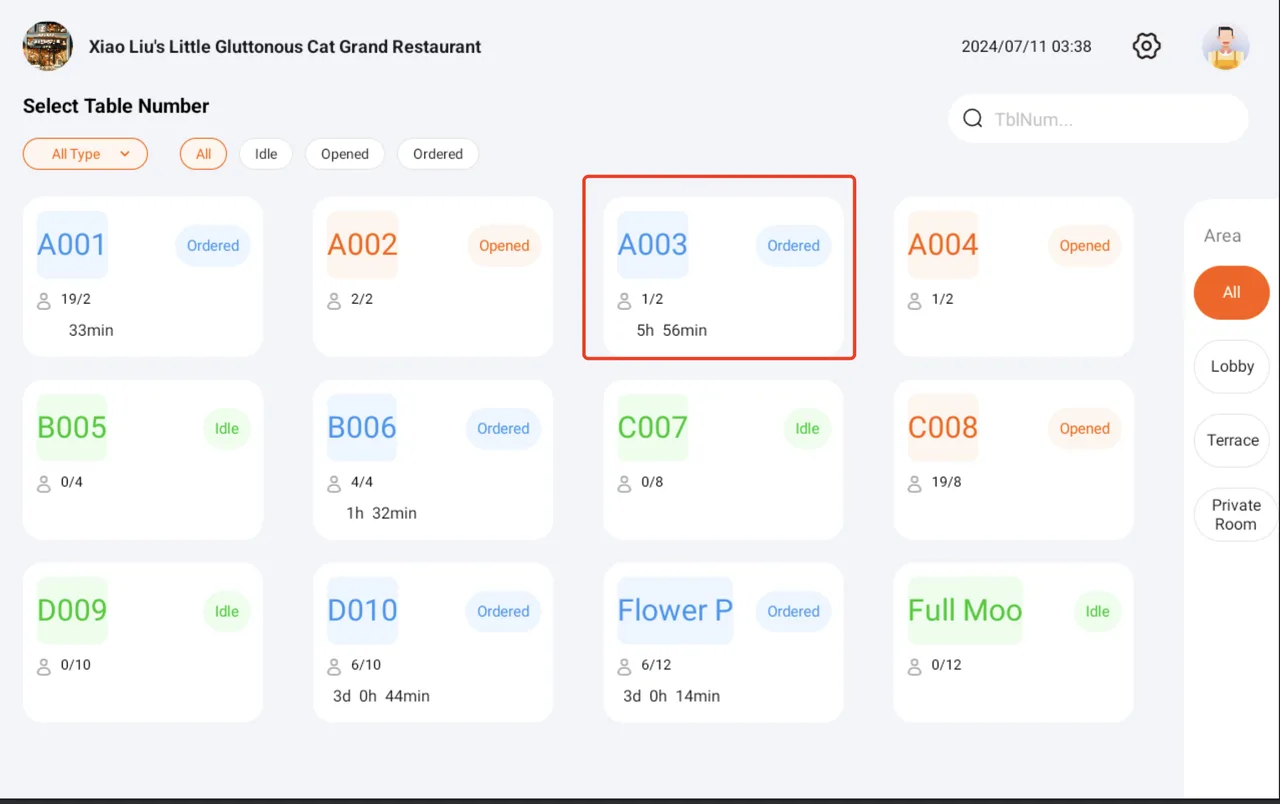
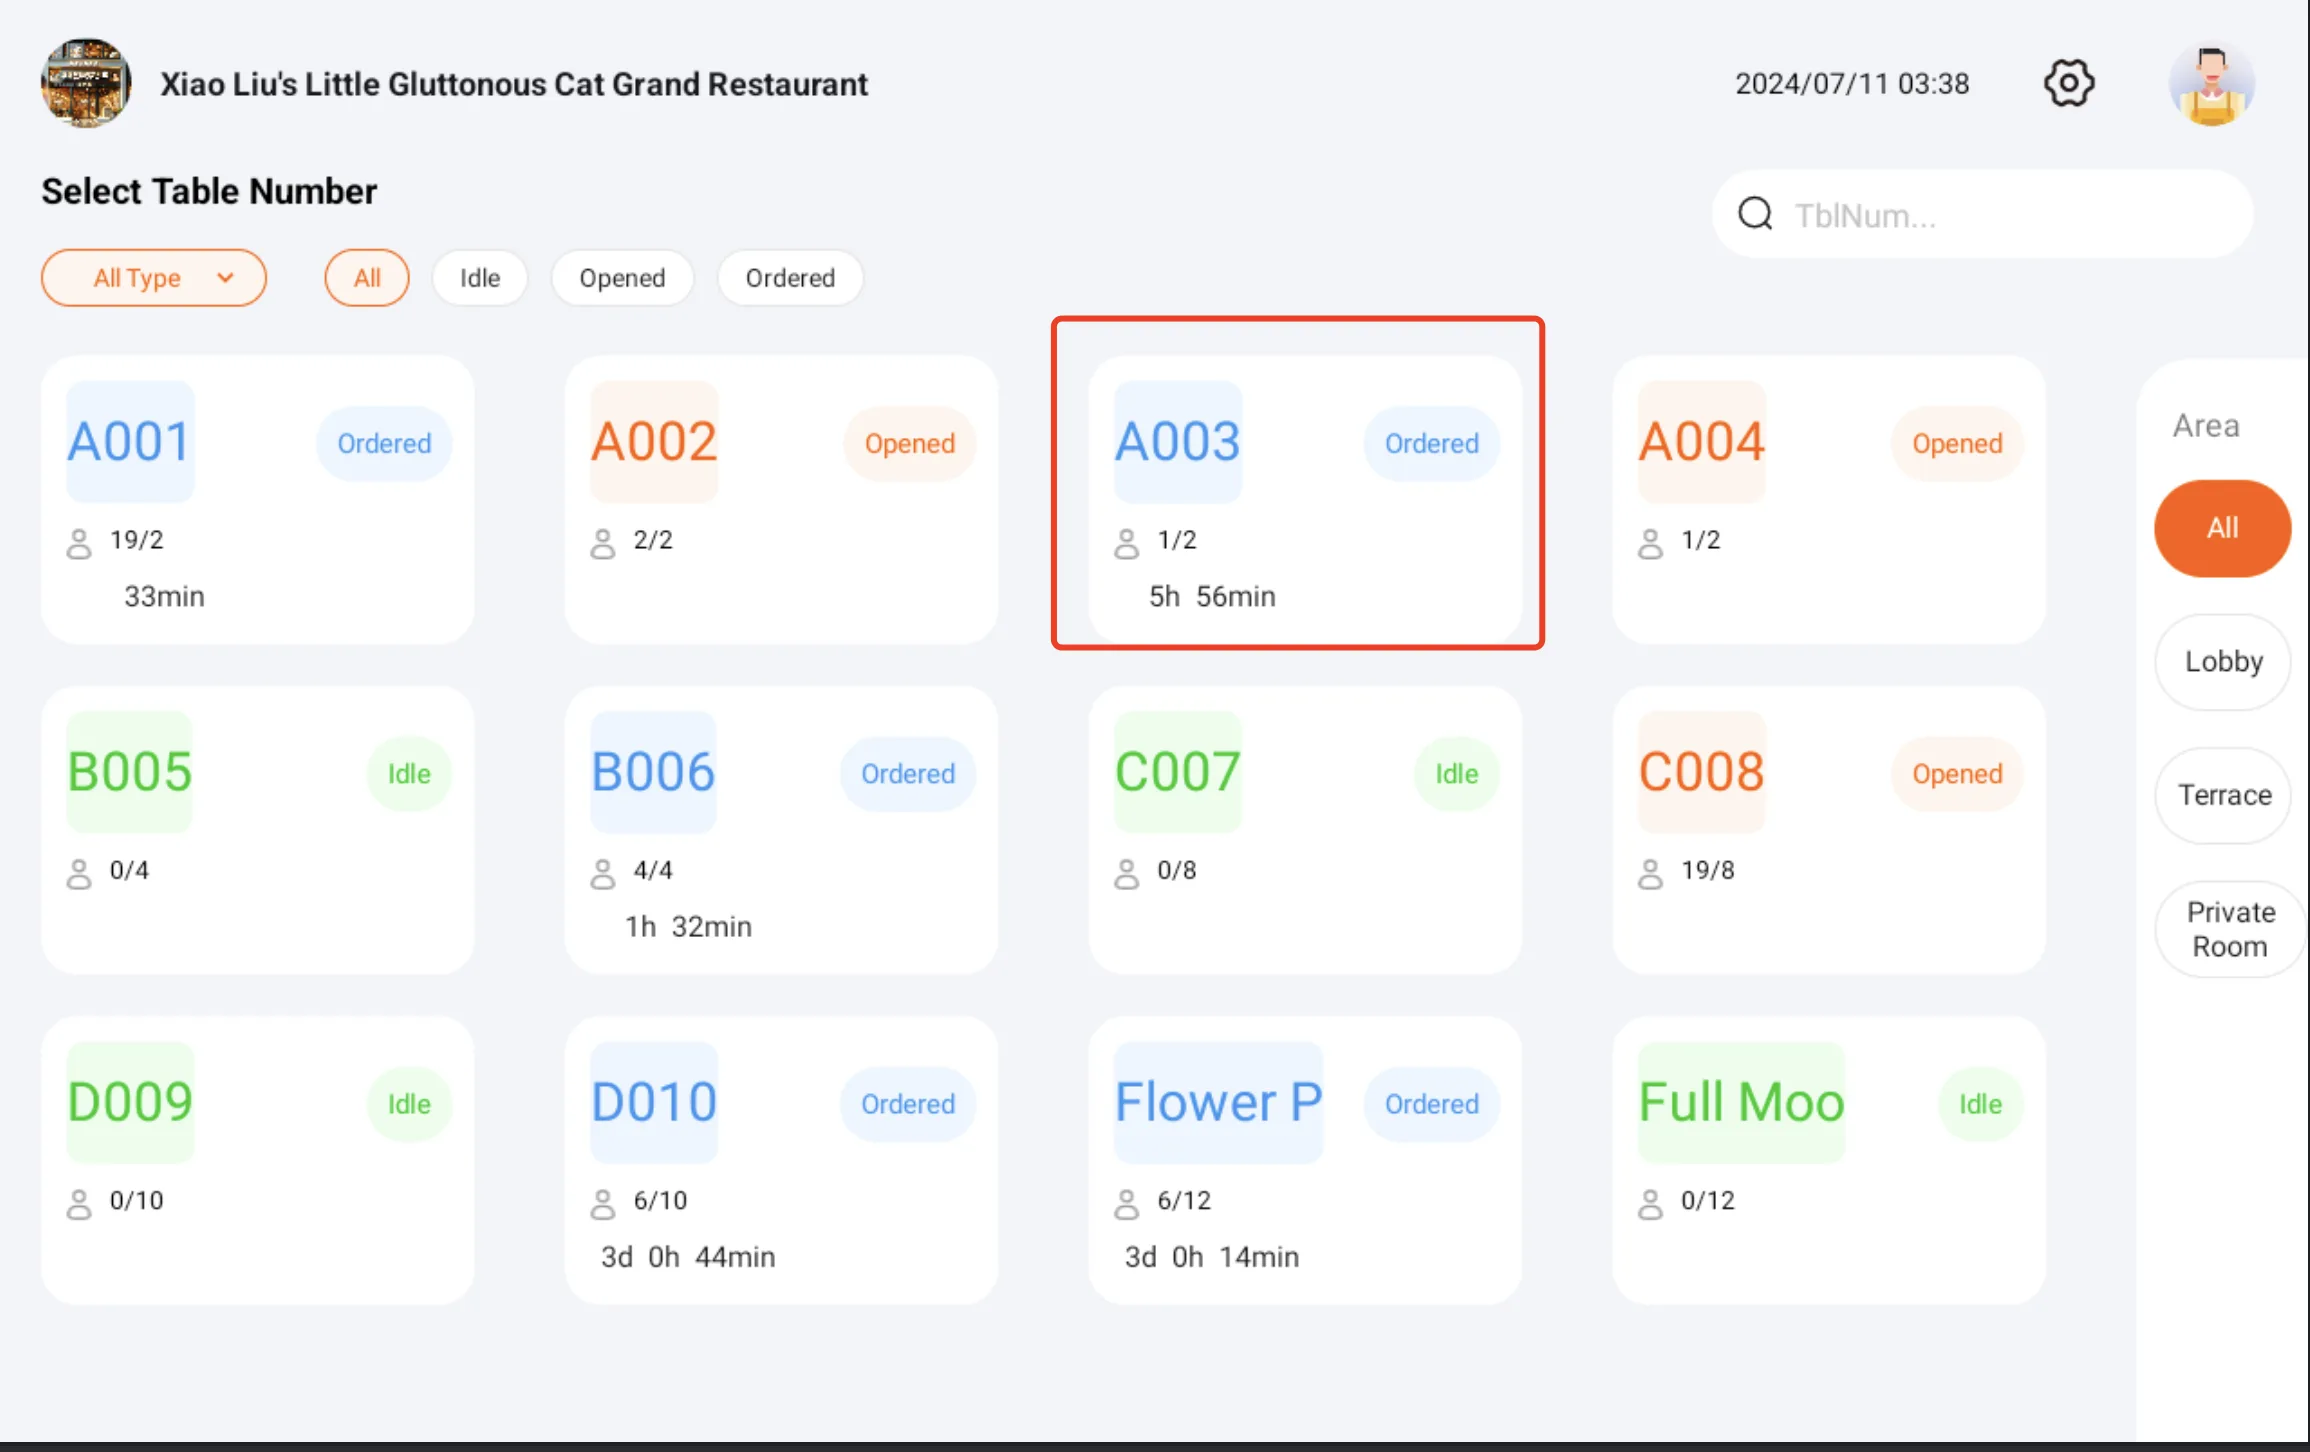
- After sign-in, the system opens the Table page by default. This page shows the status of all tables in the store.
Note
Tables and other basic store data must be created before use. For setup instructions, see Store Management System.
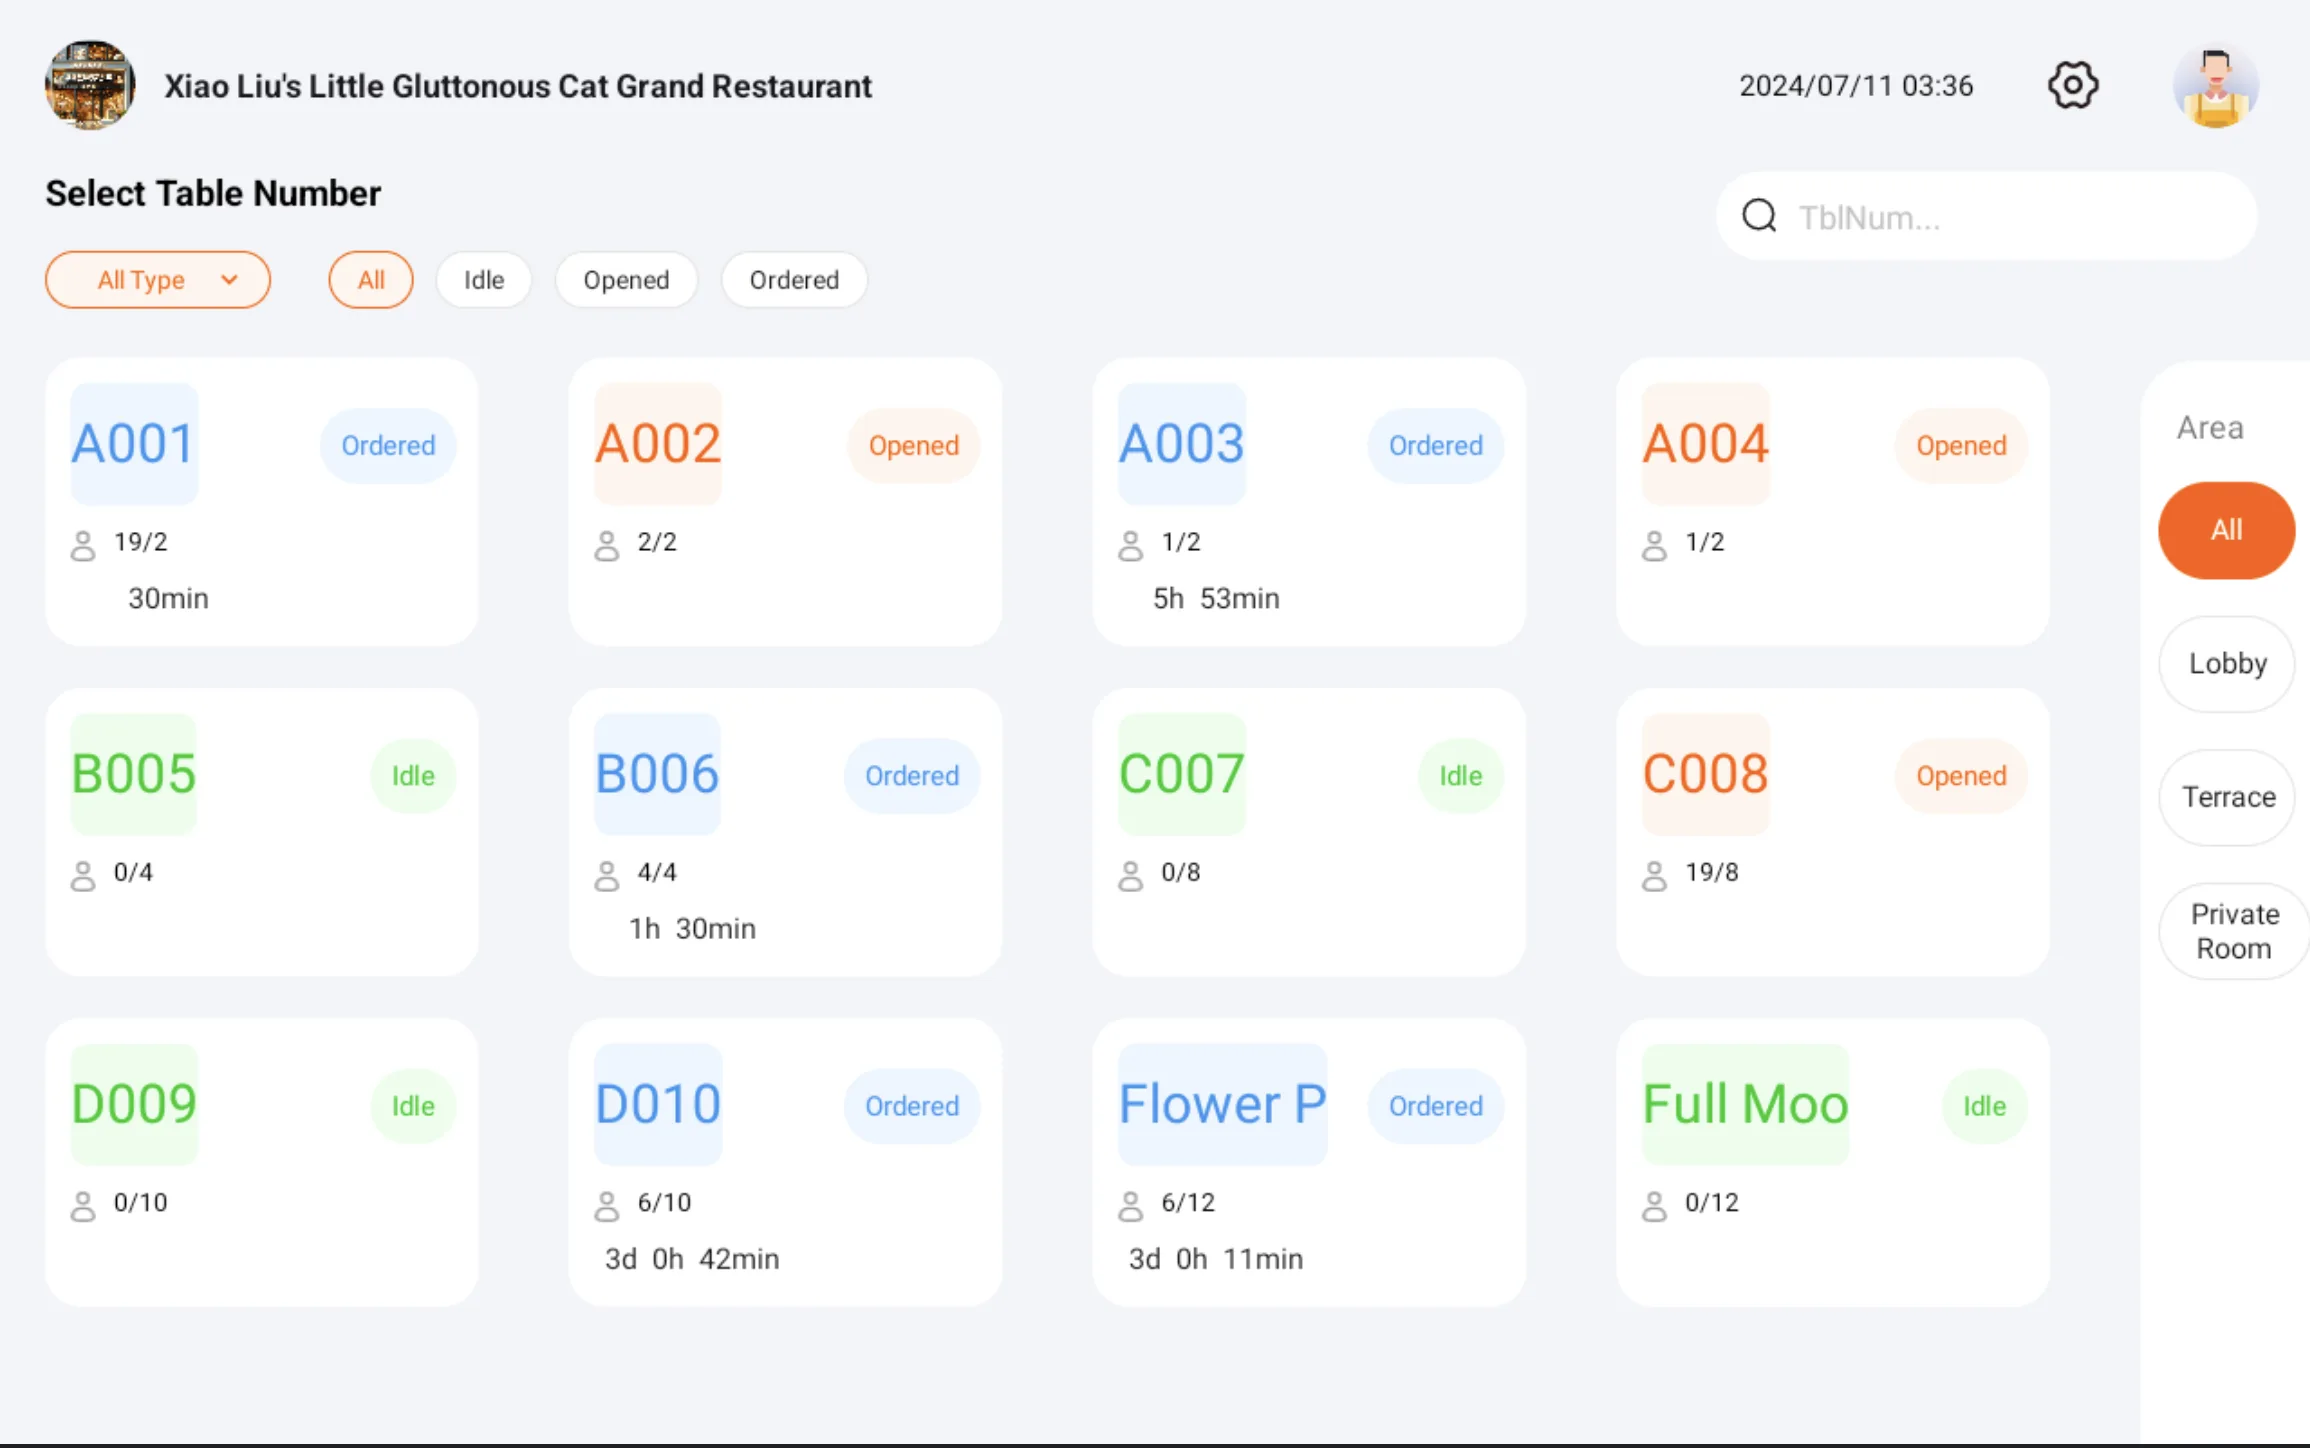
- Tables can be filtered by type and area, based on the backend configuration. By default, all tables are shown.
- Each table has one of three statuses:
- Opened: The table has been opened but no order has been submitted. This may happen when the cashier opens a table without placing an order, or when a guest scans the table QR code but has not submitted the order yet.
- Ordered: An order has already been placed for the table.
- Idle: The table is currently available.
- A table card shows the table capacity. Opened and ordered tables also show the current number of diners.
- Ordered tables show the dining time, calculated from the time the order was placed.
- Waiters can perform different actions depending on the table status and the situation on site.
Seat Guests and Place an Order
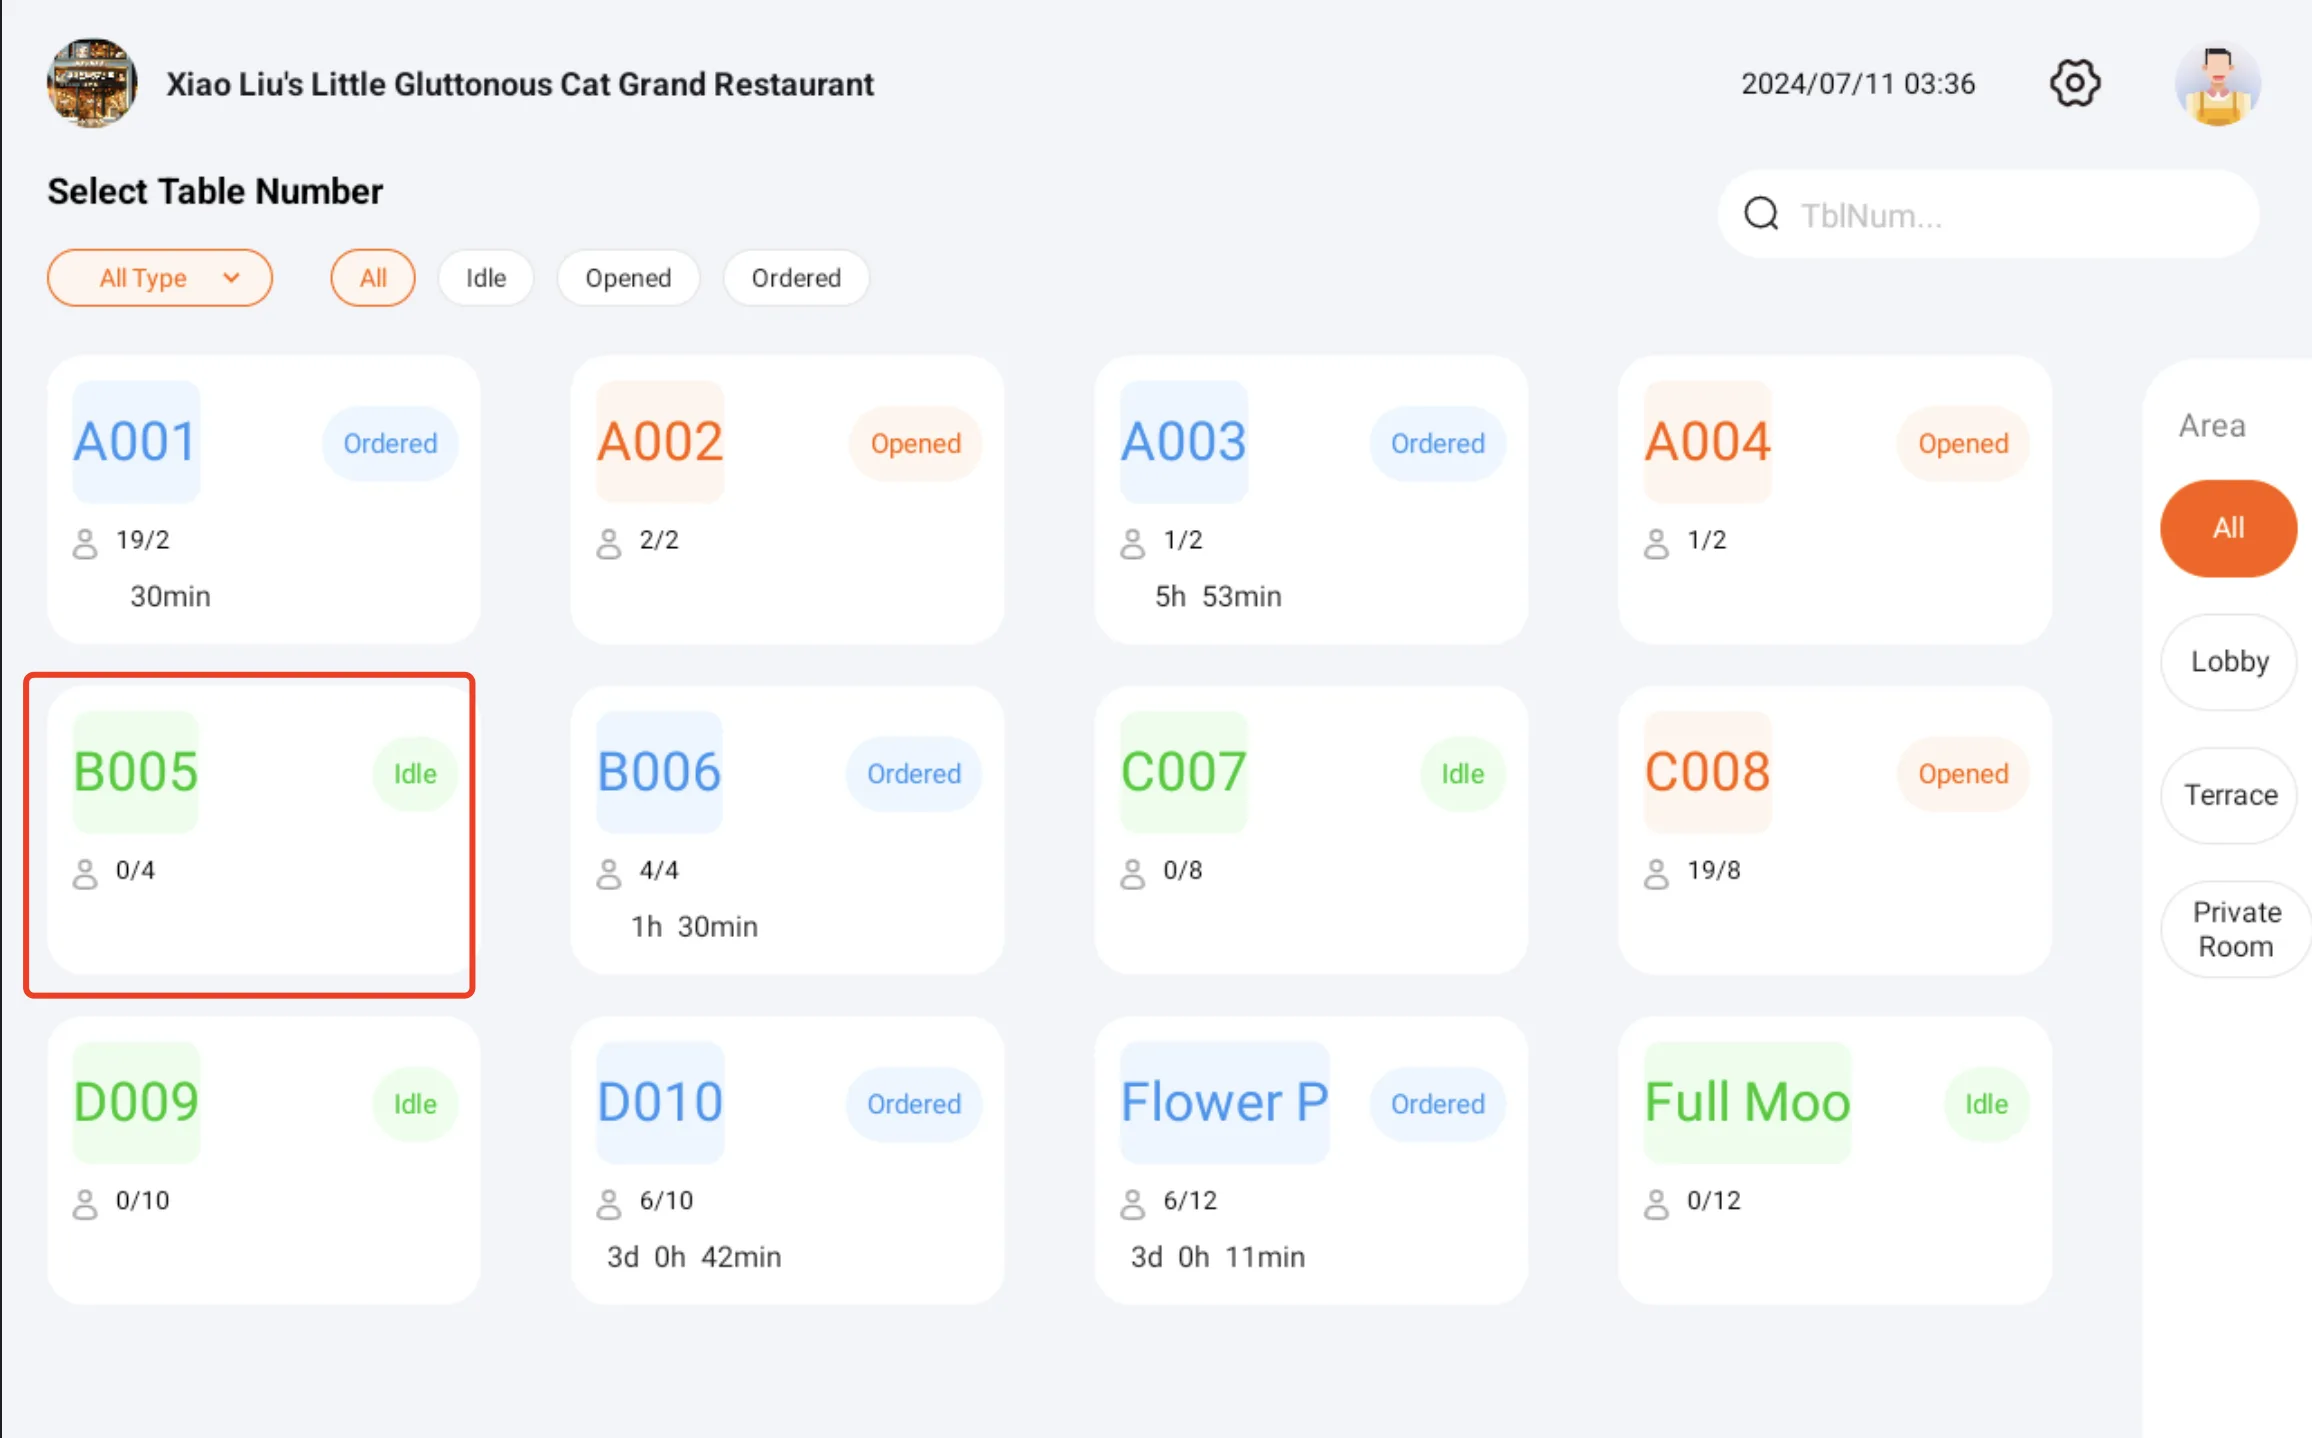
- When guests are seated, select a suitable idle table based on the number of diners.
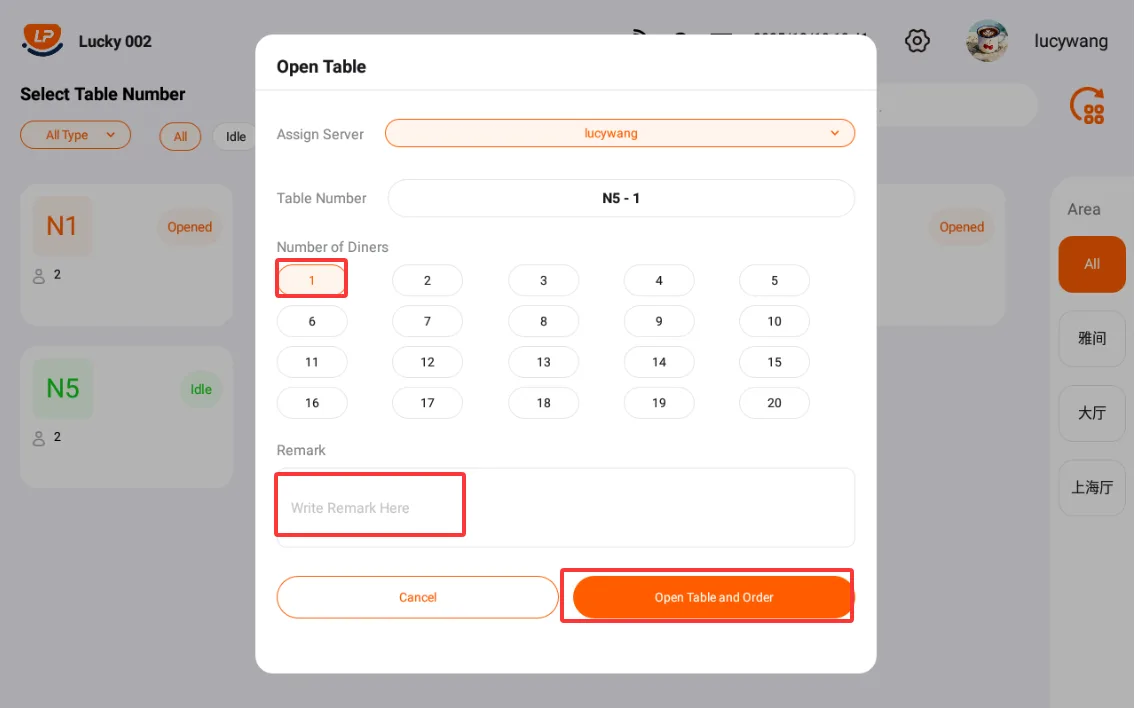
- In the pop-up window, select the actual number of diners, add a note if needed, and tap Open Table and Order.
- Select the guest on the right side, then tap item cards to add dishes. Items are grouped by category and can be searched by name.
Note
- Menu items must be created before they can be ordered. For setup instructions, see Store Management System.
- The item images in this guide are for testing only and are not actual restaurant products. If any image creates an infringement concern, contact us for removal.
- To order multiple portions of the same item, tap the item card multiple times, or adjust the quantity from the ordered list on the left.
- After adding the items, tap Place Order in the lower-left corner.
- After the order is submitted, the page shows a success message and the ordered list on the left changes to the ordered state.
- If printing is configured and paper is installed, the device prints the order ticket automatically.
- Order information is also sent to the kitchen KDS when the store has the corresponding device configured.
Cancel Table Opening
- If guests decide not to dine during the ordering process, tap Cancel Check-in in the middle of the page. The table returns to the idle state.
Add Items During the Meal
- Guests may add items while ordering or after the meal has started.
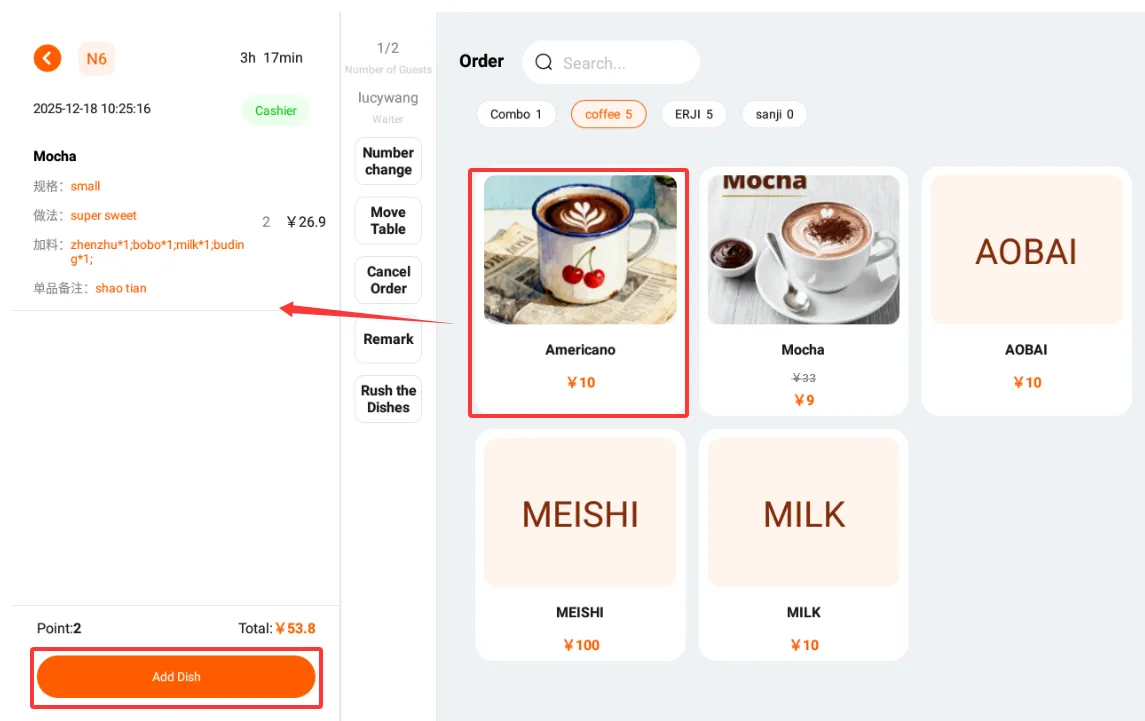
- Tap the guest's table card.
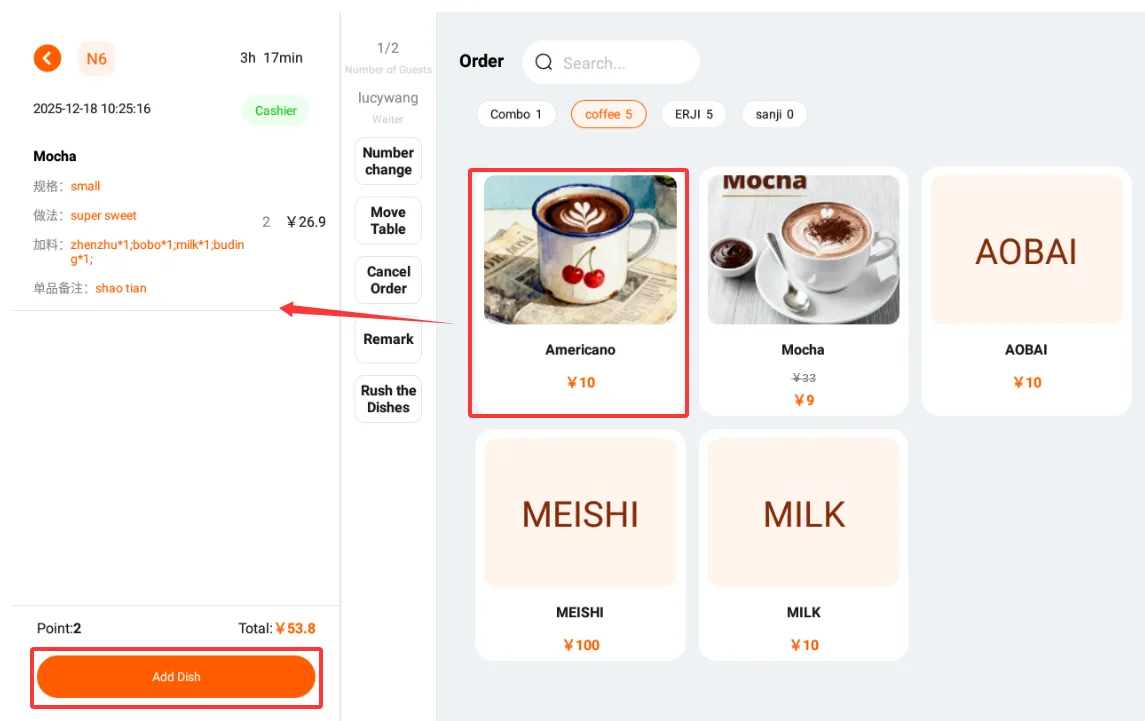
- The left side shows the items that have already been ordered.
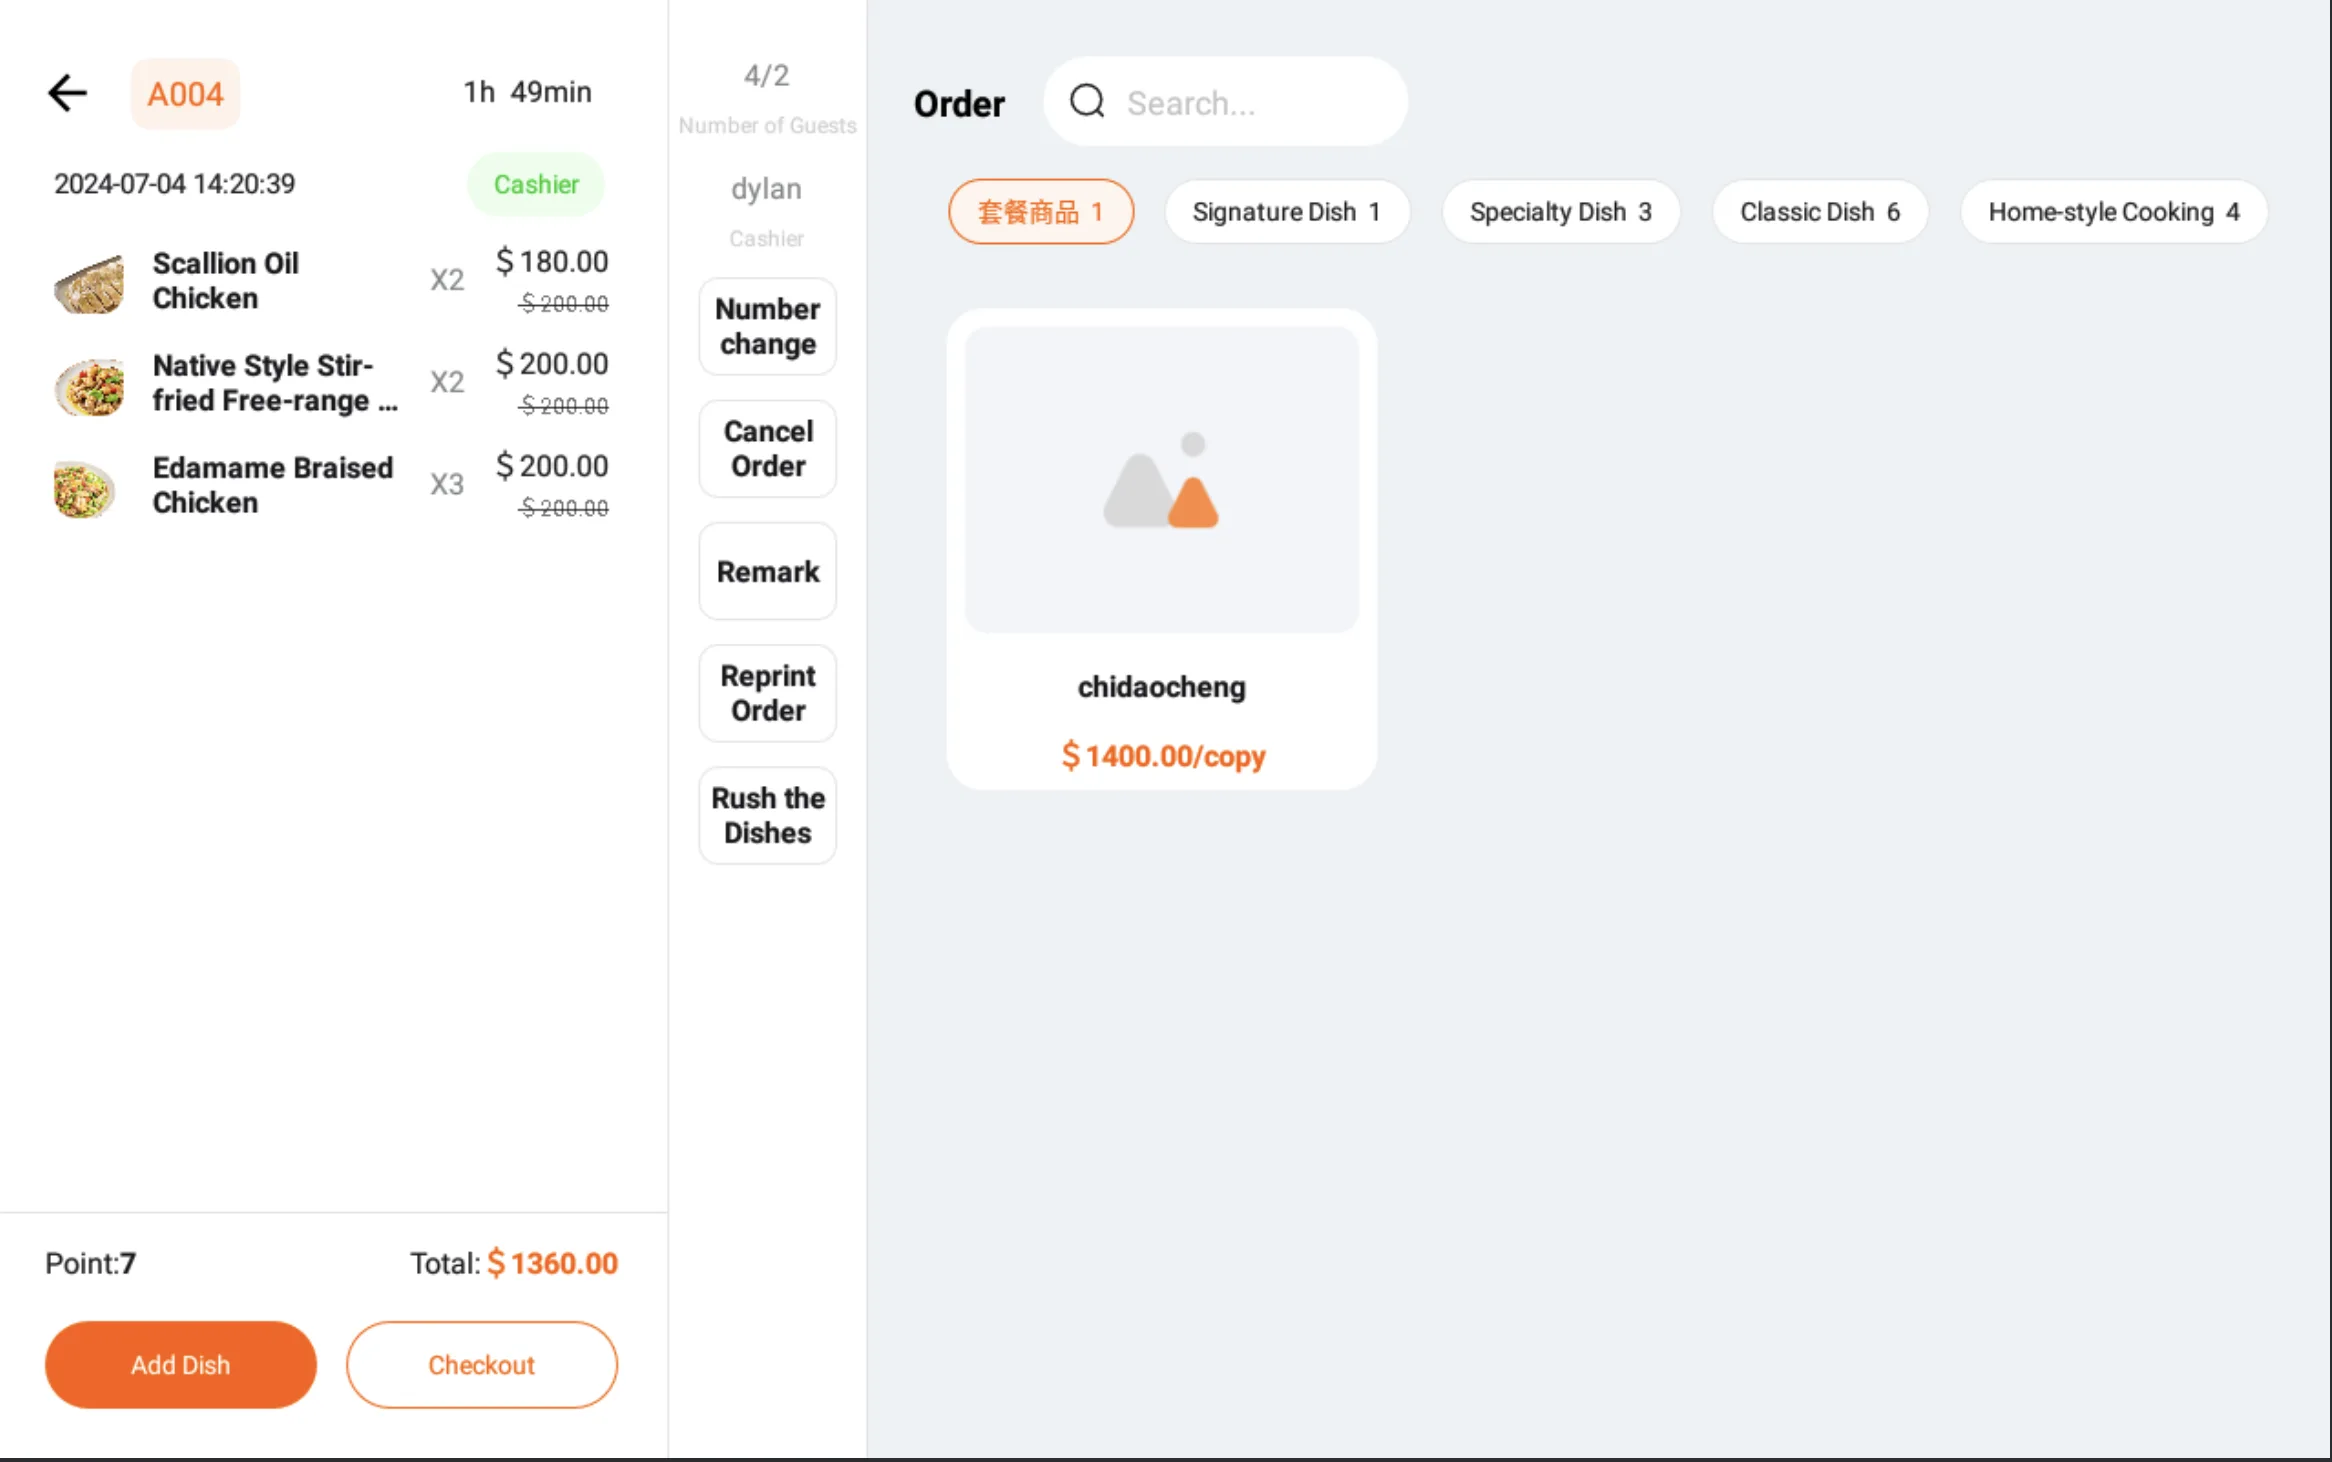
- Tap the additional items on the right. The flow is the same as placing the first order.
- After adding the items, tap Add Dish in the lower-left corner.
Rush Dishes
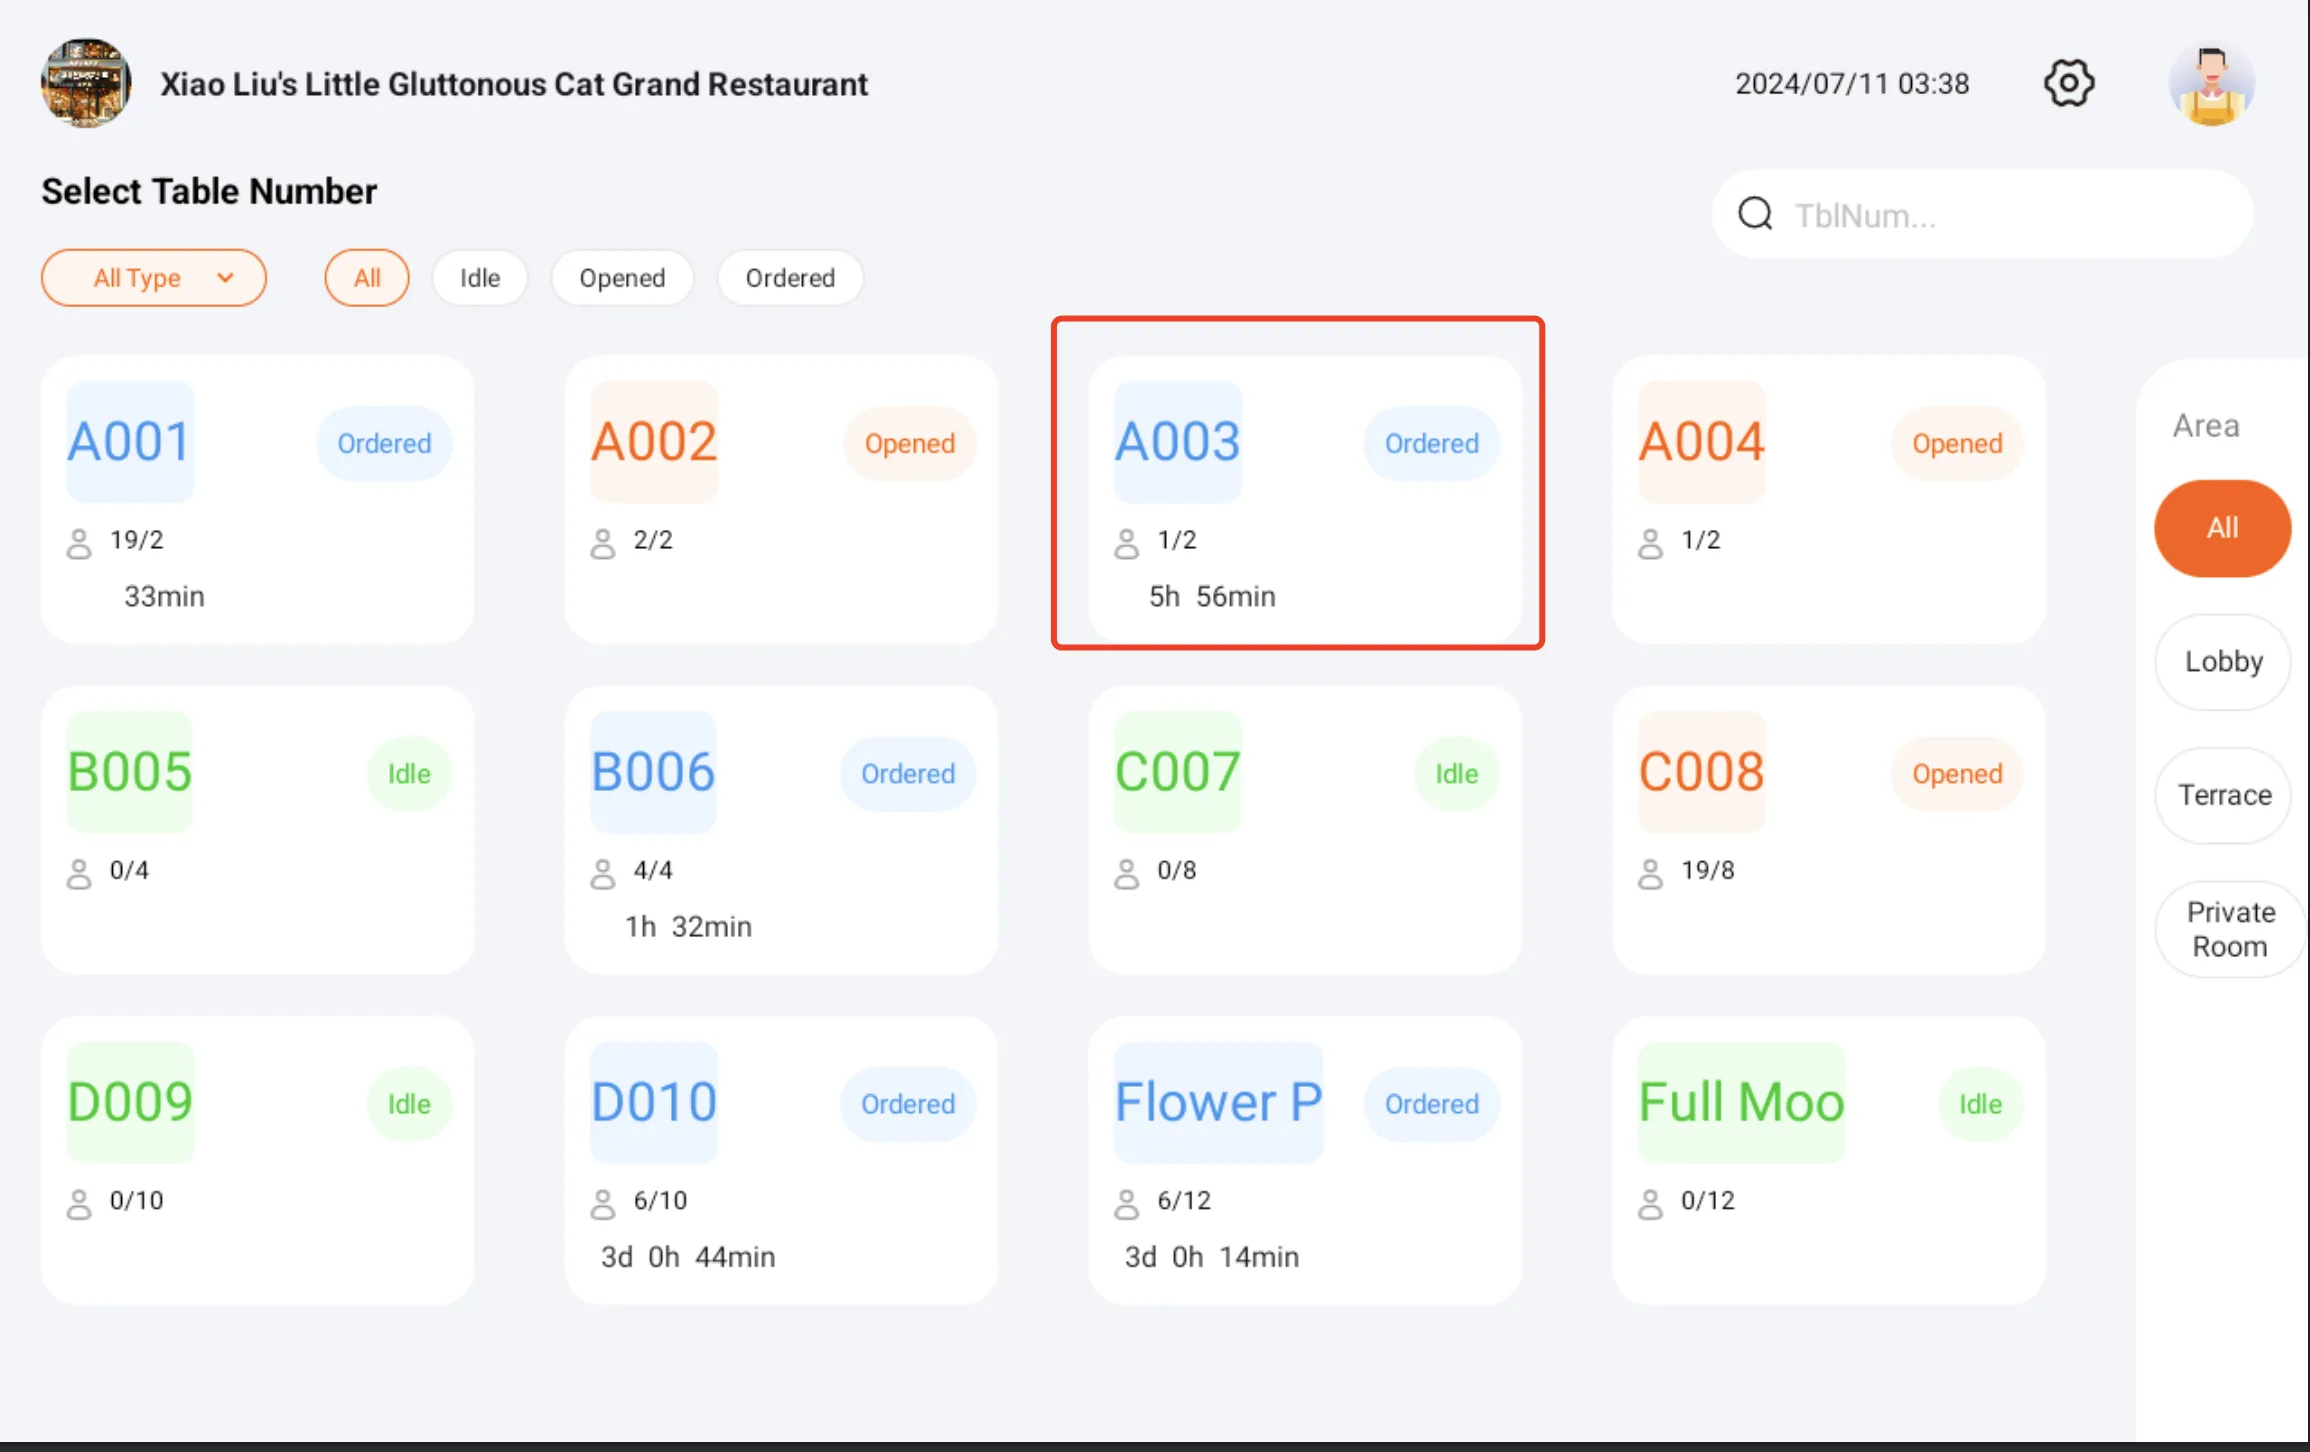
- If guests ask about delayed food, tap the corresponding table card.
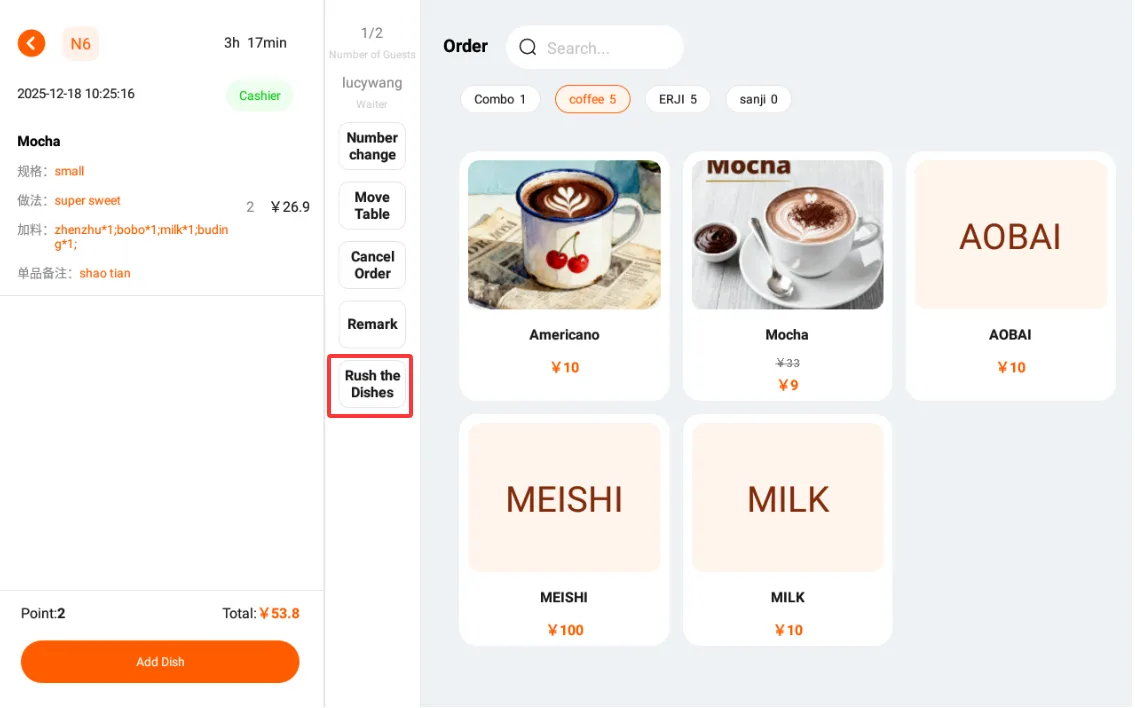
- Tap Rush Dishes in the middle of the page. The rush request is sent to the kitchen KDS when the store has the corresponding device configured.
Cancel an Order
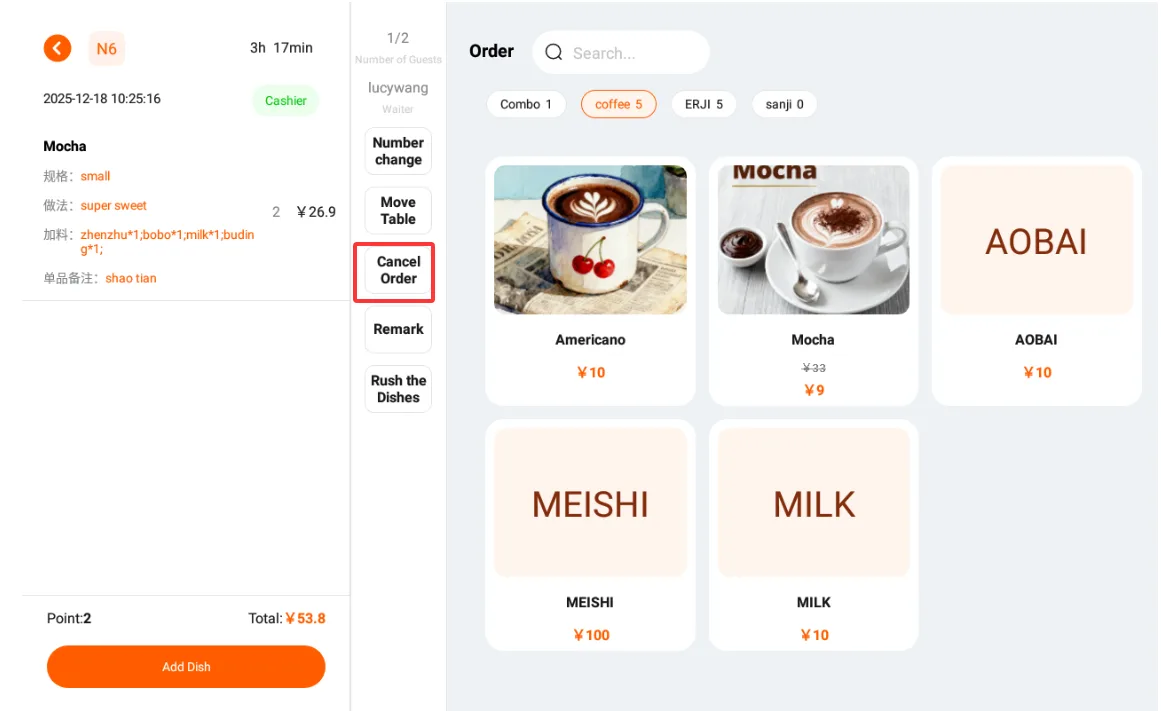
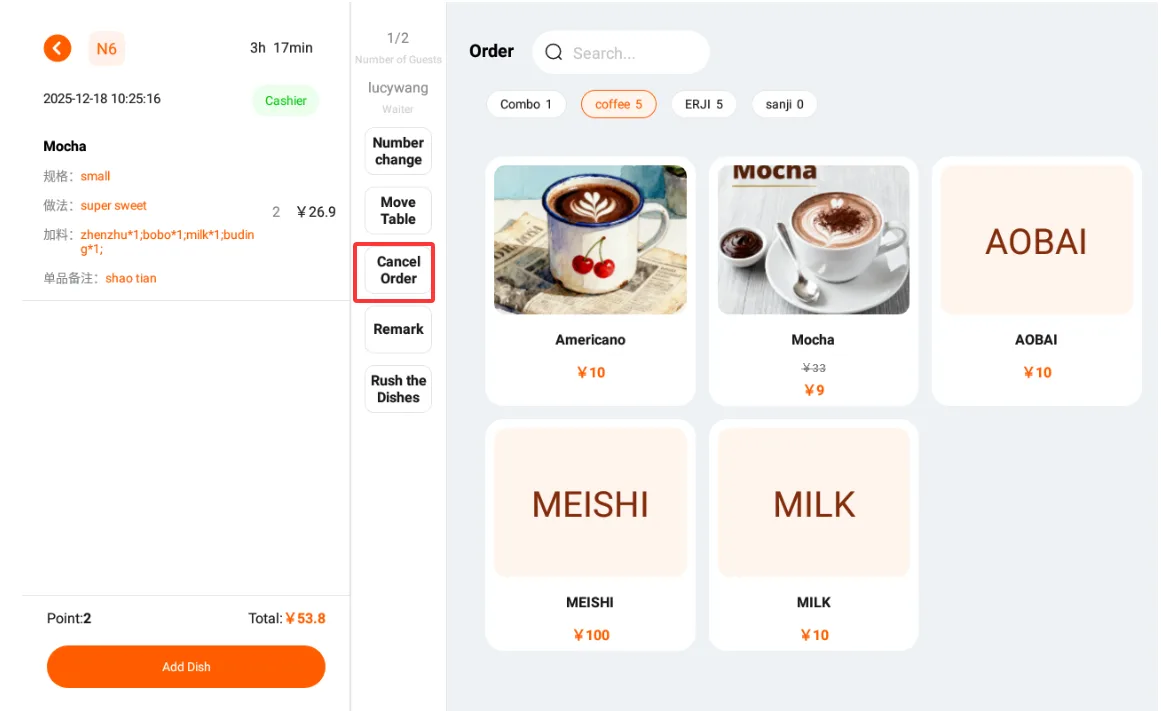
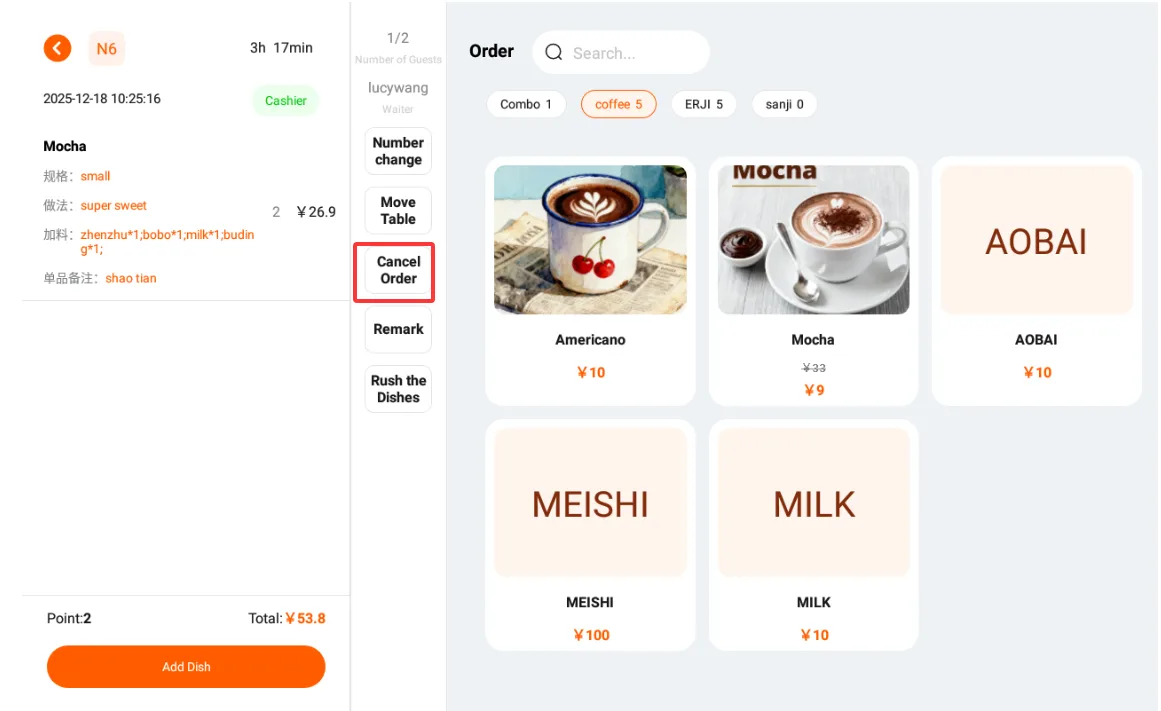
- If guests request to cancel an order that has already been placed, follow the store's policy and the situation on site. If the order can be cancelled, tap the guest's table card.
- Tap Cancel Order in the middle of the page.
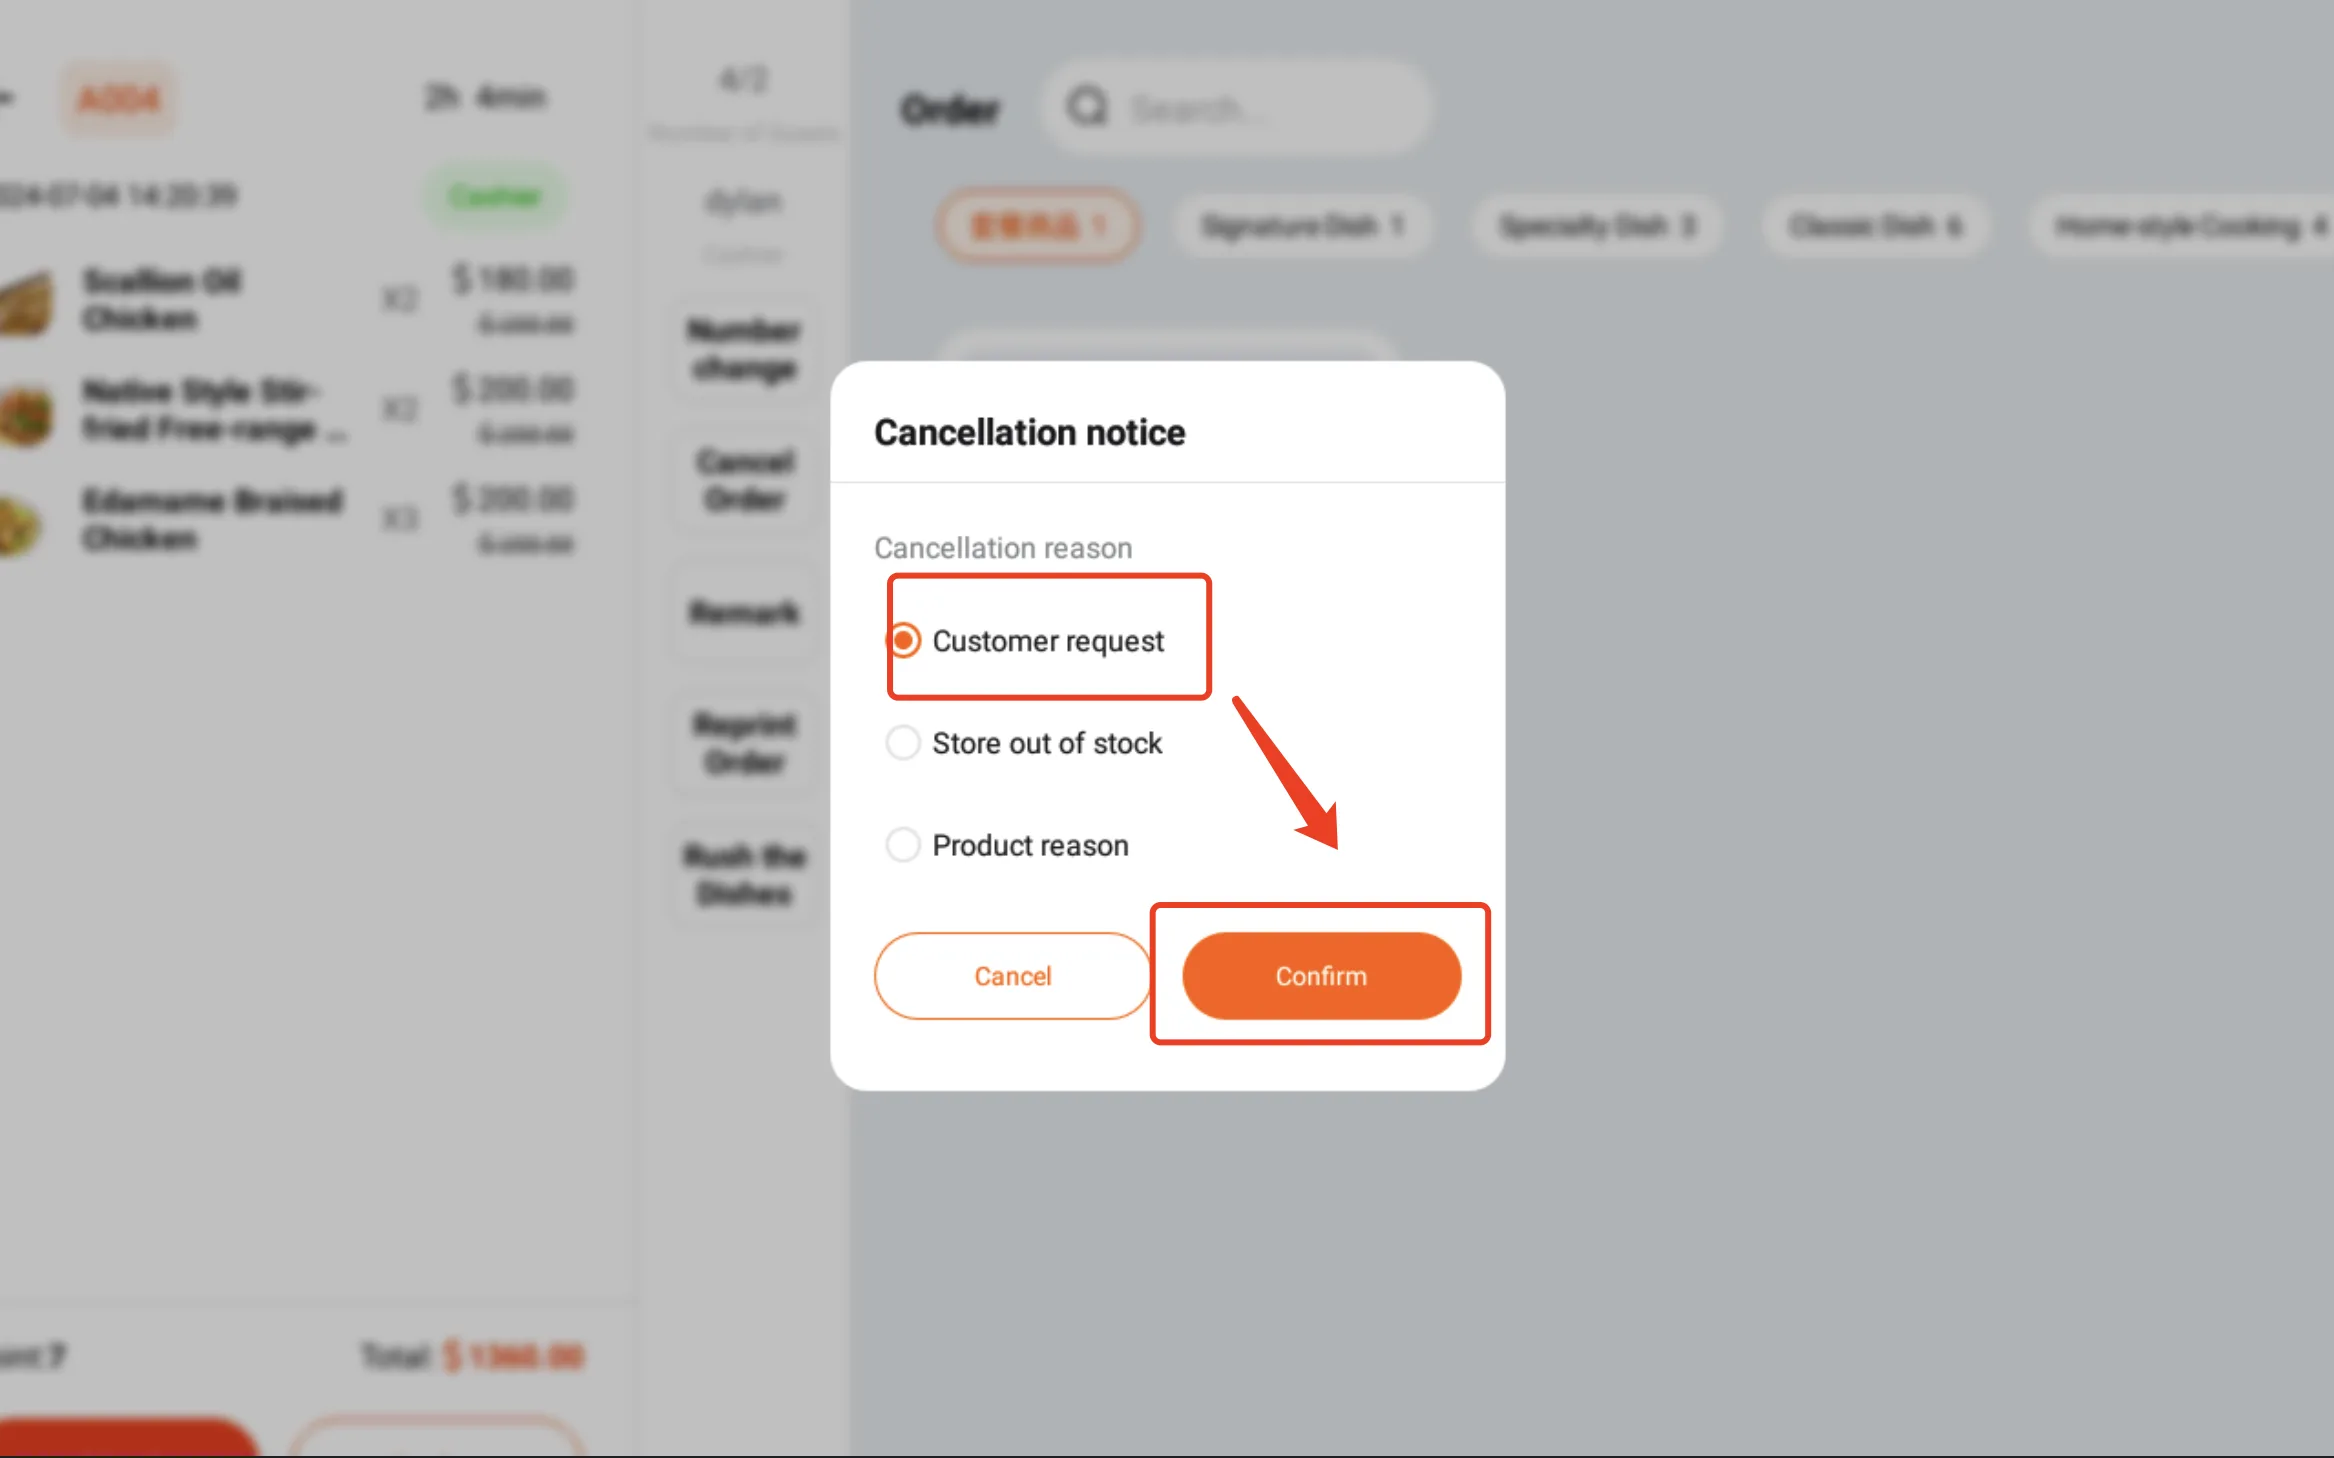
- Select the cancellation reason in the pop-up window and tap Confirm.
- The cancellation message is also sent to the kitchen KDS when the store has the corresponding device configured.
Note
Cancelling an order cancels all items in that order. To return only specific items, use the dish return function.
Return Dishes
- If guests request to return a specific item, follow the store's policy and the situation on site. If the item can be returned, tap the guest's table card.
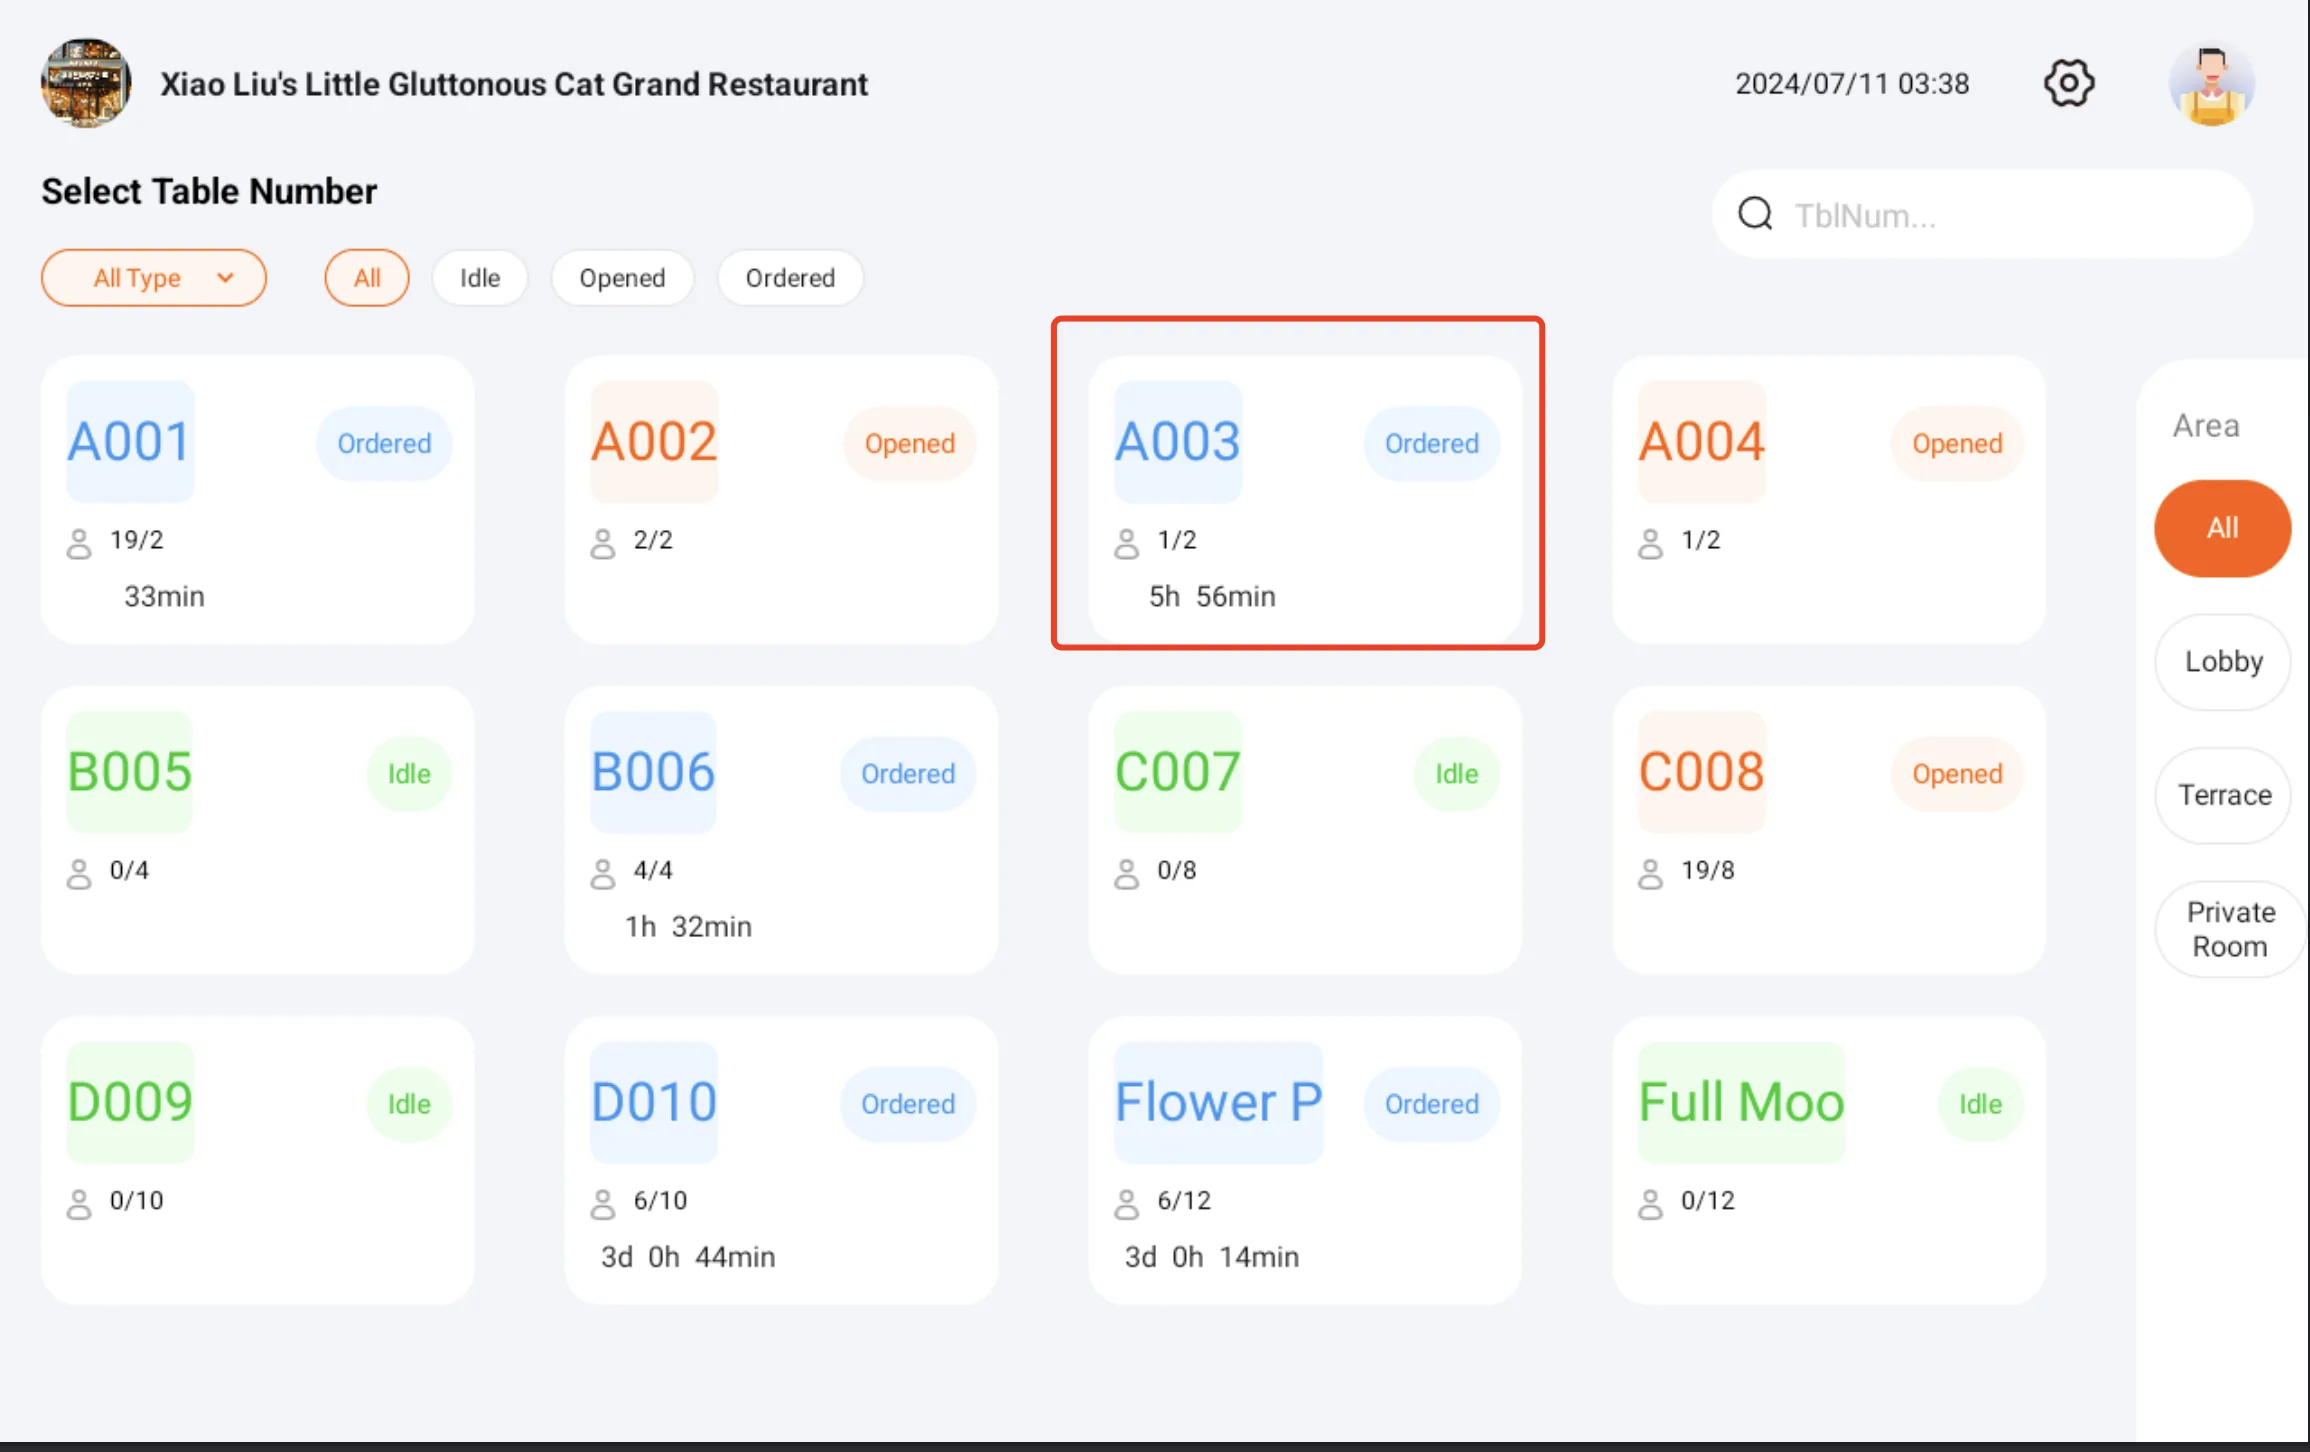
- Select the item to return from the ordered list on the left.
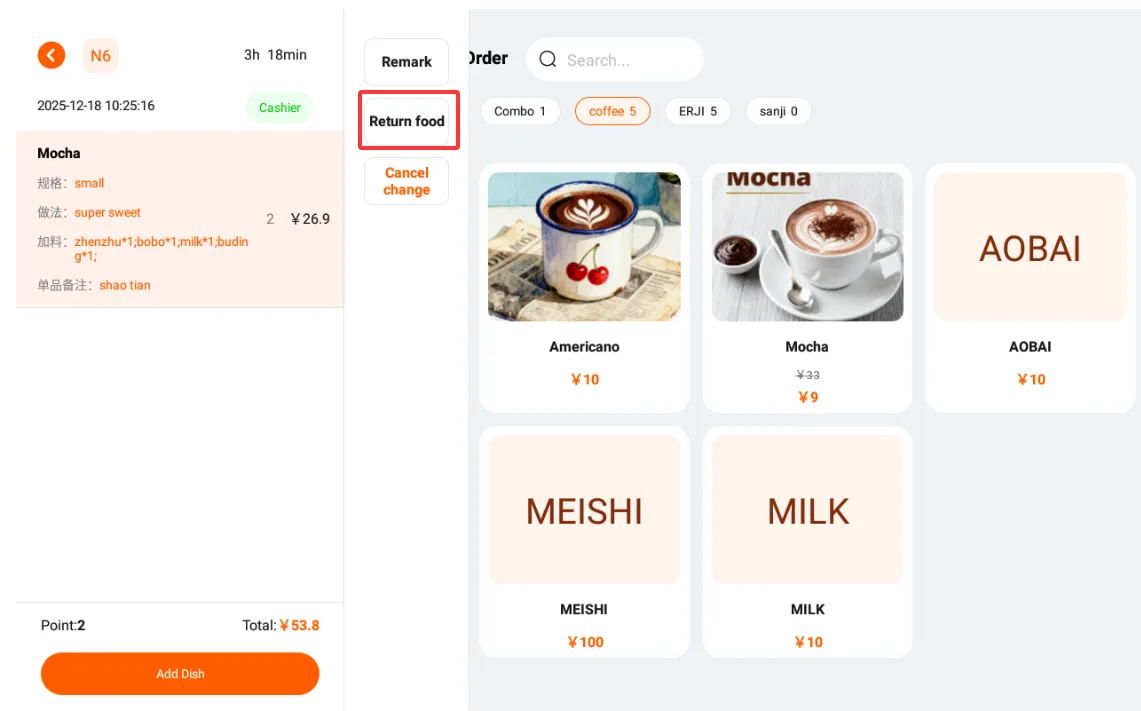
- Confirm the item in the pop-up window, then tap Return Dishes.
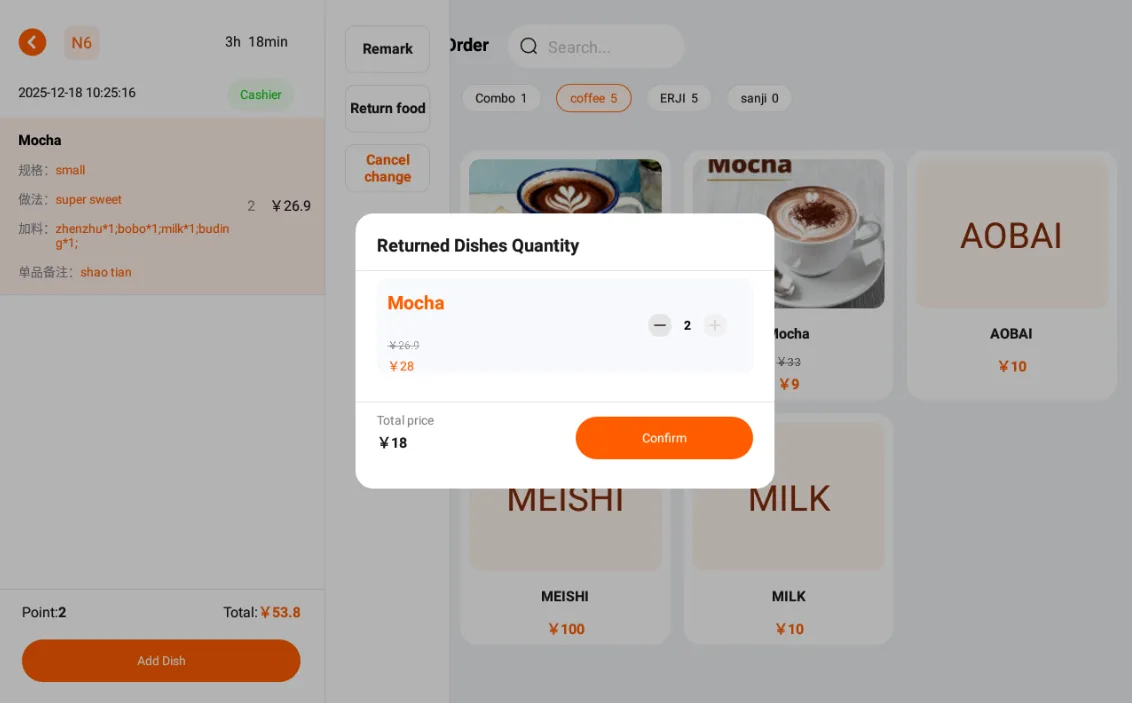
- In the next pop-up window, select the return quantity and reason, then tap Confirm to complete the return.
- The return message is also sent to the kitchen KDS when the store has the corresponding device configured.
Move Table
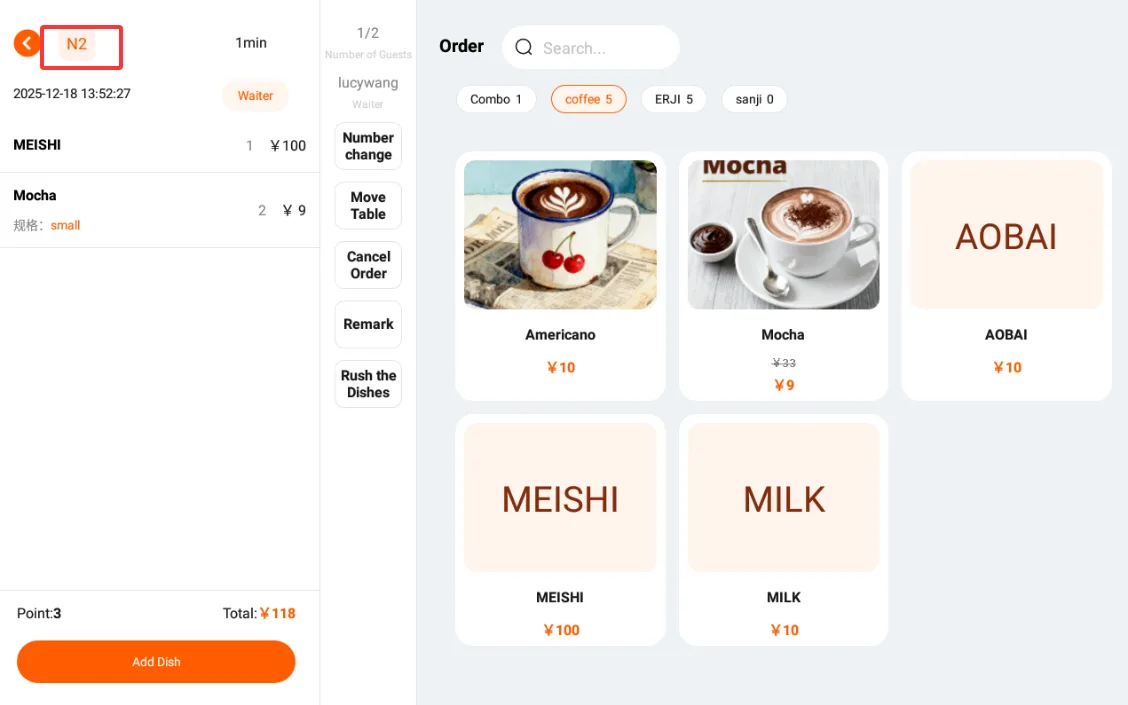
- When guests need to move to another table, tap Move Table, select the target table, and tap Confirm. After the move, the original table becomes idle.
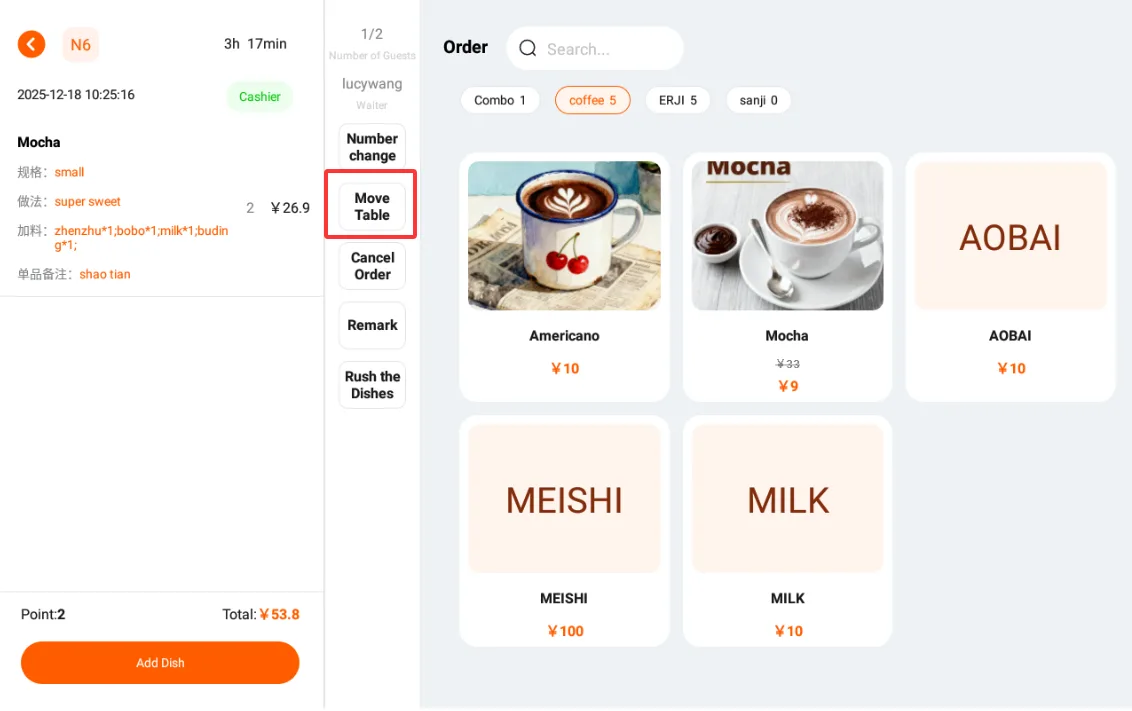
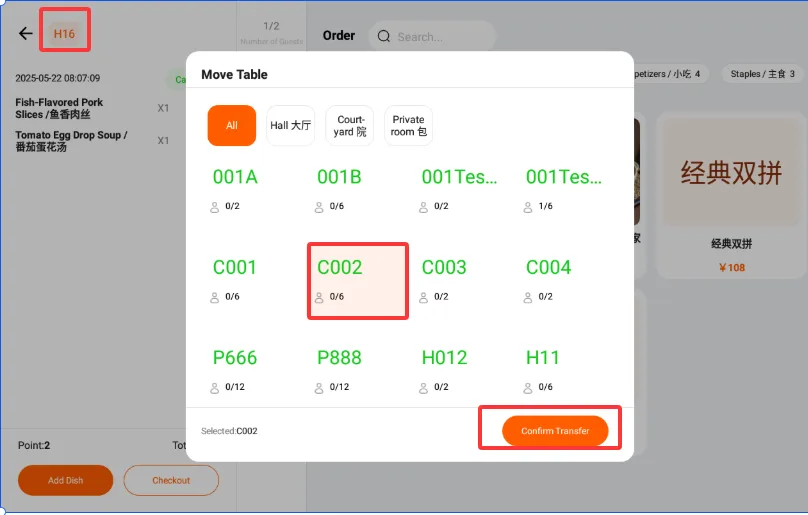
- The ordering page updates to the new table number, and the original table can be used for new orders.
- The bill page also shows the updated table number.
- Receipts printed by the POS for ordering and checkout show the new table number.
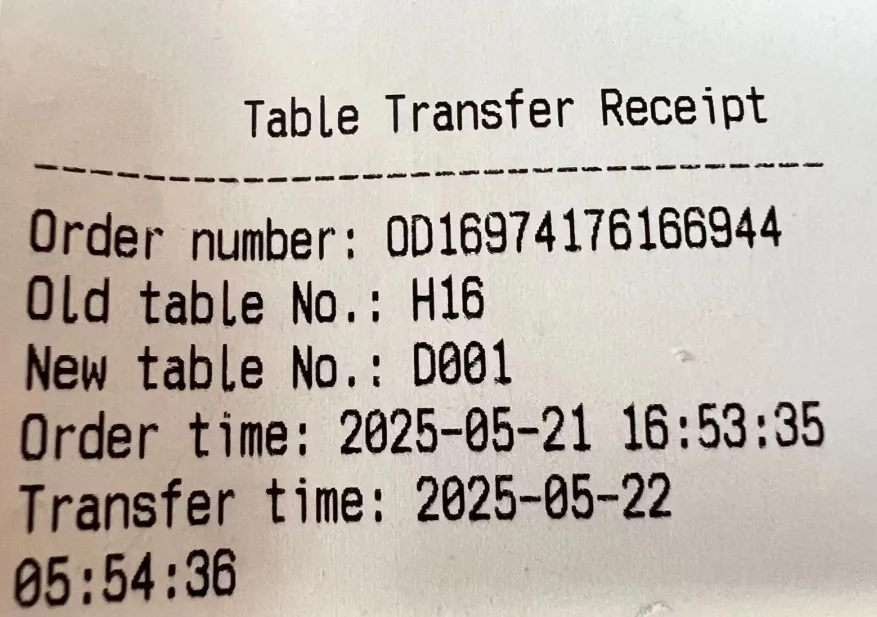
- The KDS order updates to the new table number, and the KDS prints a table transfer ticket after the move.
Split Order
The order splitting function lets staff manually split an order by item and settlement needs. It creates independent sub-orders, keeps the related information synchronized, and supports different service scenarios while improving checkout accuracy.
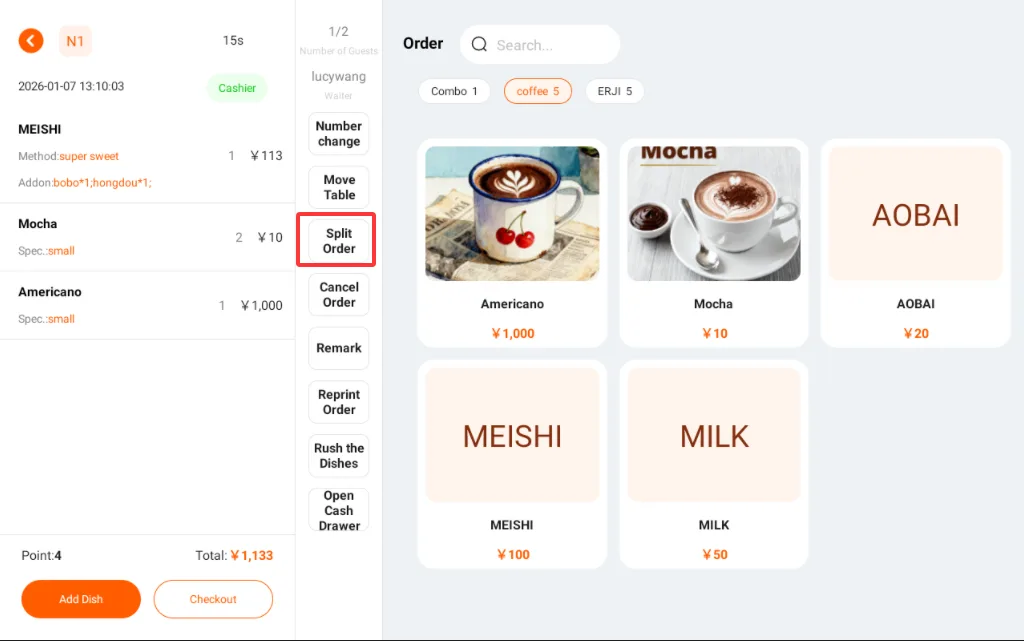
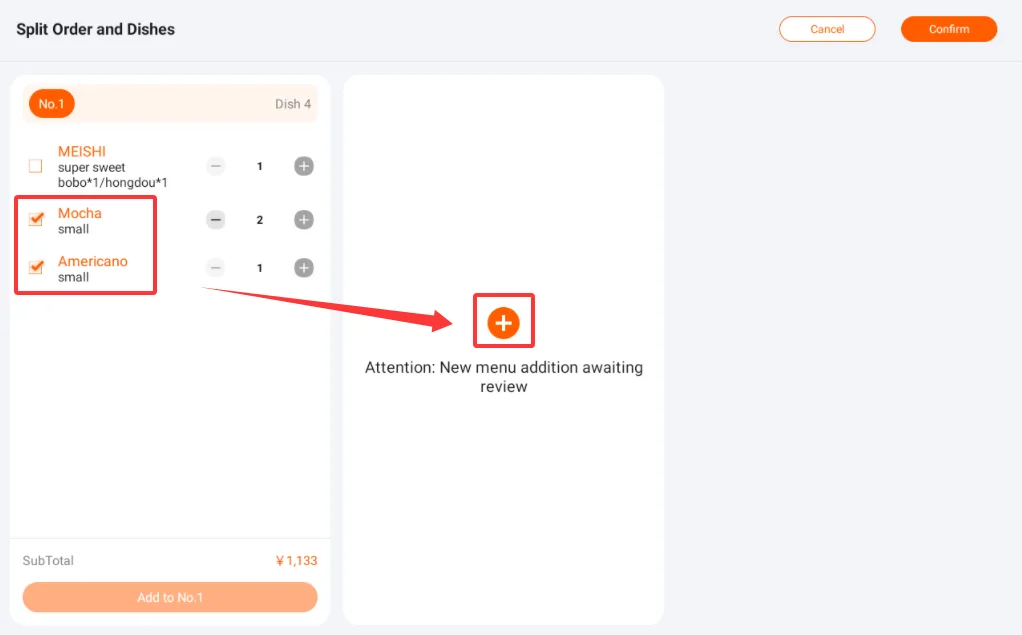
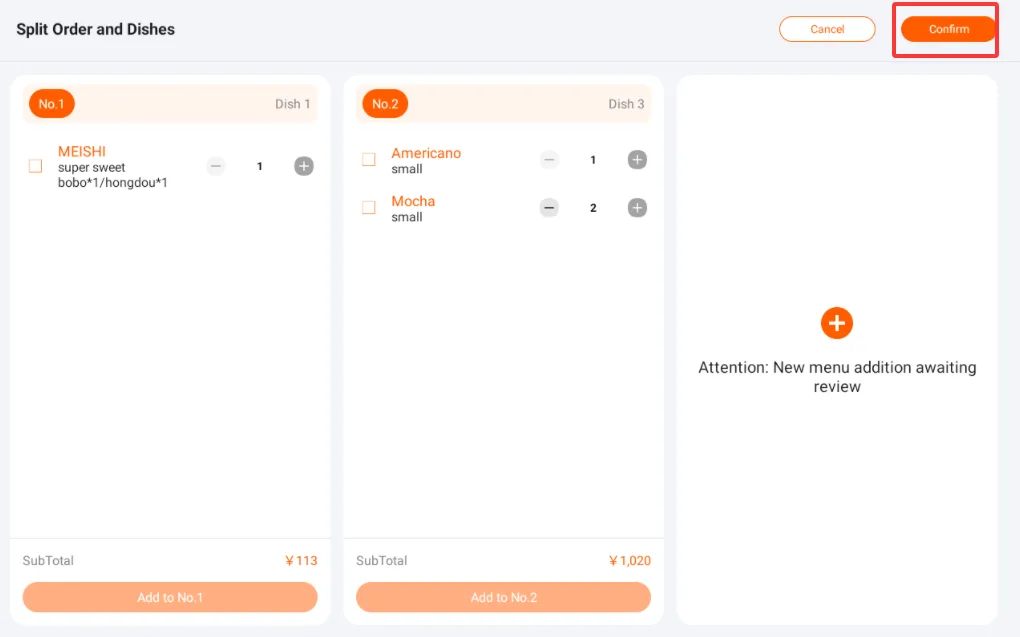
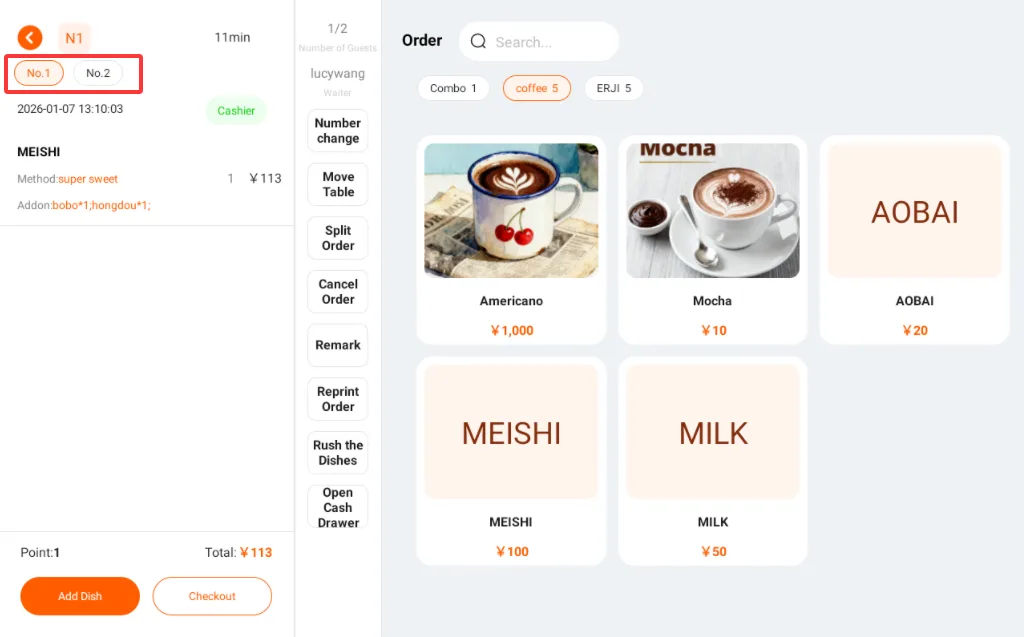
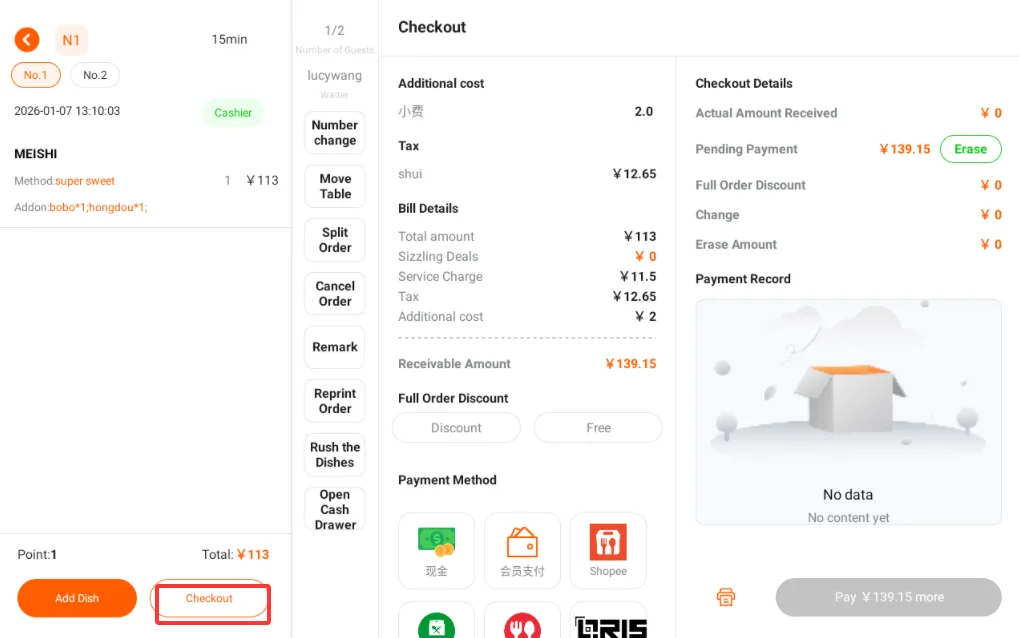
- Sub-orders can be checked out separately.
System Settings
- Tap the gear icon in the upper-right corner of the home page.
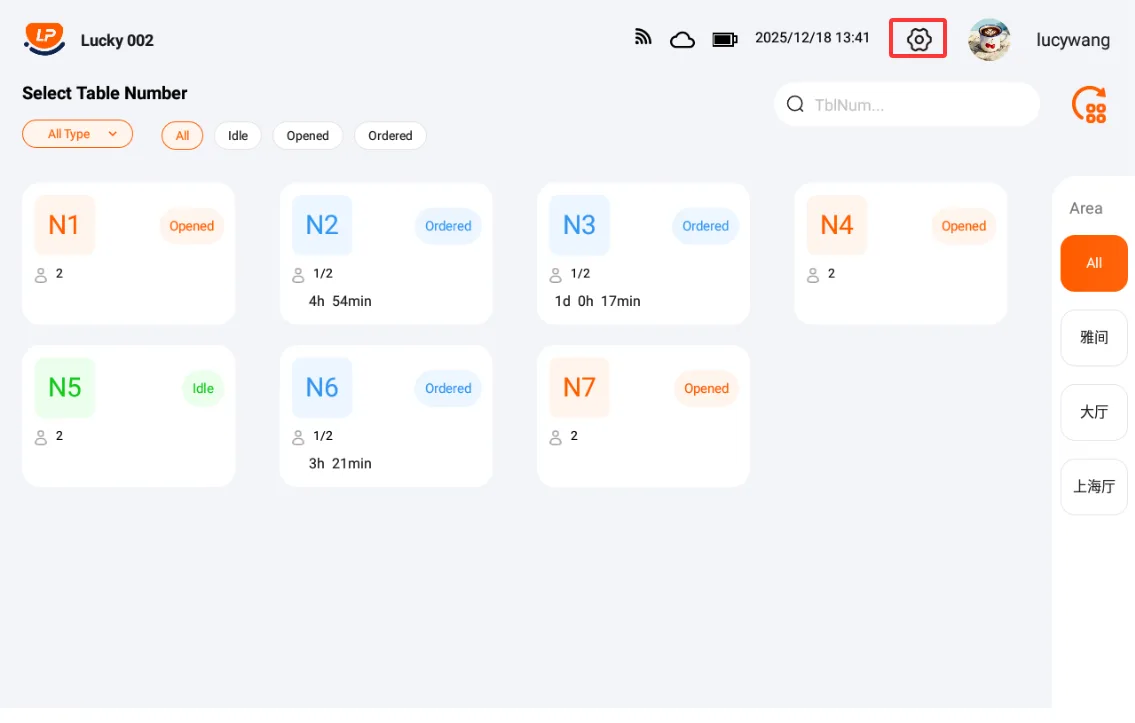
- This module is the entry point for basic system settings, including sound, brightness, network, time, and language.
- Tap a card to configure the corresponding setting.
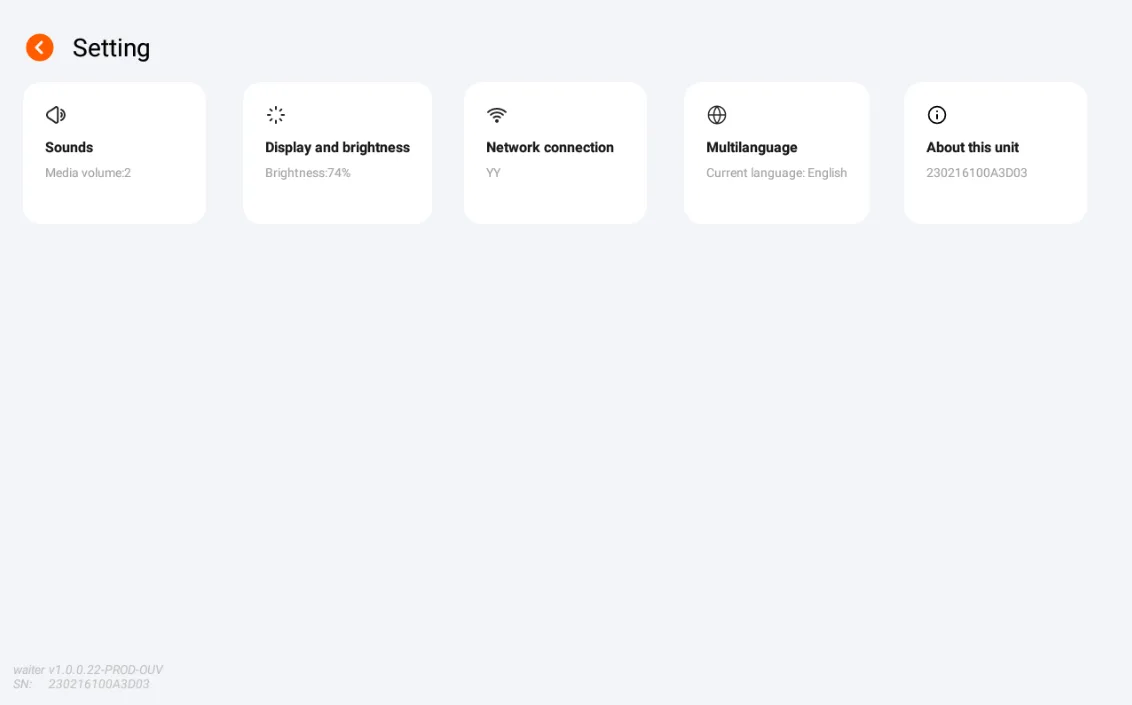
- About This Device displays system and device information.
- Restart System restarts the device. After restart, the user must sign in again.