
Appearance
Detailed Guide
Preparation
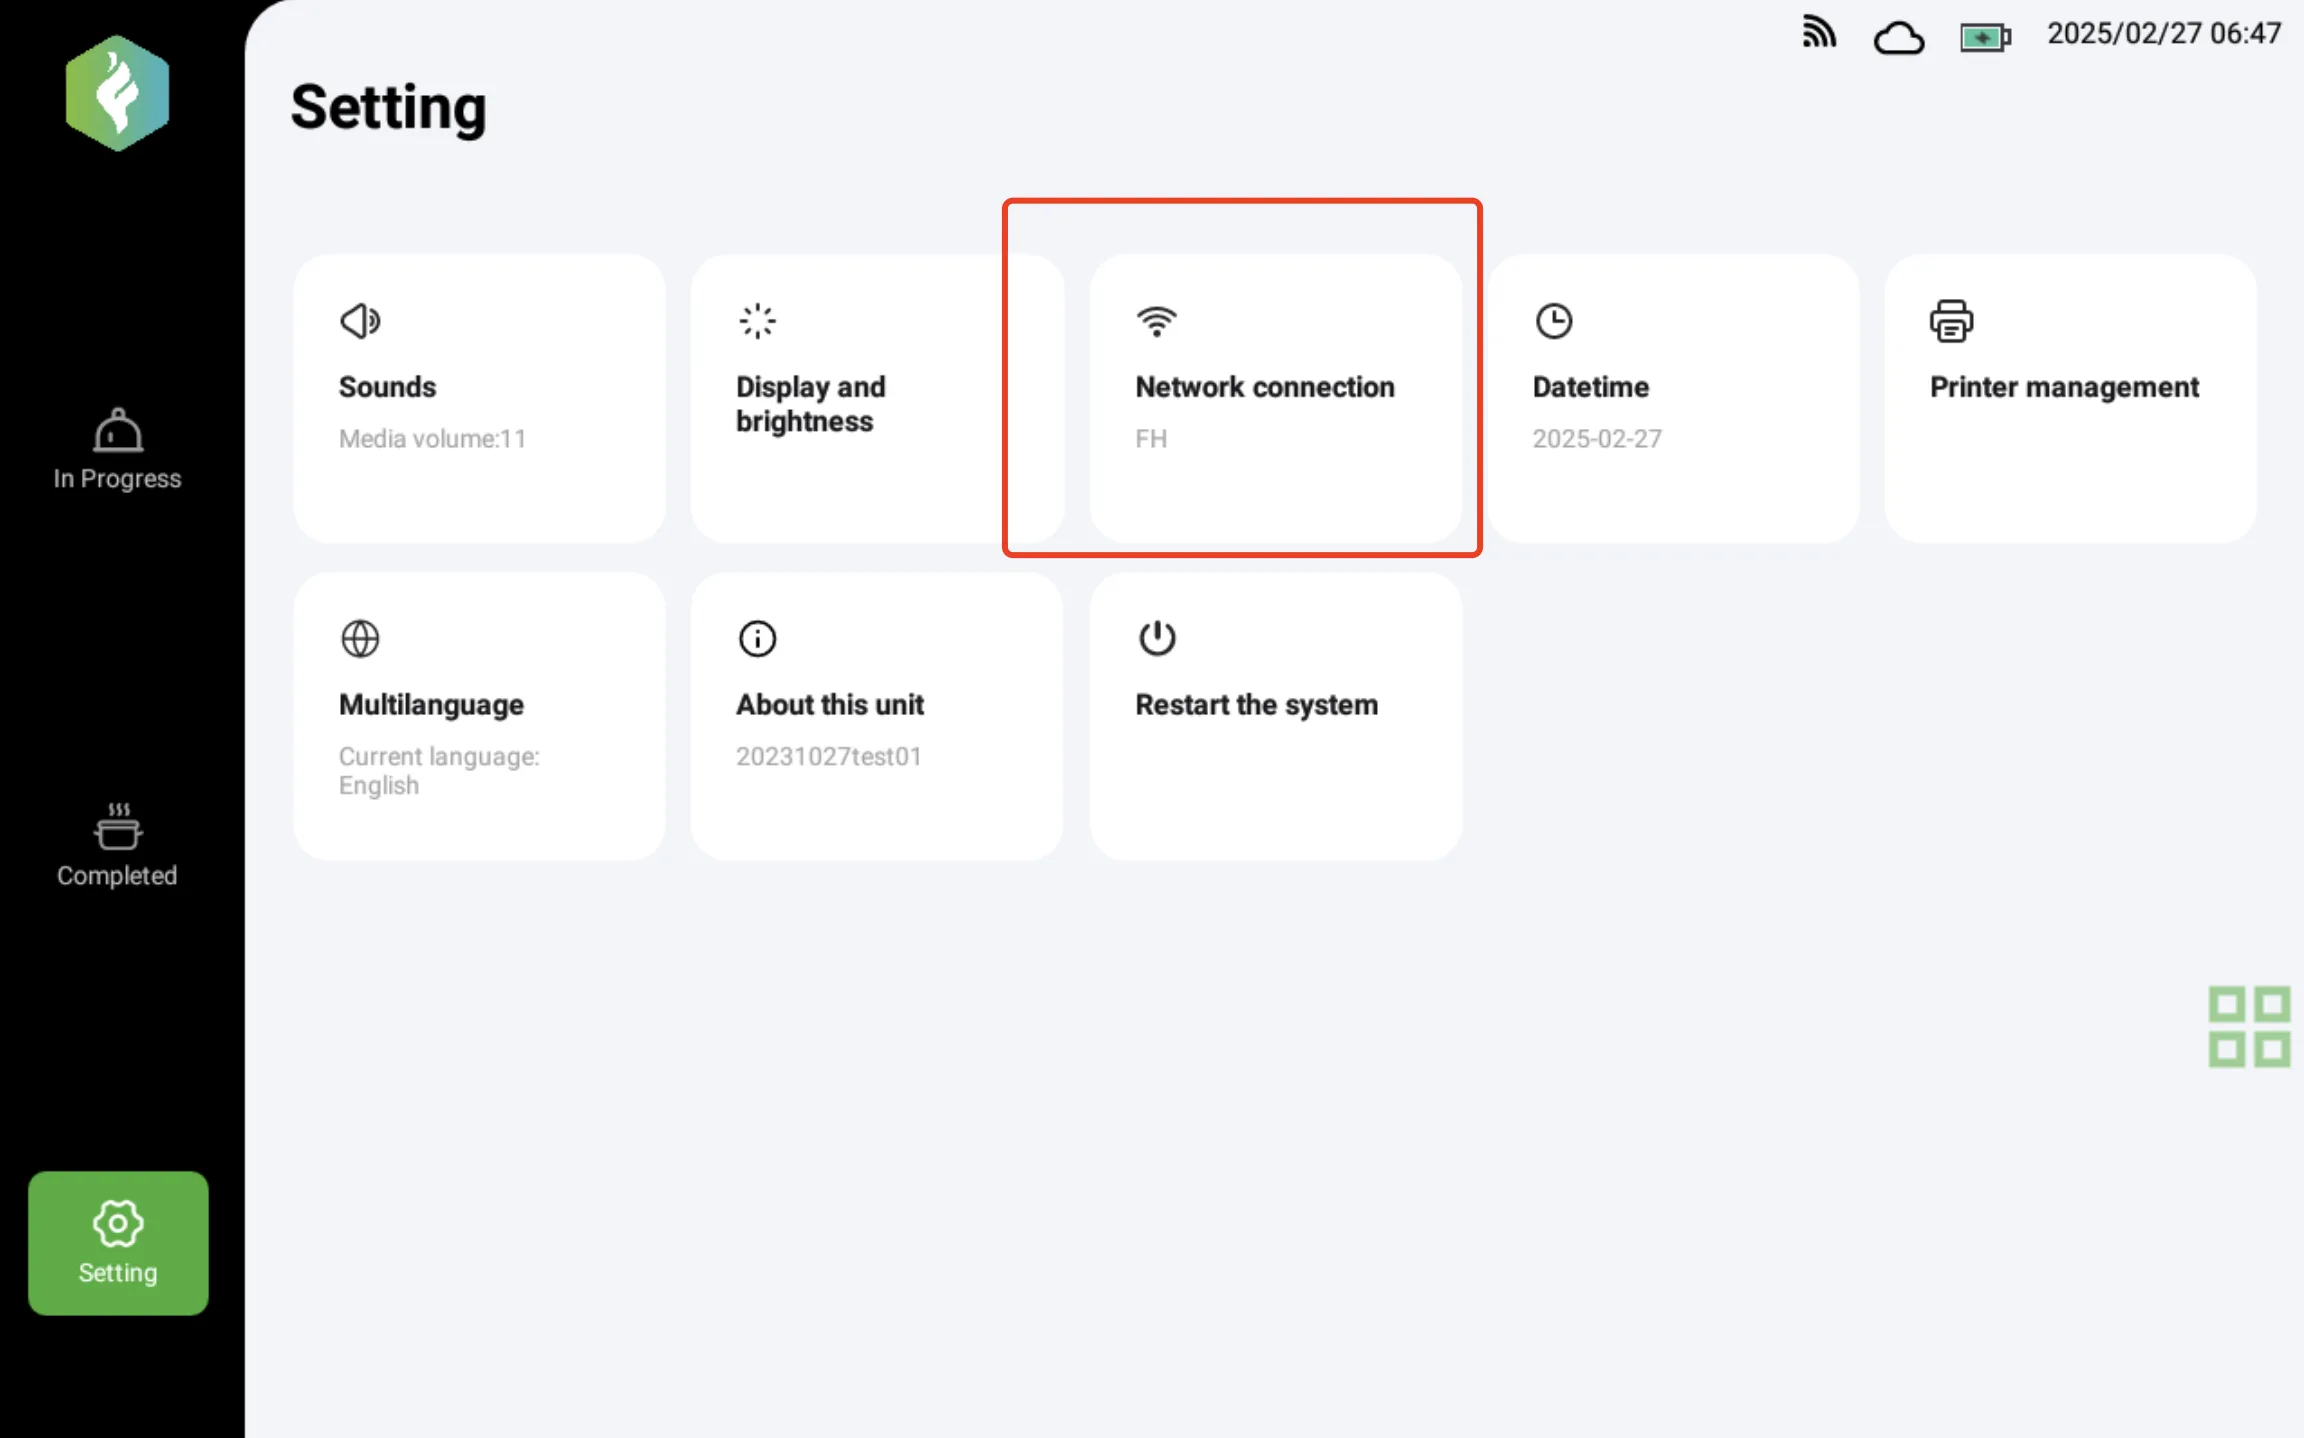
Connect to the Network
- After powering on the device, open Settings and choose Network to connect to an available Wi-Fi network. If possible, use a wired network connection for better stability.
Adjust Volume
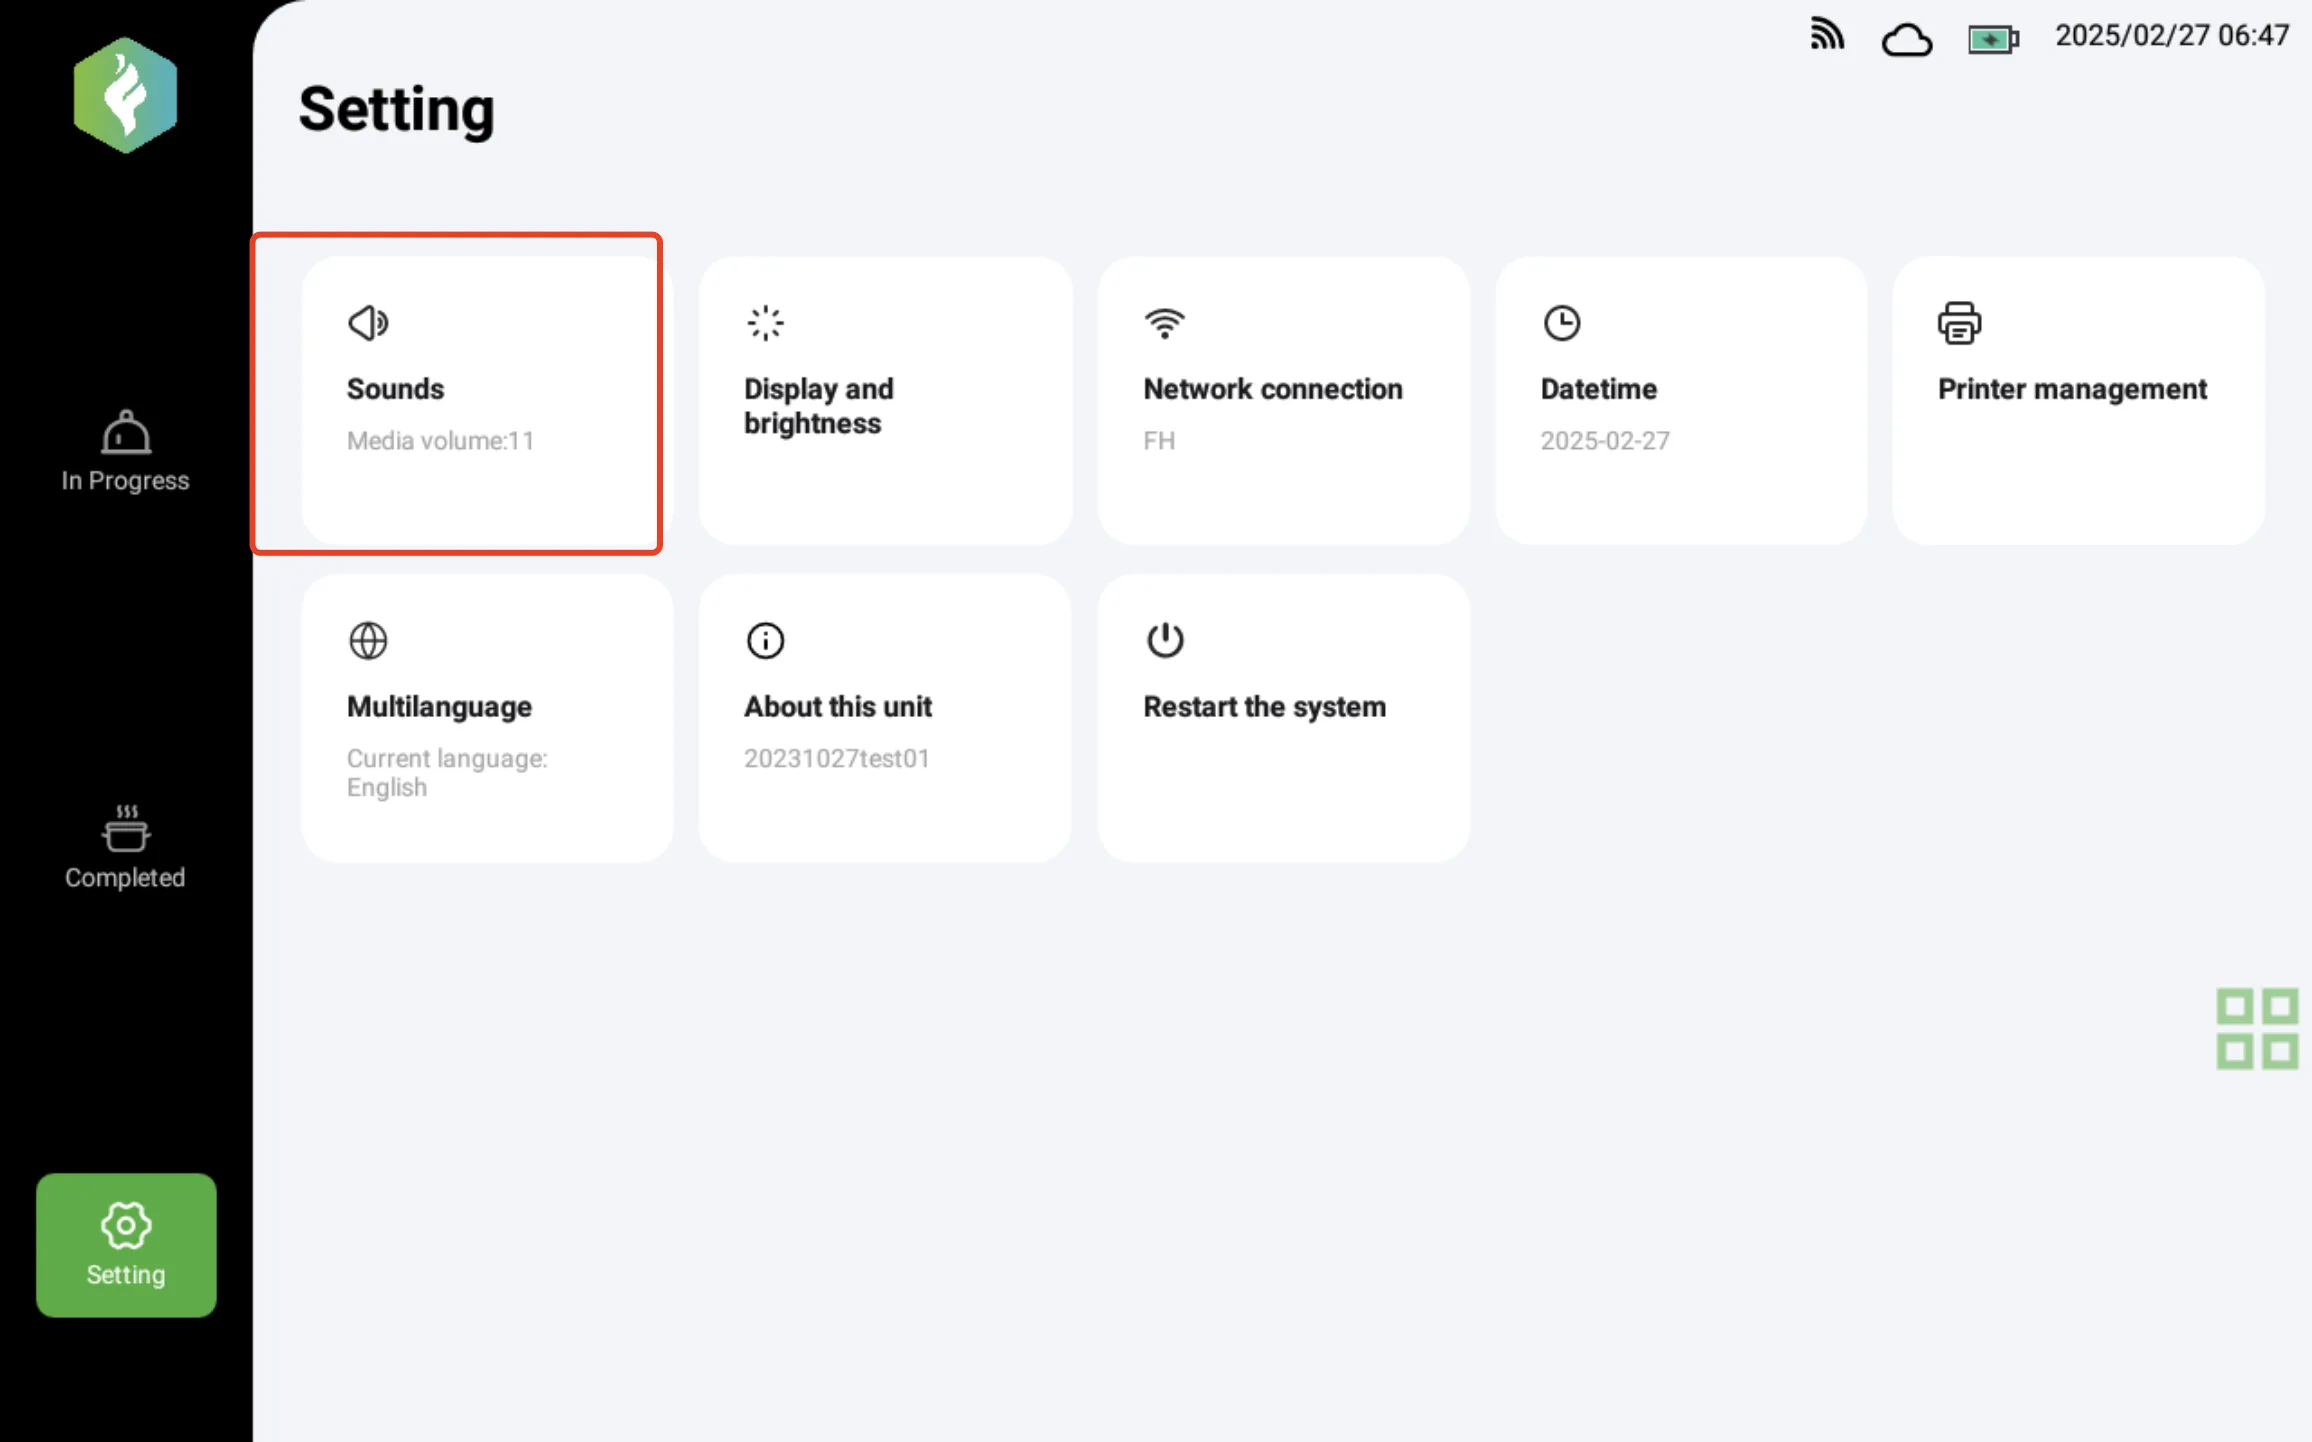
- Open Settings and tap Sound to set an appropriate volume.
- The system plays voice notifications for new orders, order status changes such as returns or cancellations, and rush requests.
- If the kitchen is noisy, use an external speaker so staff can hear notifications clearly.
Time Calibration
Check the Time
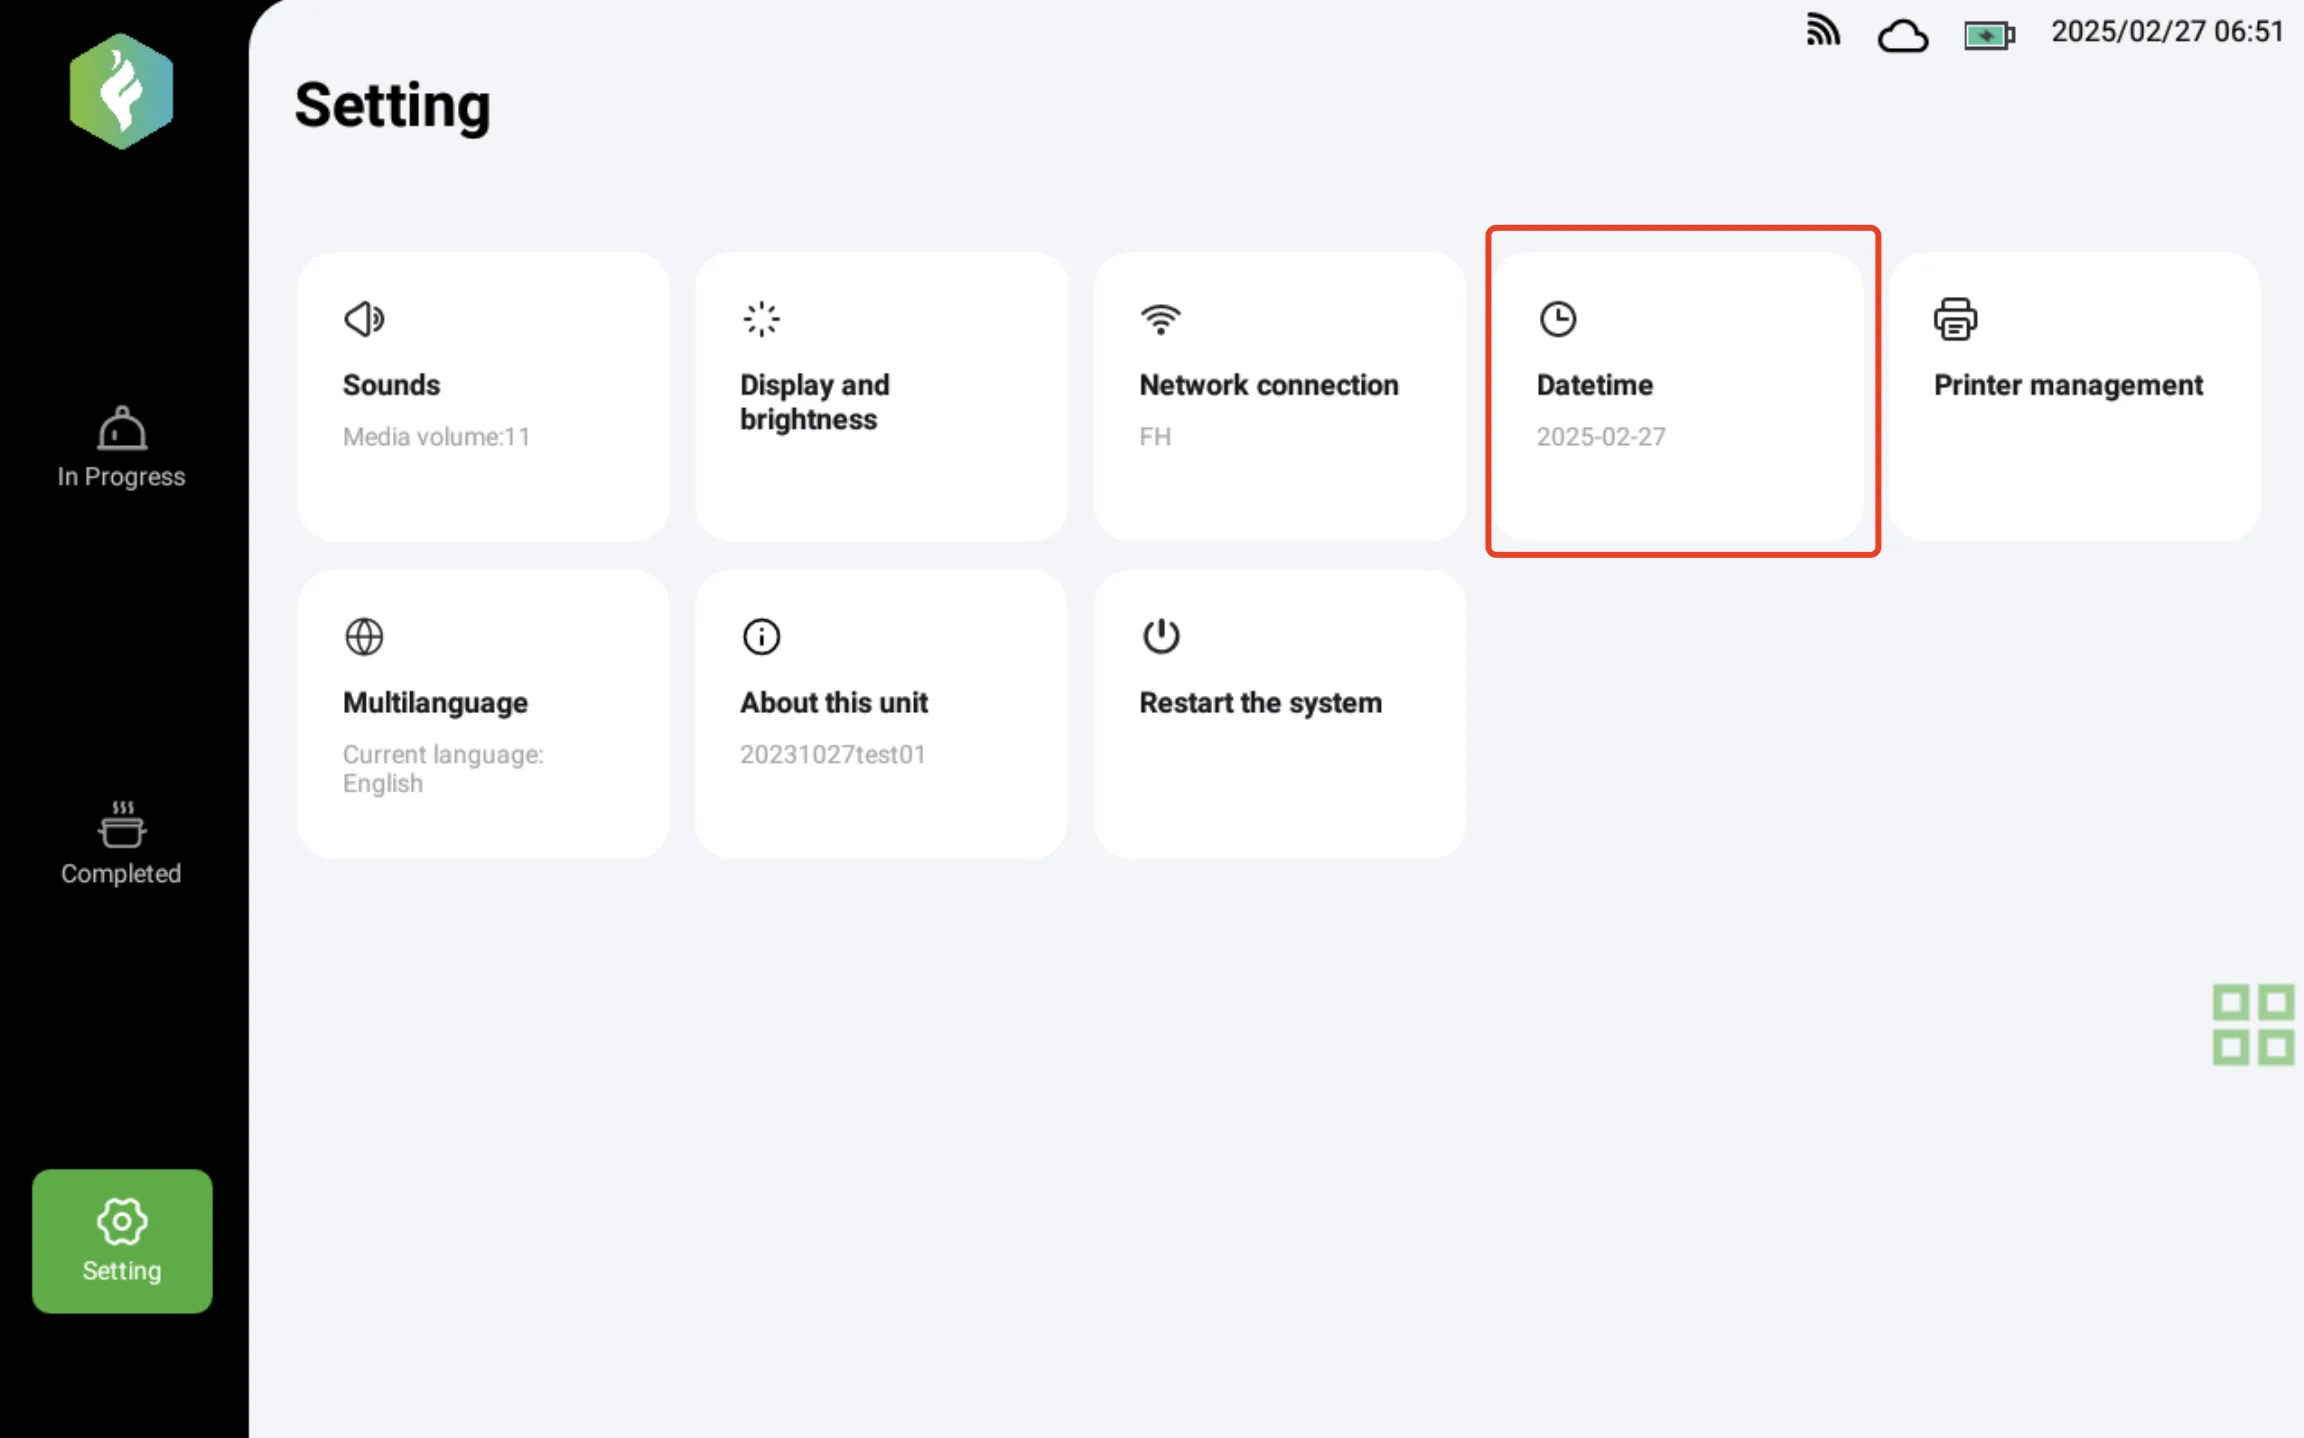
- Check whether the device time is correct. If it is not, update the time zone.
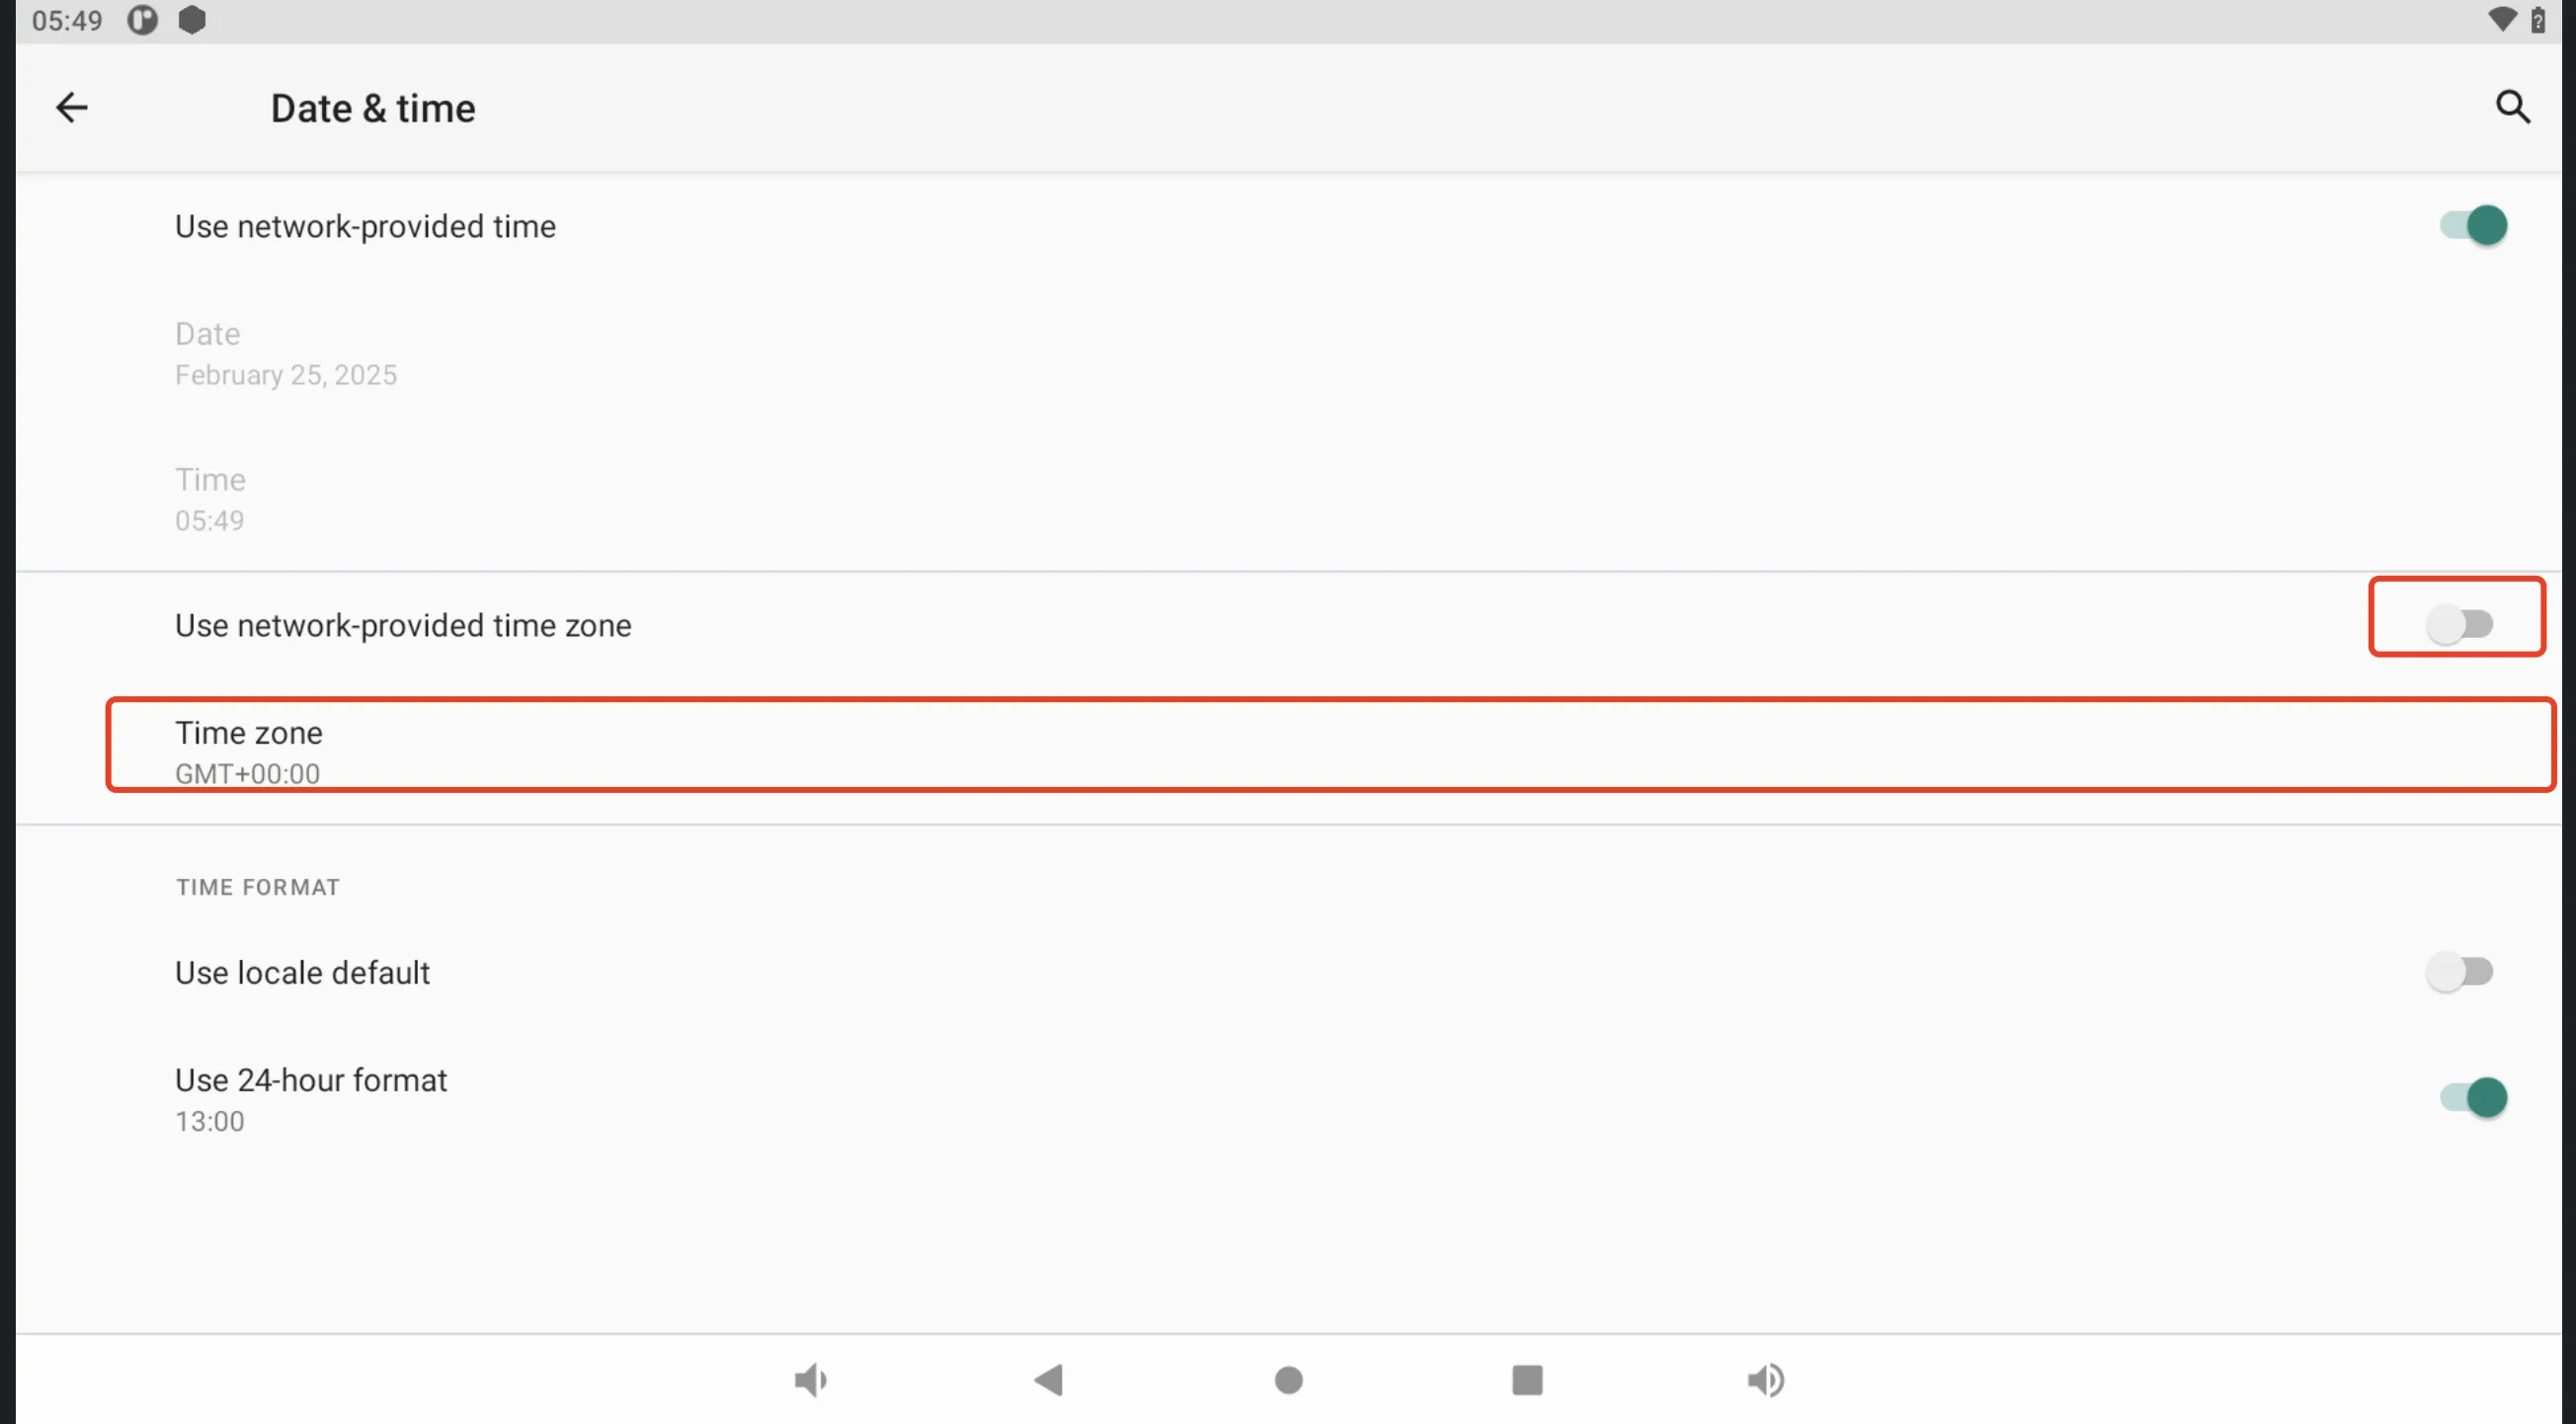
Open Time Settings
- Tap the Time card to open time settings.
Use Network Time Zone
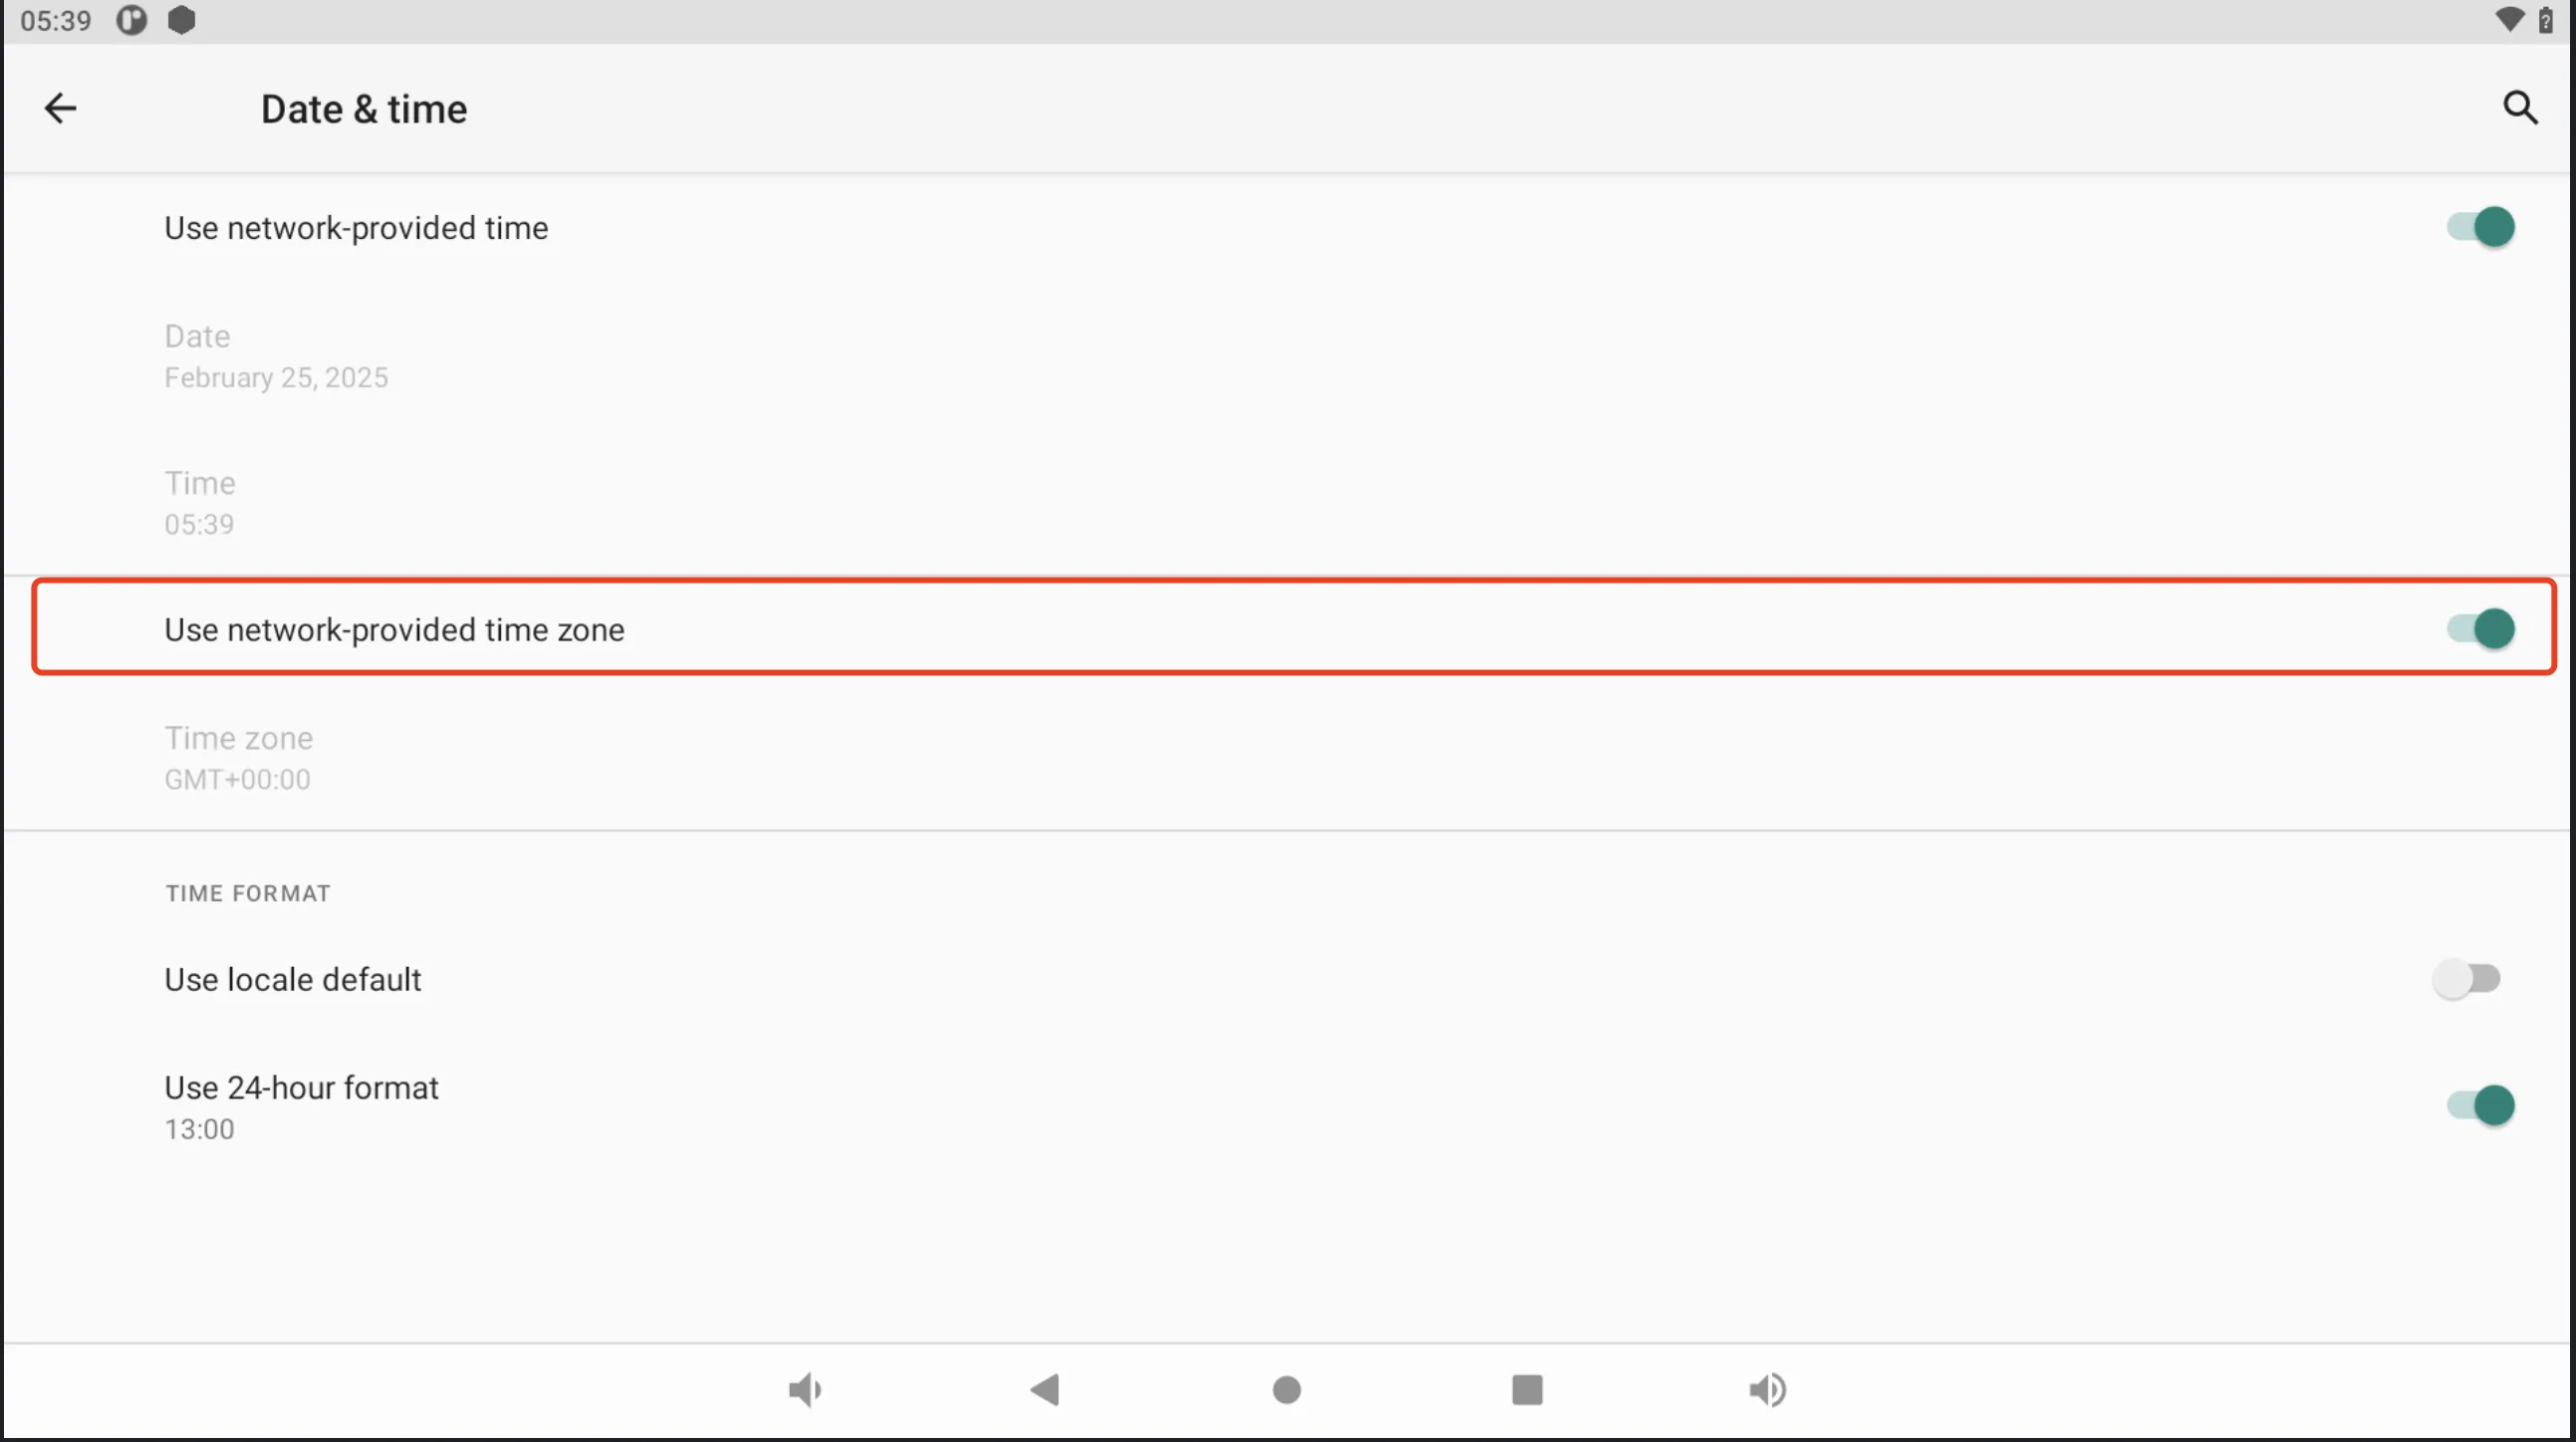
- Turn on Use network time zone. If this does not set the correct time, use the manual time-zone method below.
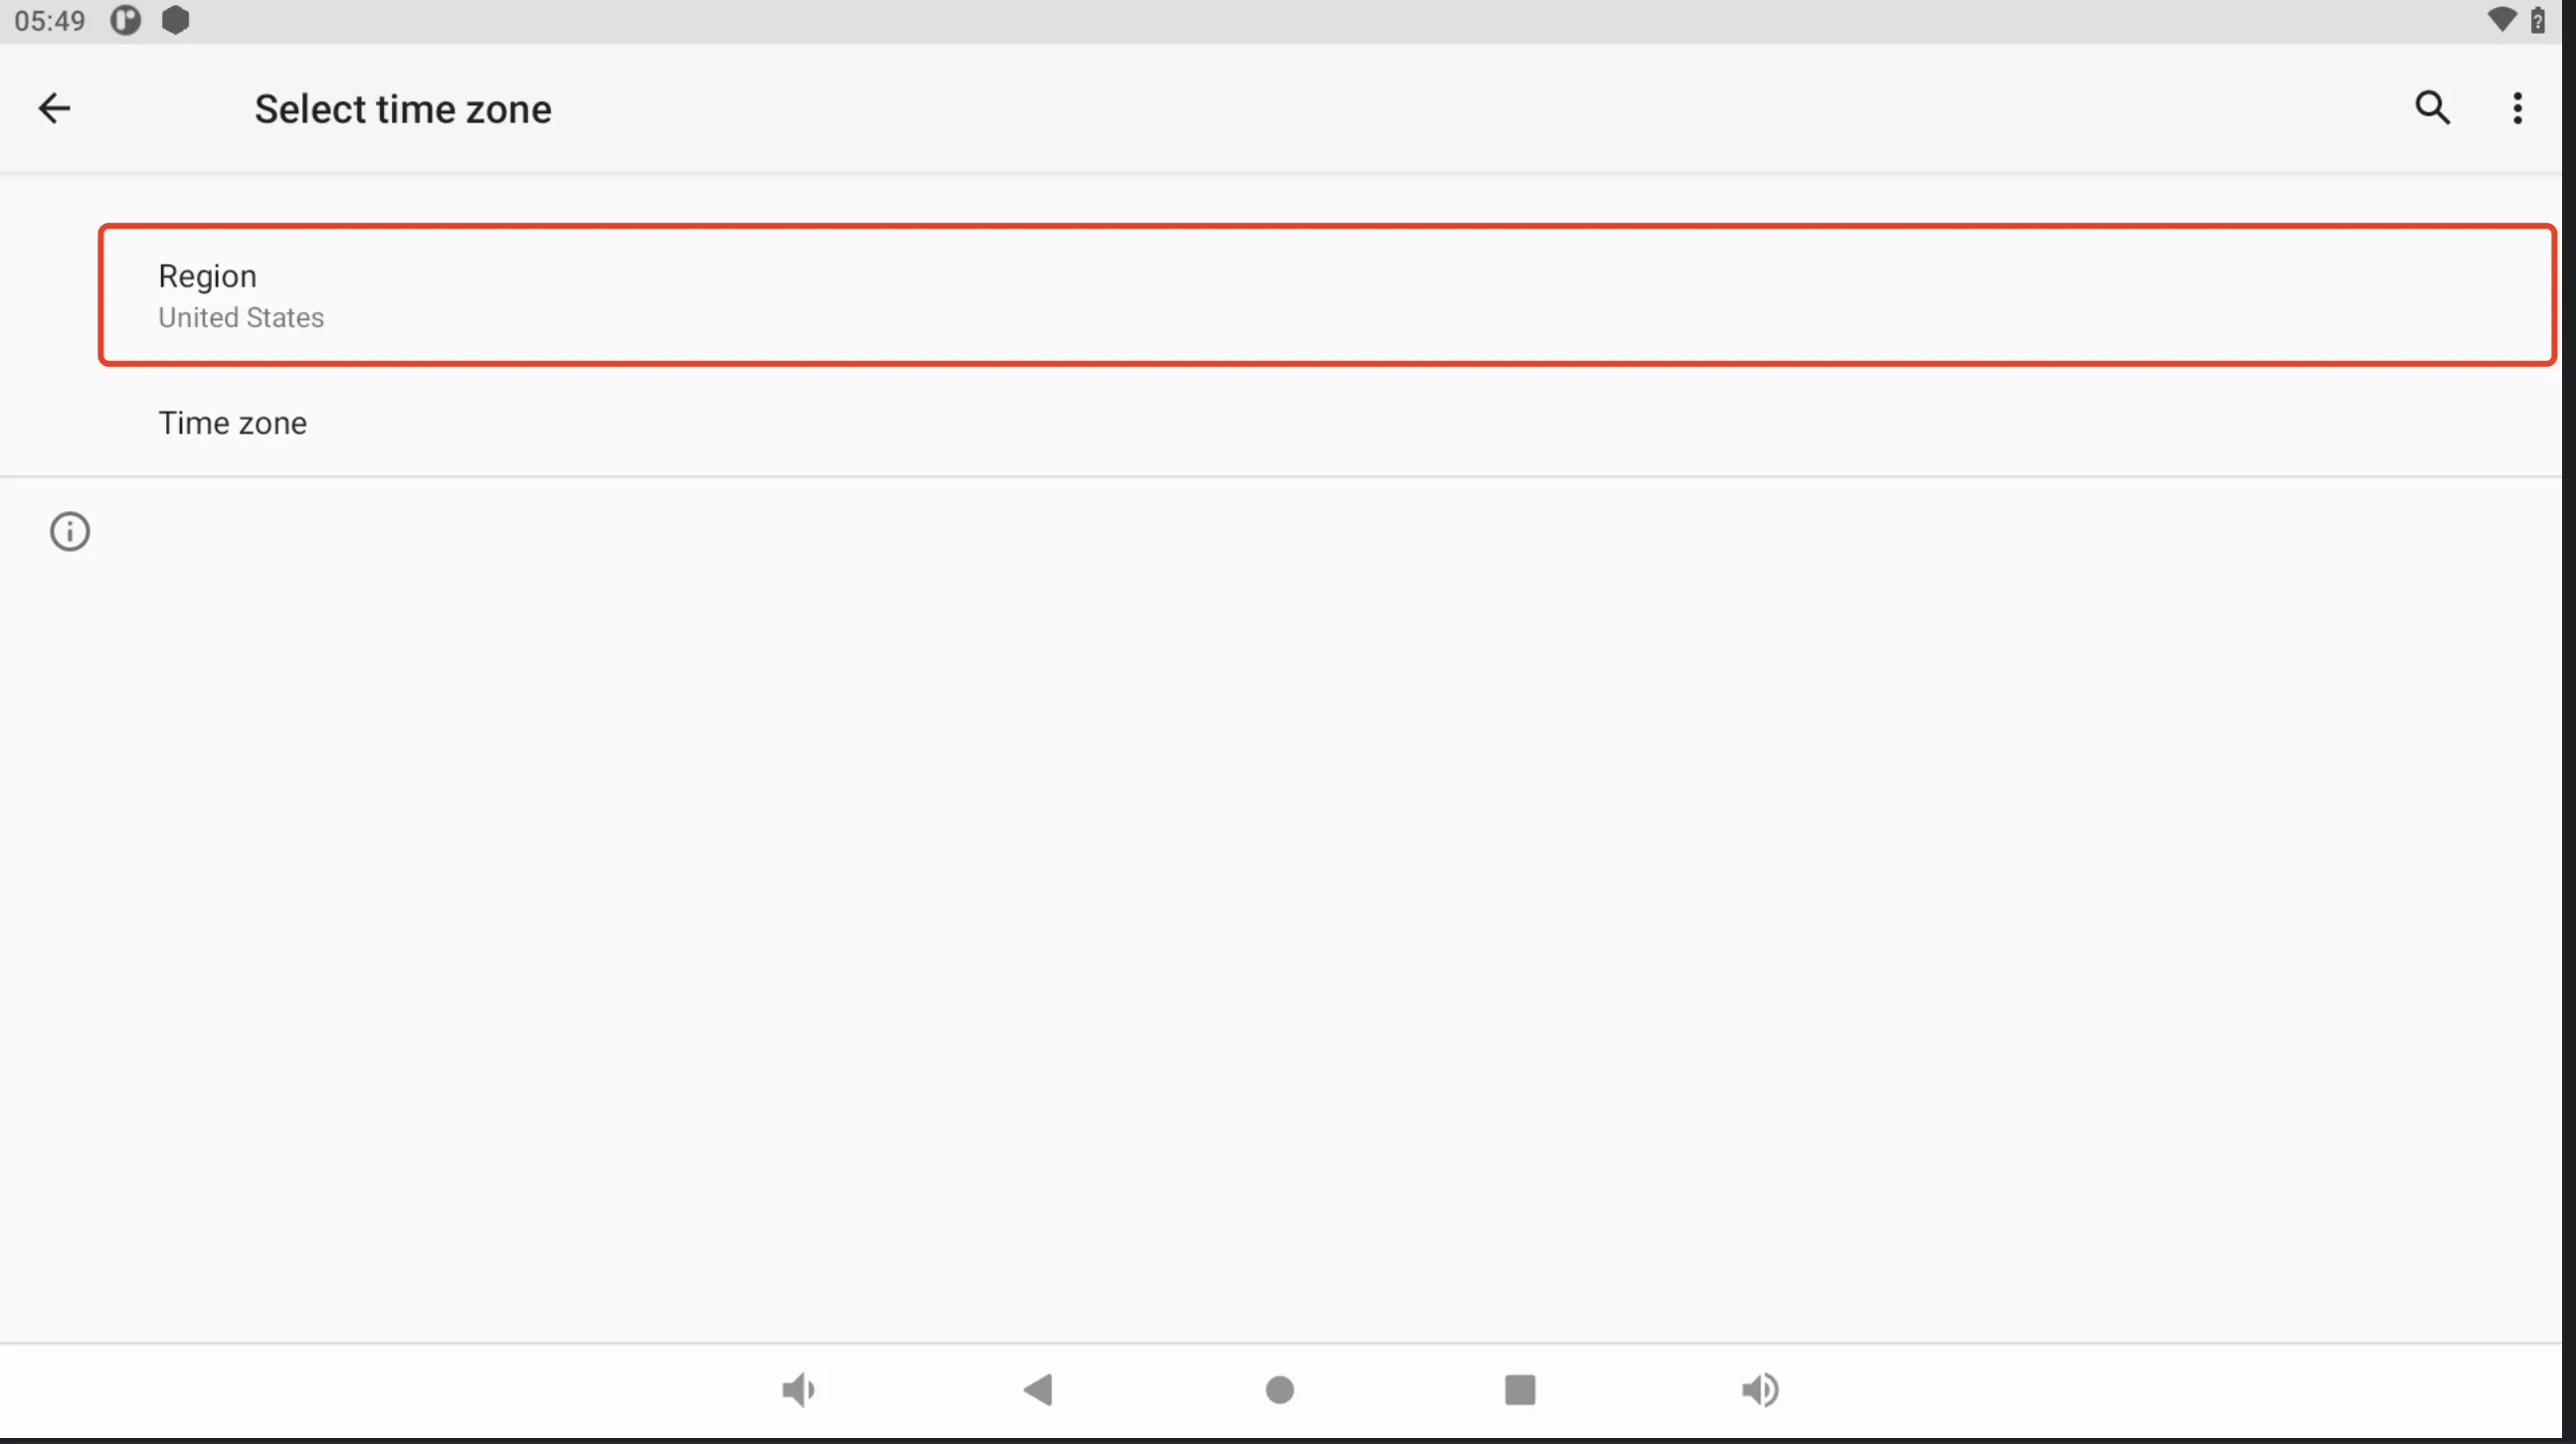
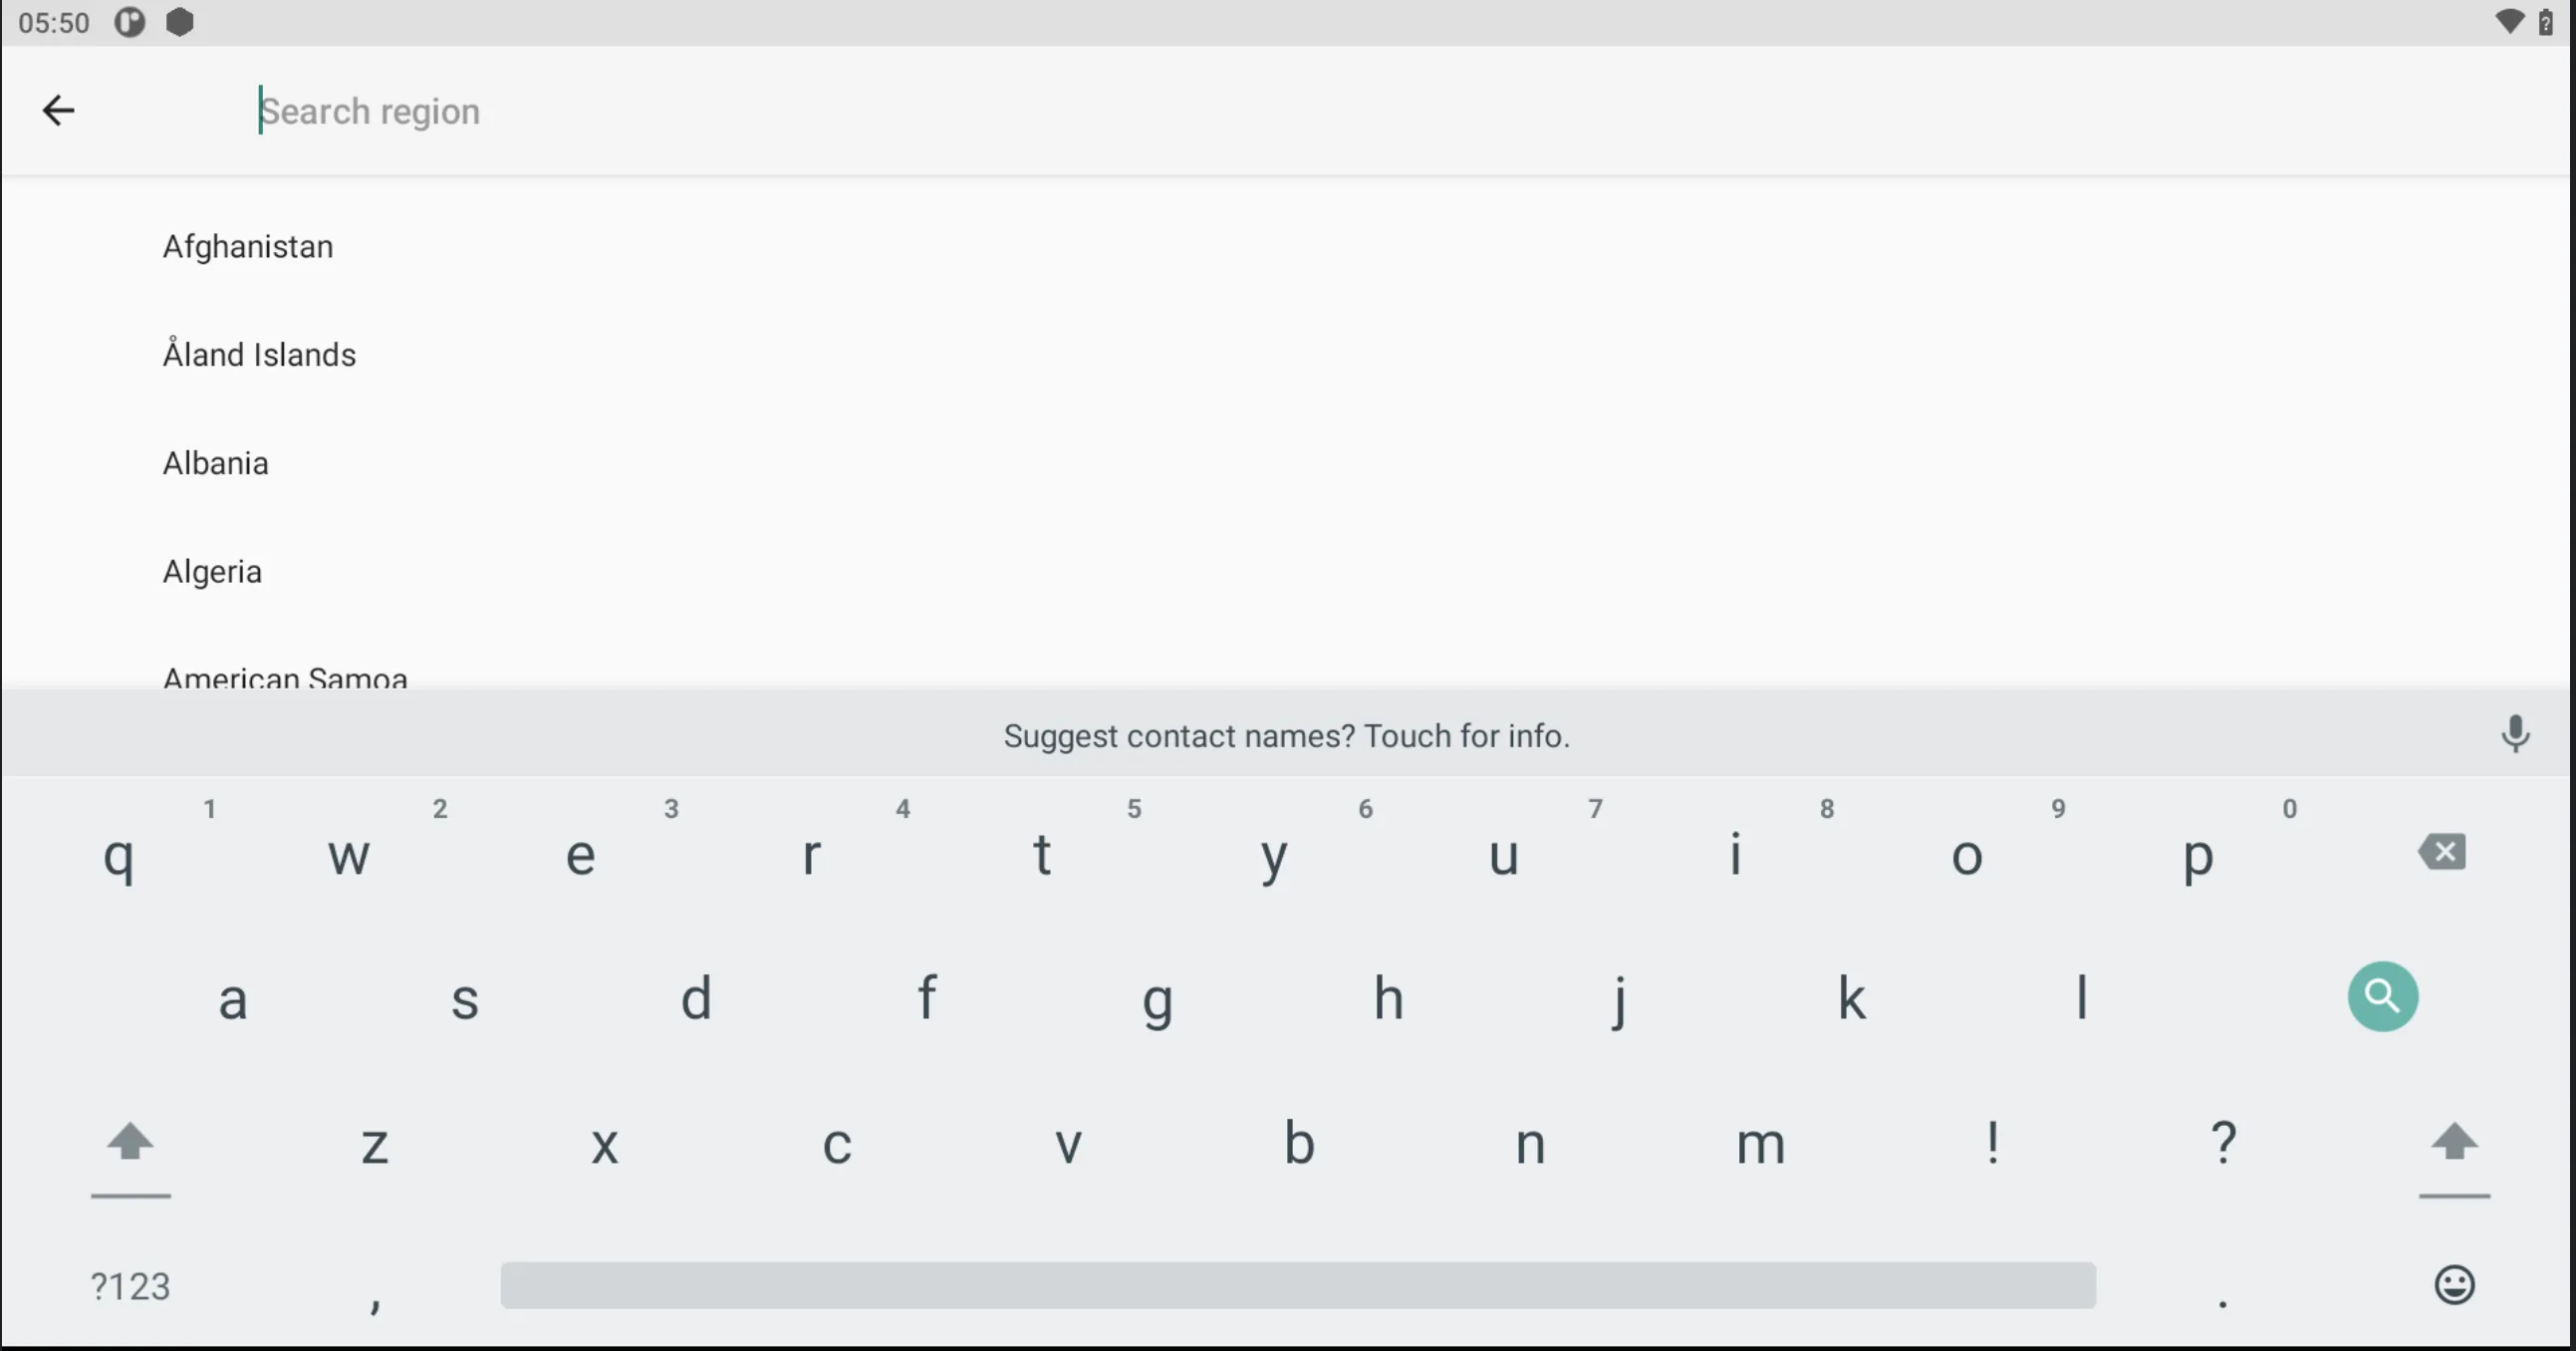
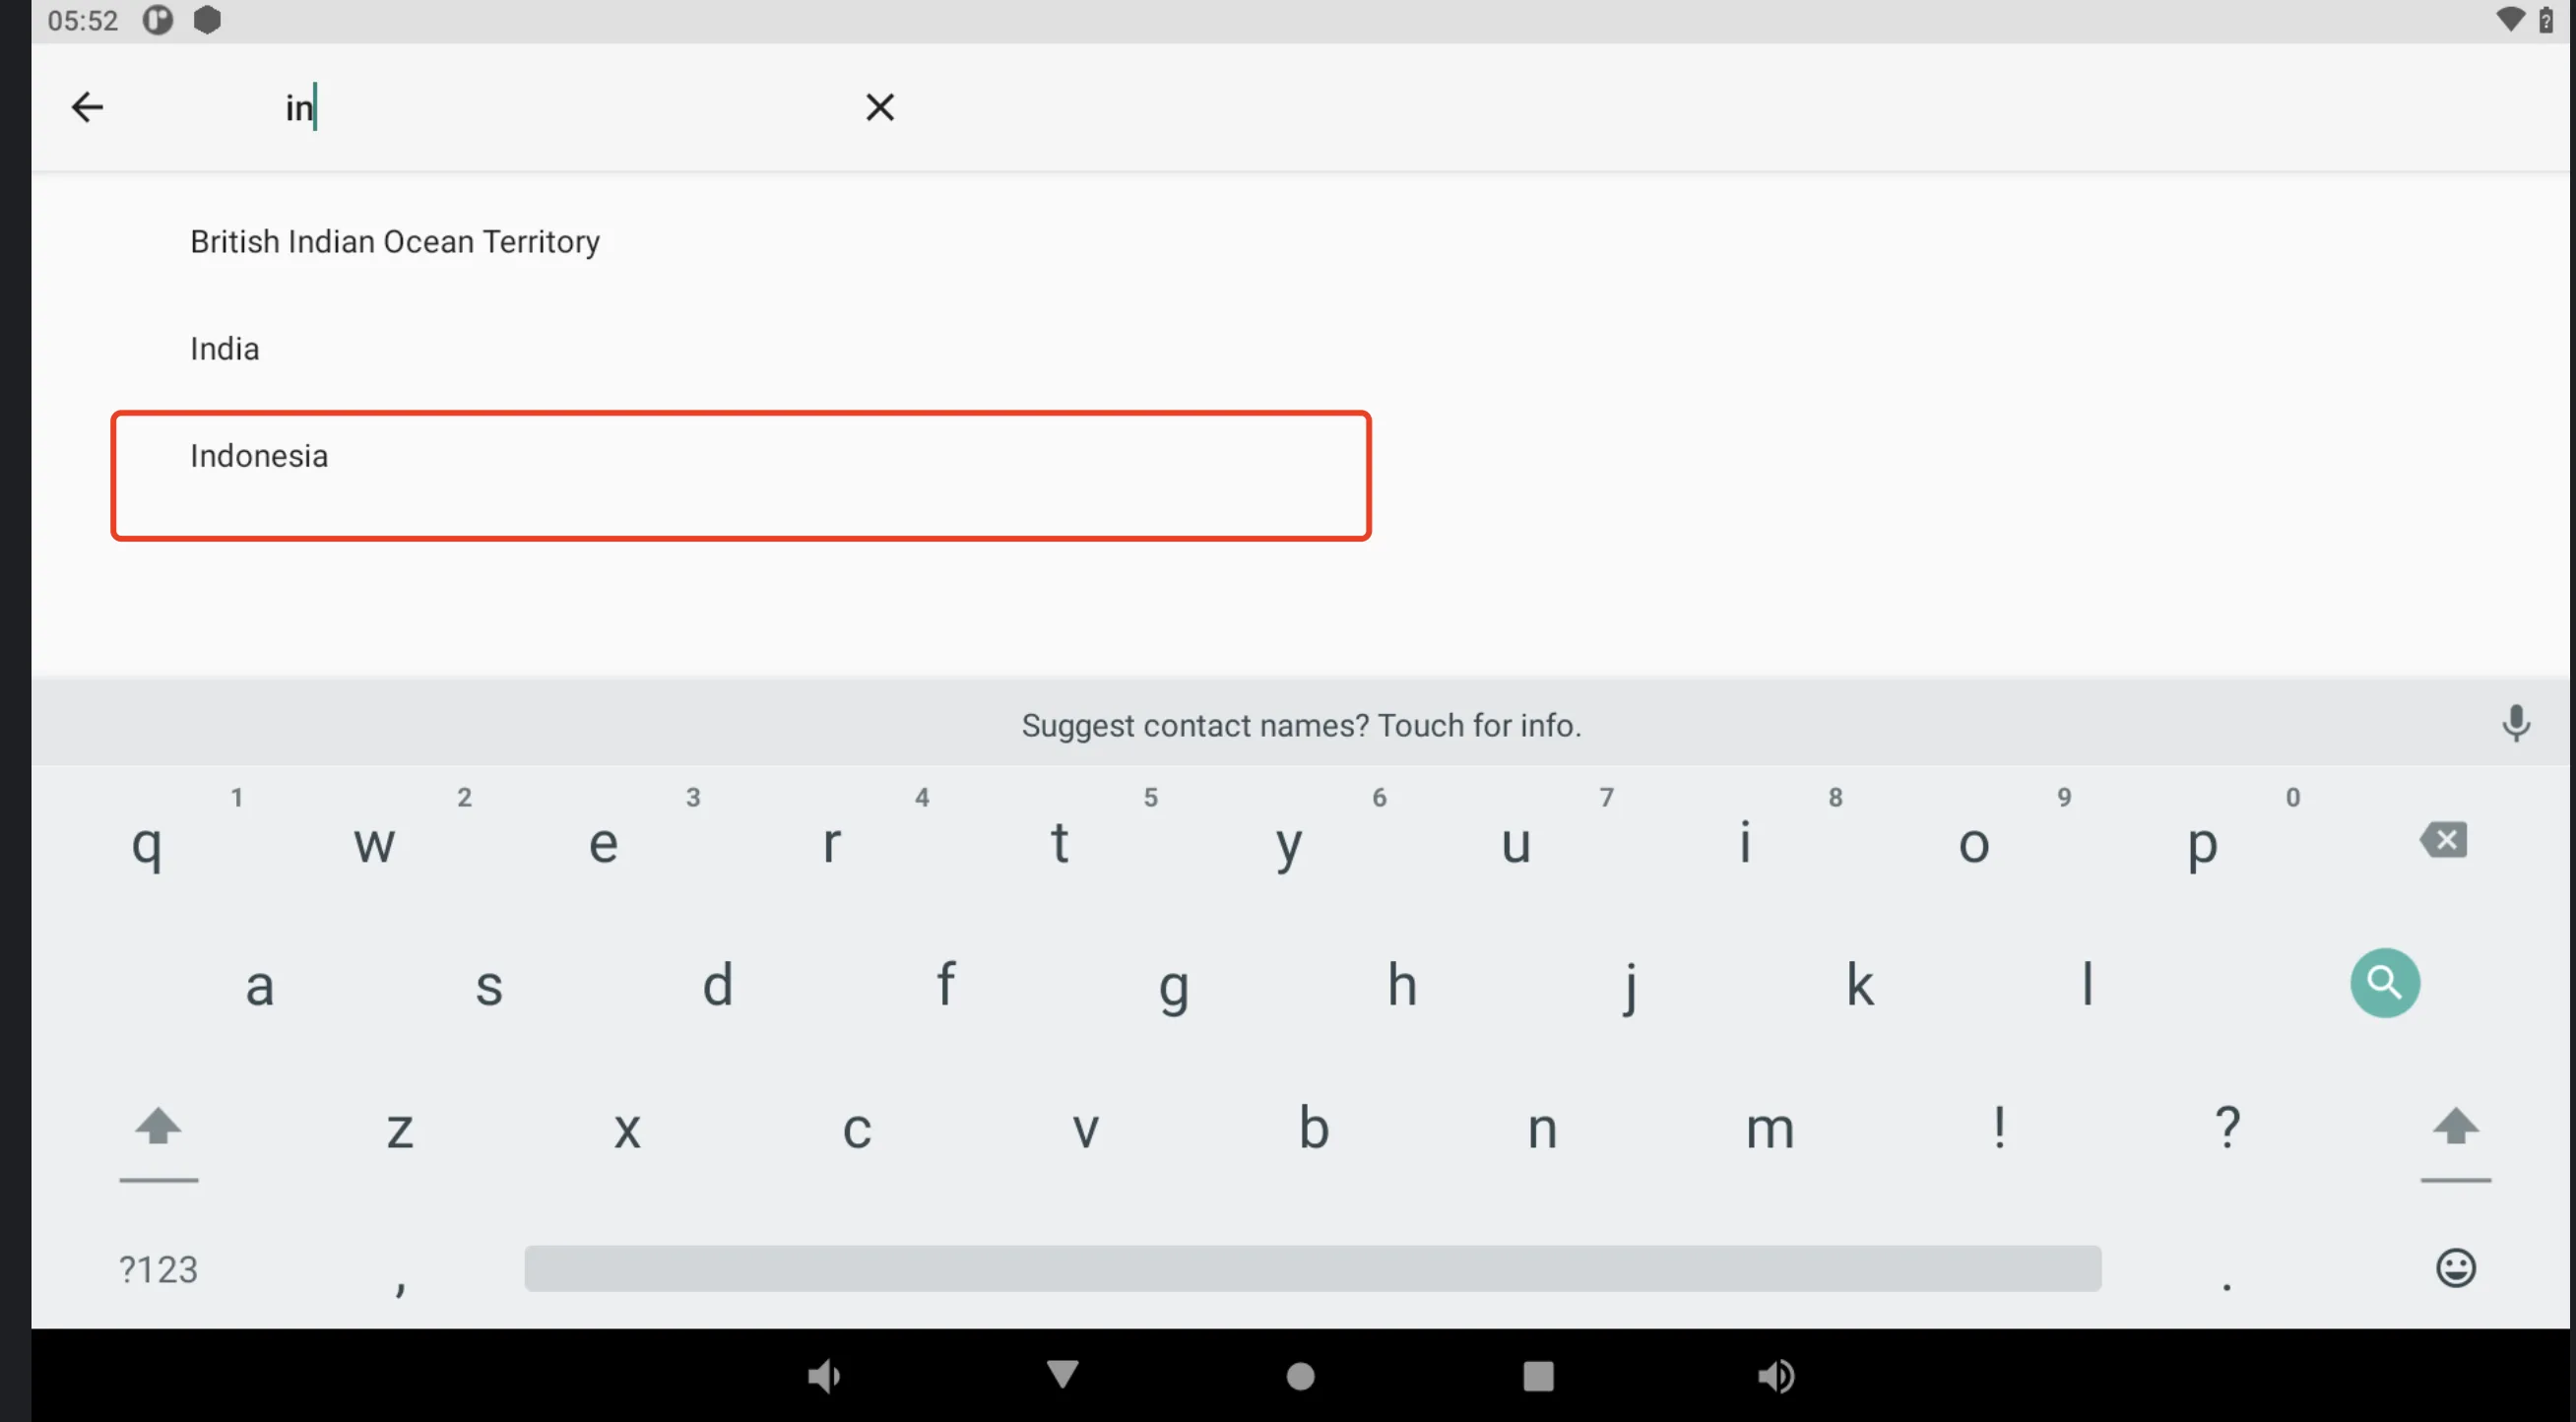
Set Time Zone Manually
- Turn off Use network time.
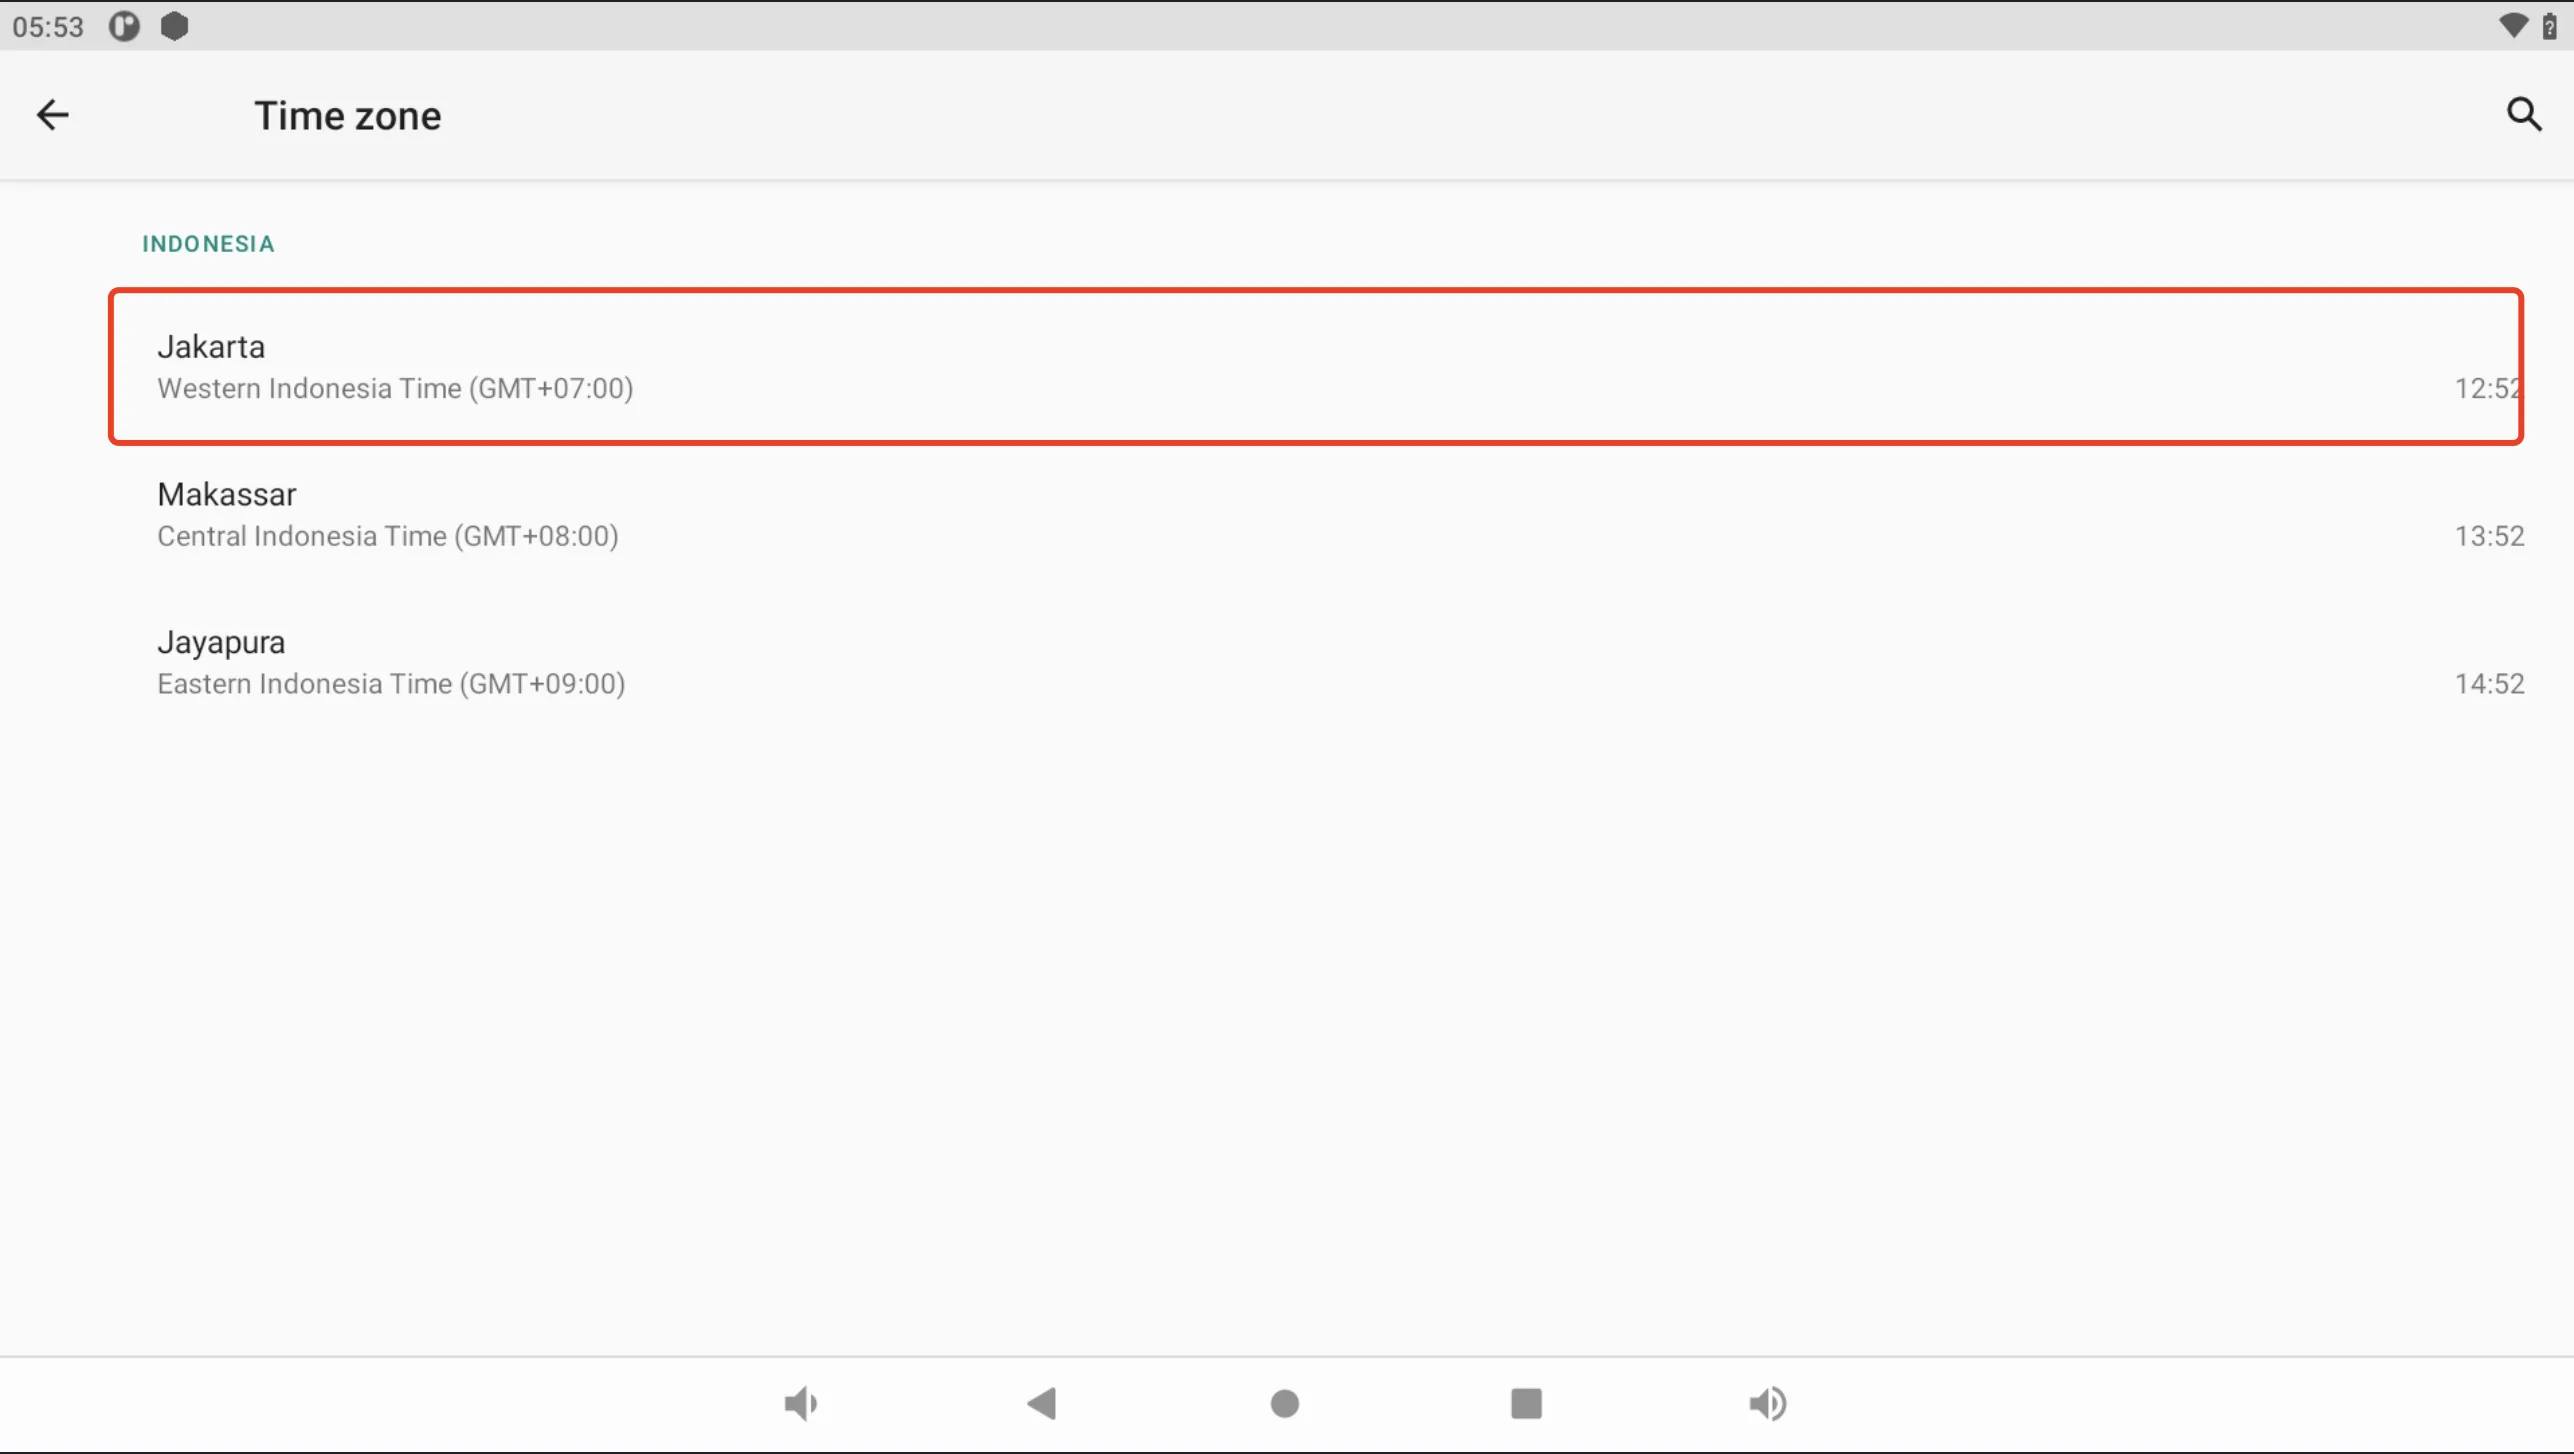
- Tap Time zone.
- Select the store's region, then select the matching time zone.
- Confirm that the selected time zone is correct.
Finish Setup
- If all settings are correct, tap the back button in the upper-left corner to return to the home page.
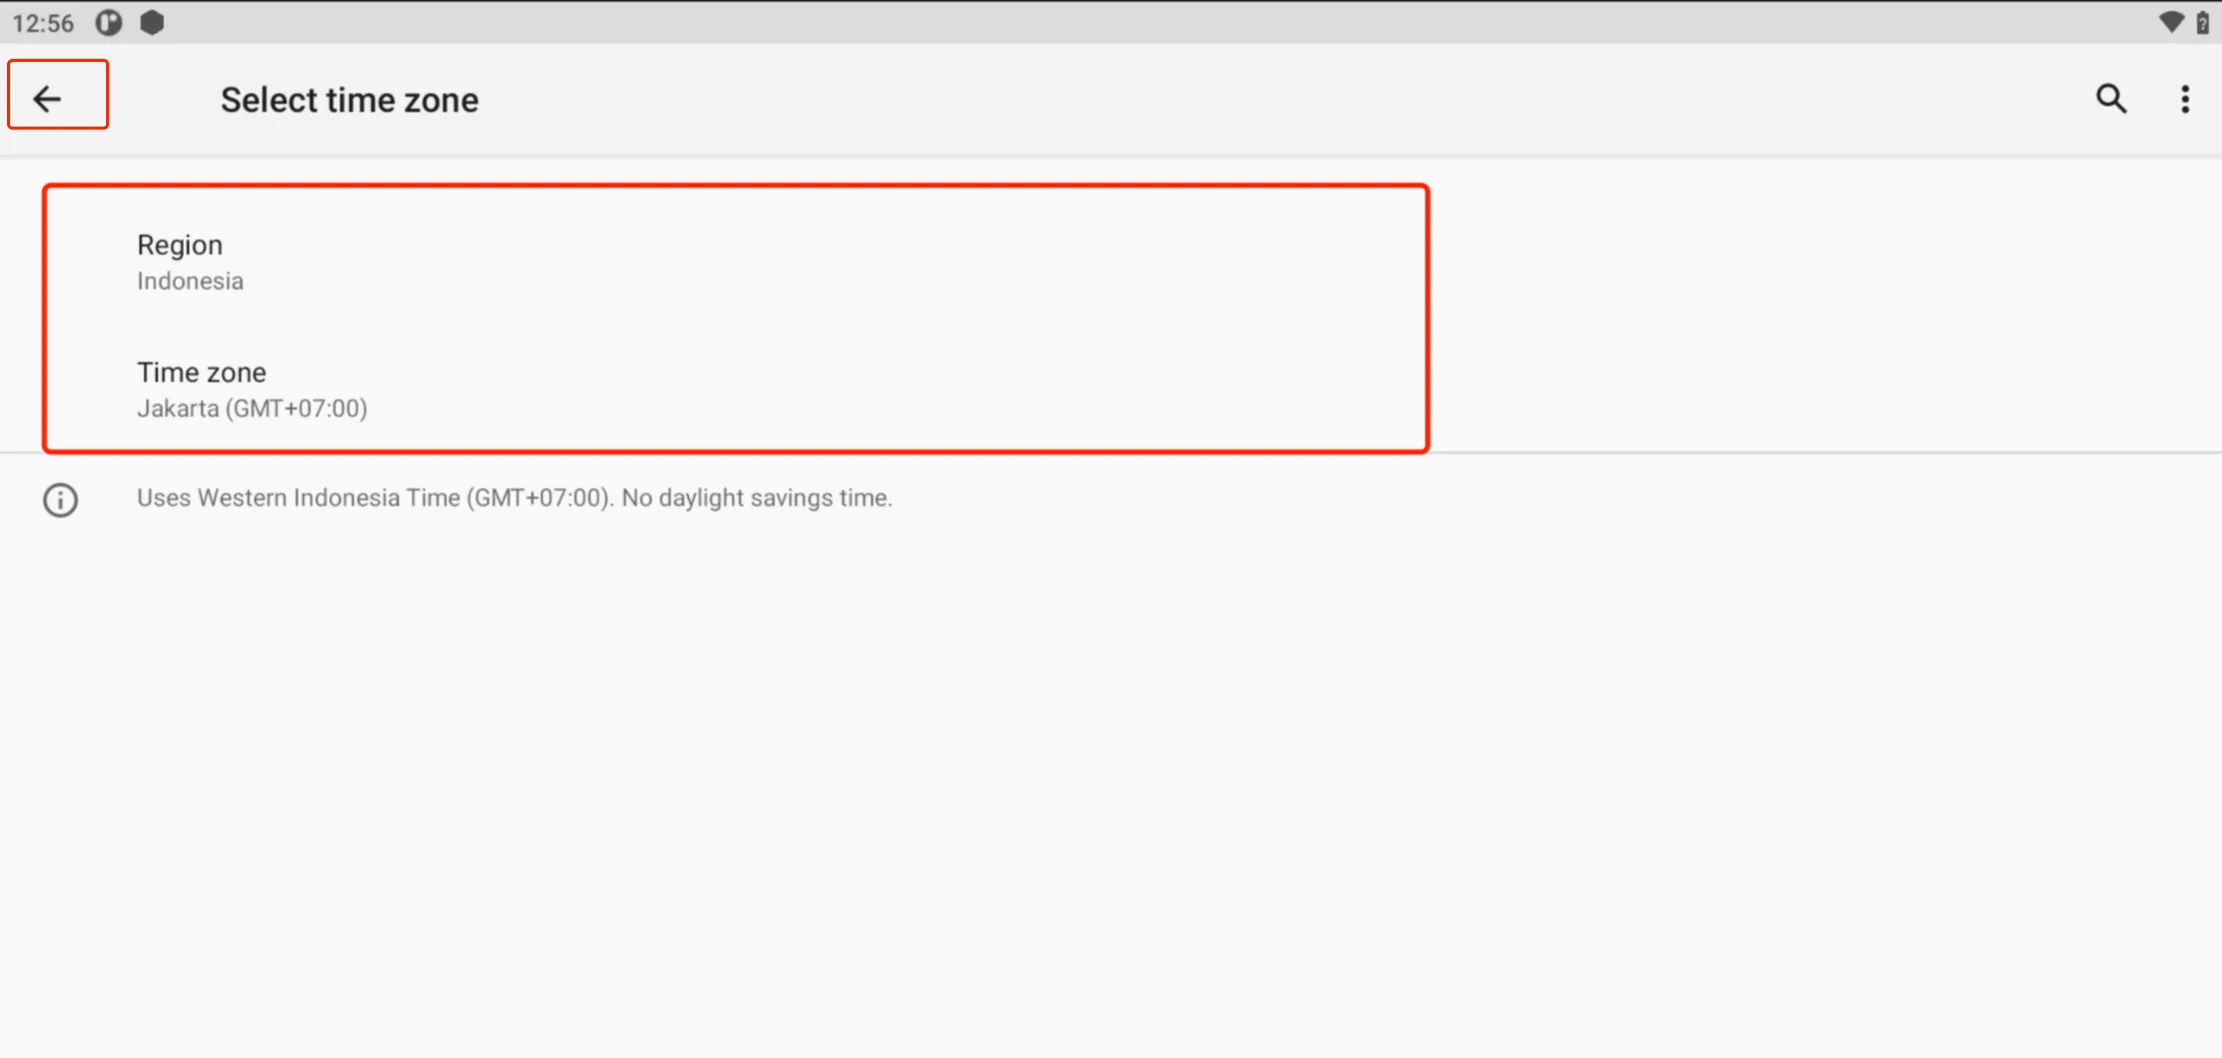
This keeps the device time aligned with the local store time and helps avoid schedule or order timing issues.
Printer Configuration
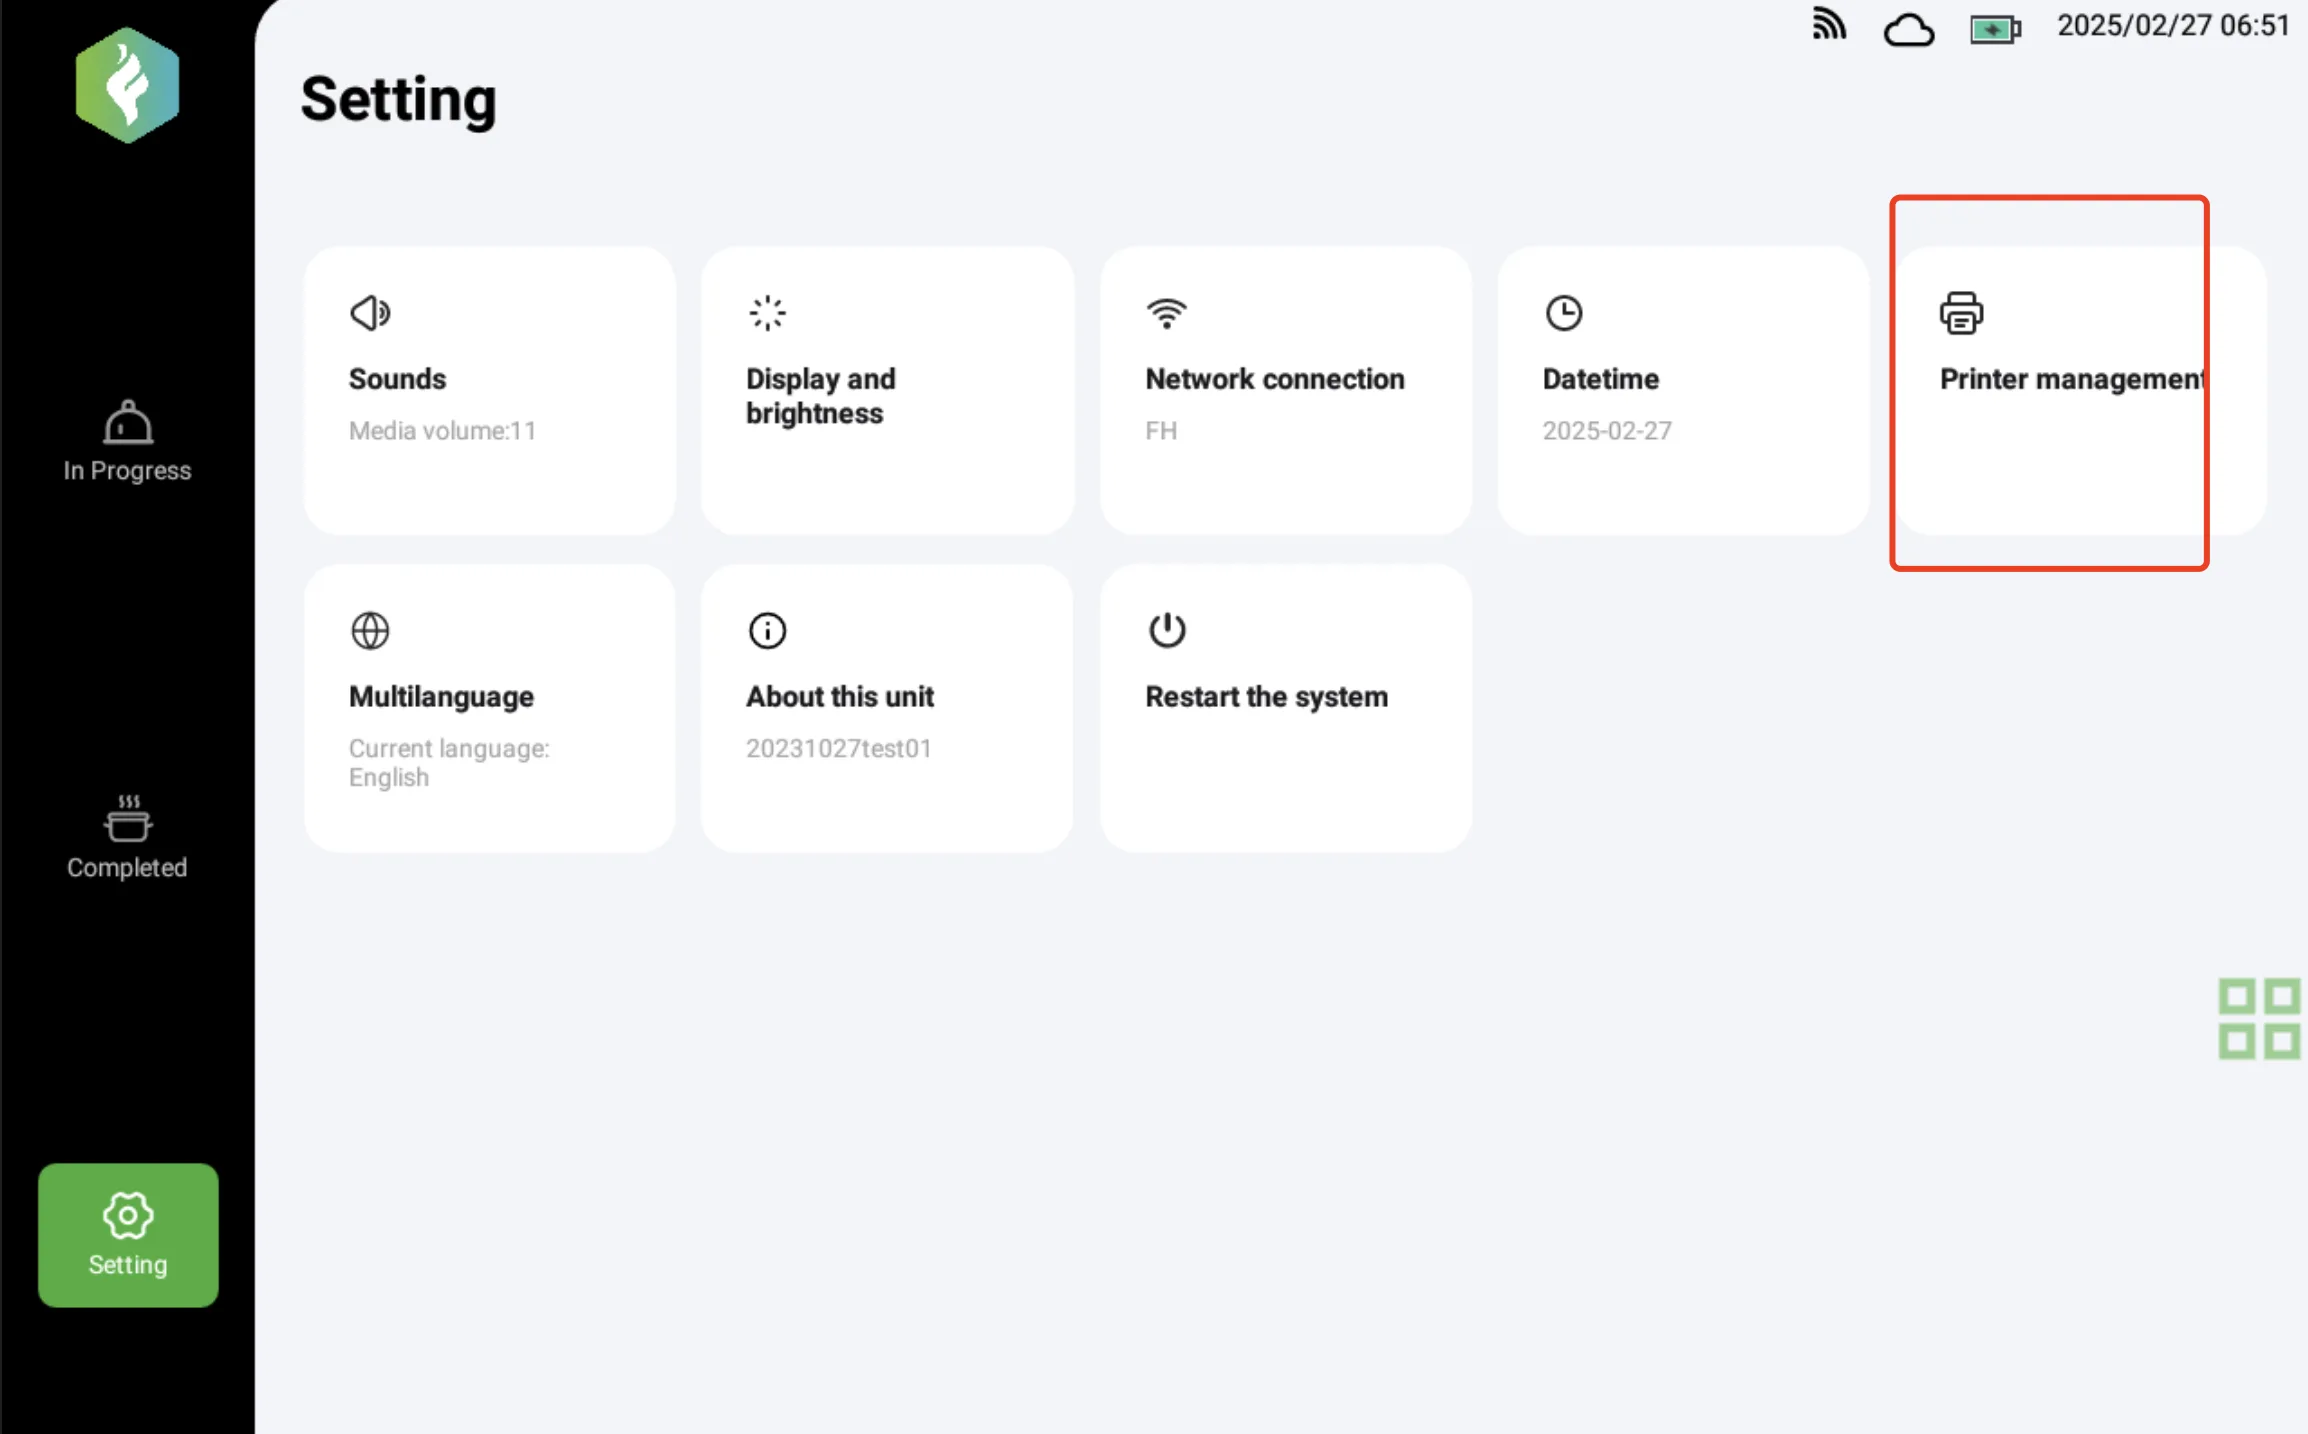
- In Settings, open Printer Management. Configured printers appear in the list. If the device has a built-in printer, it appears automatically and can be opened for configuration.
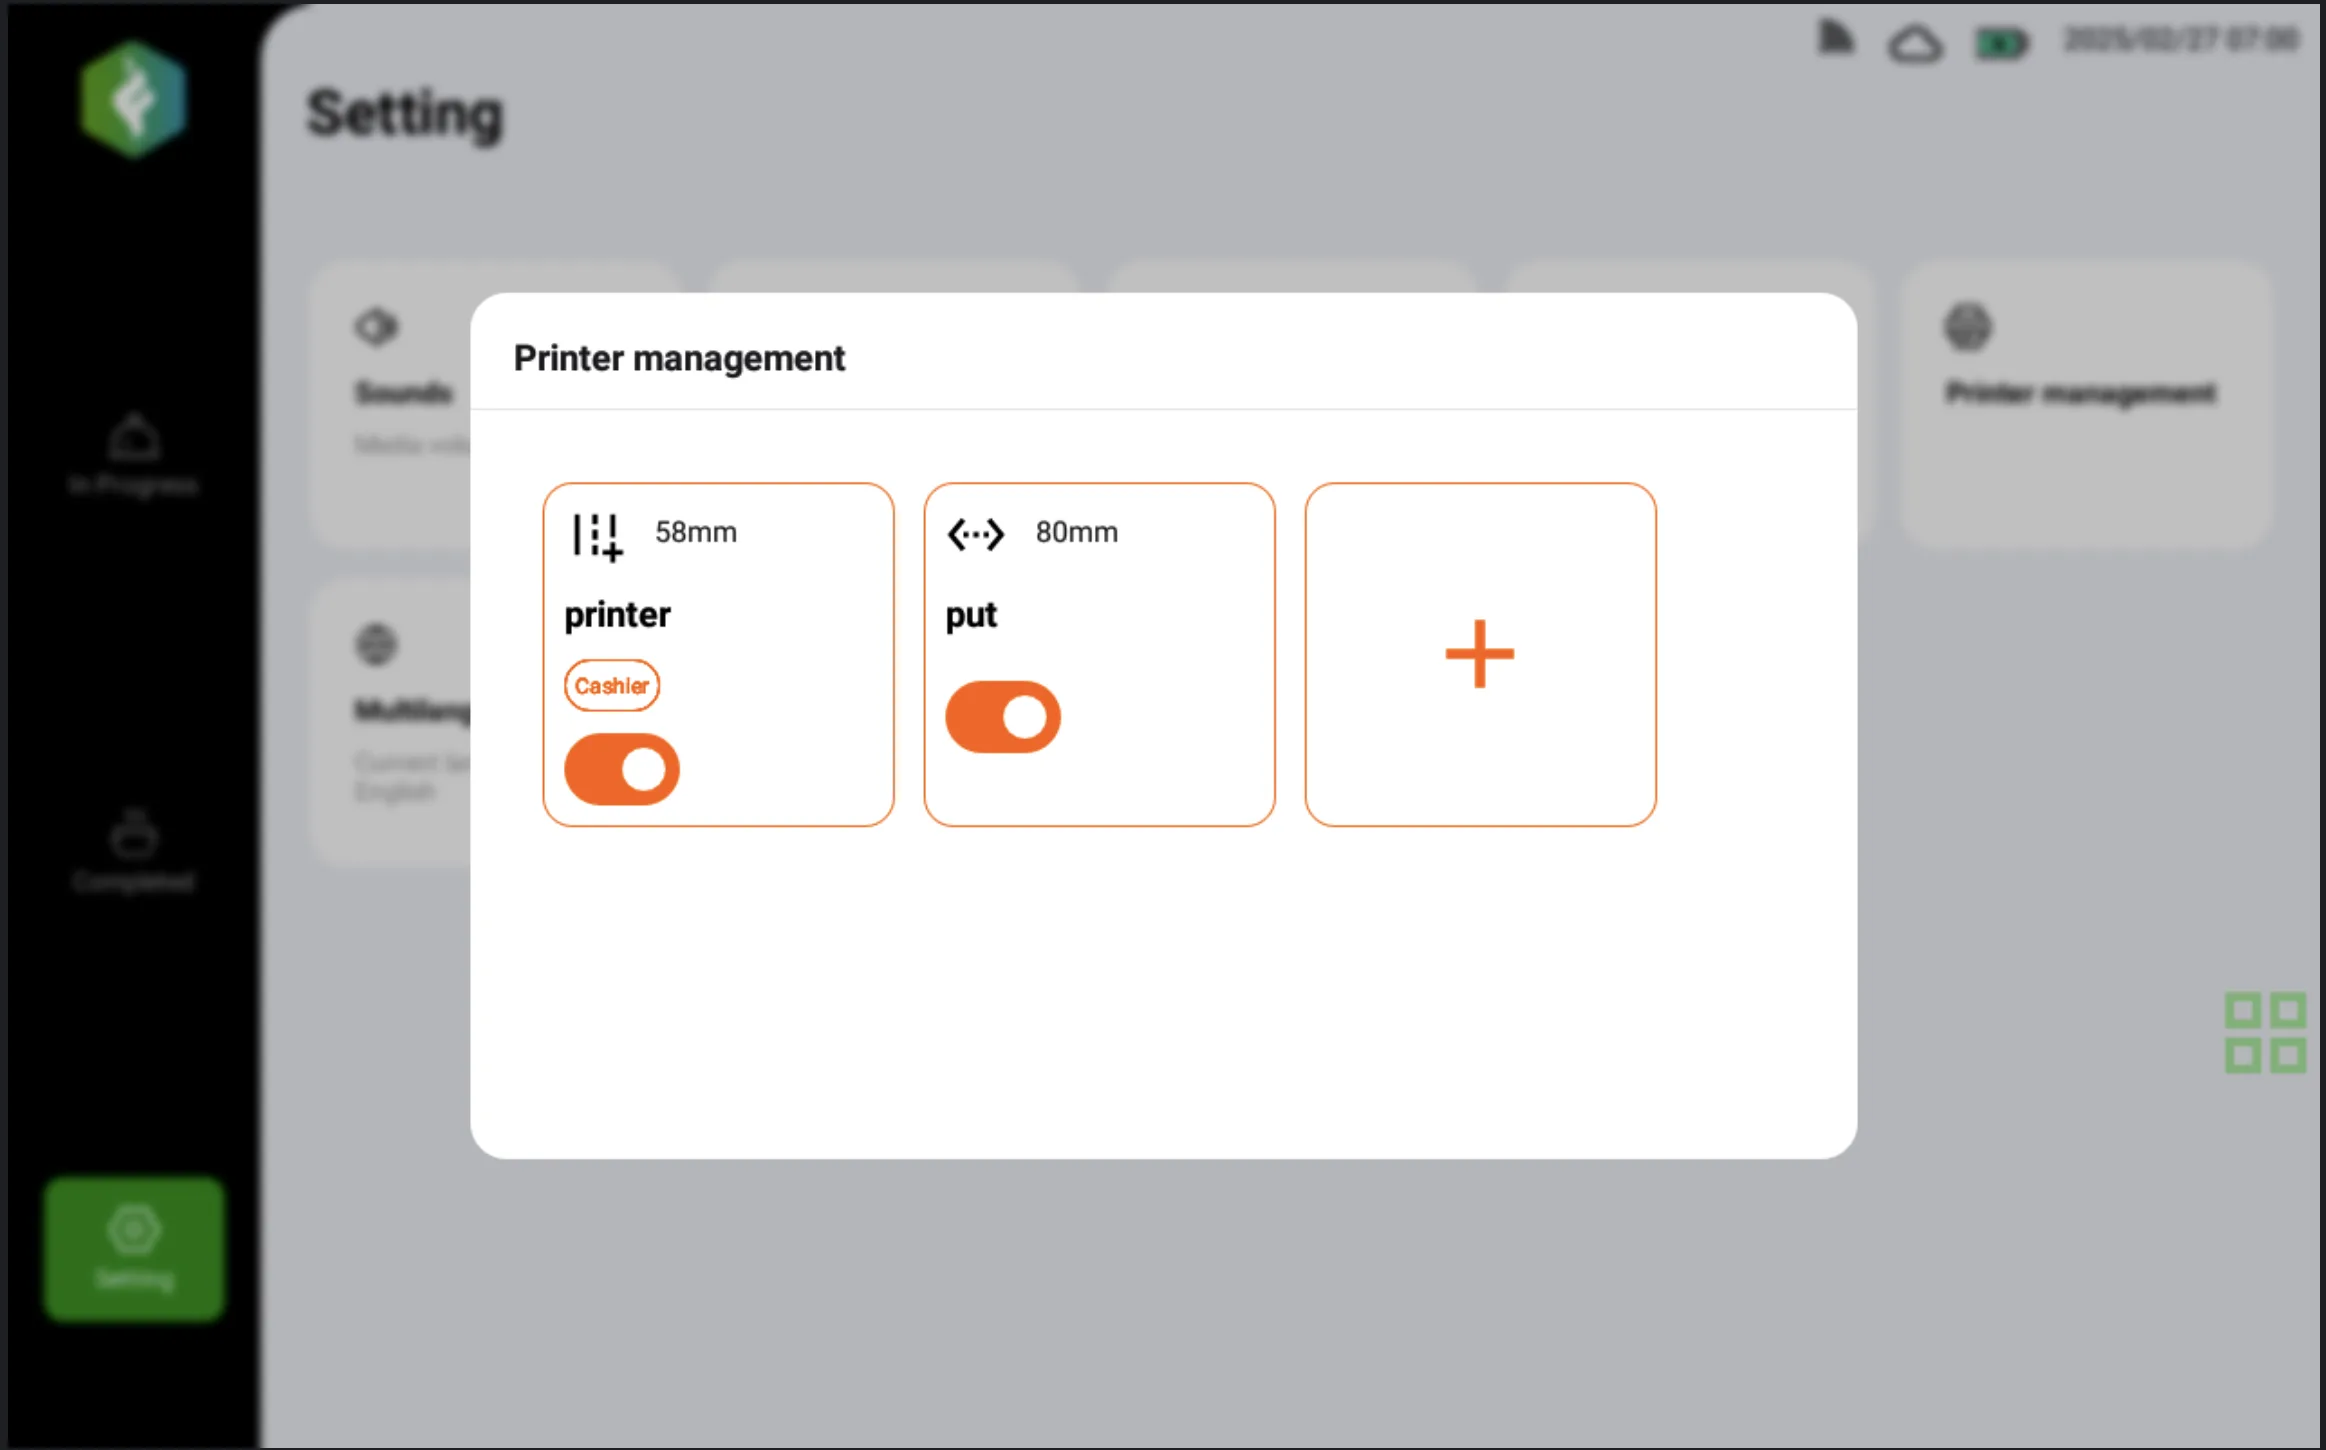
- To add a new printer, tap + and choose a connection method.
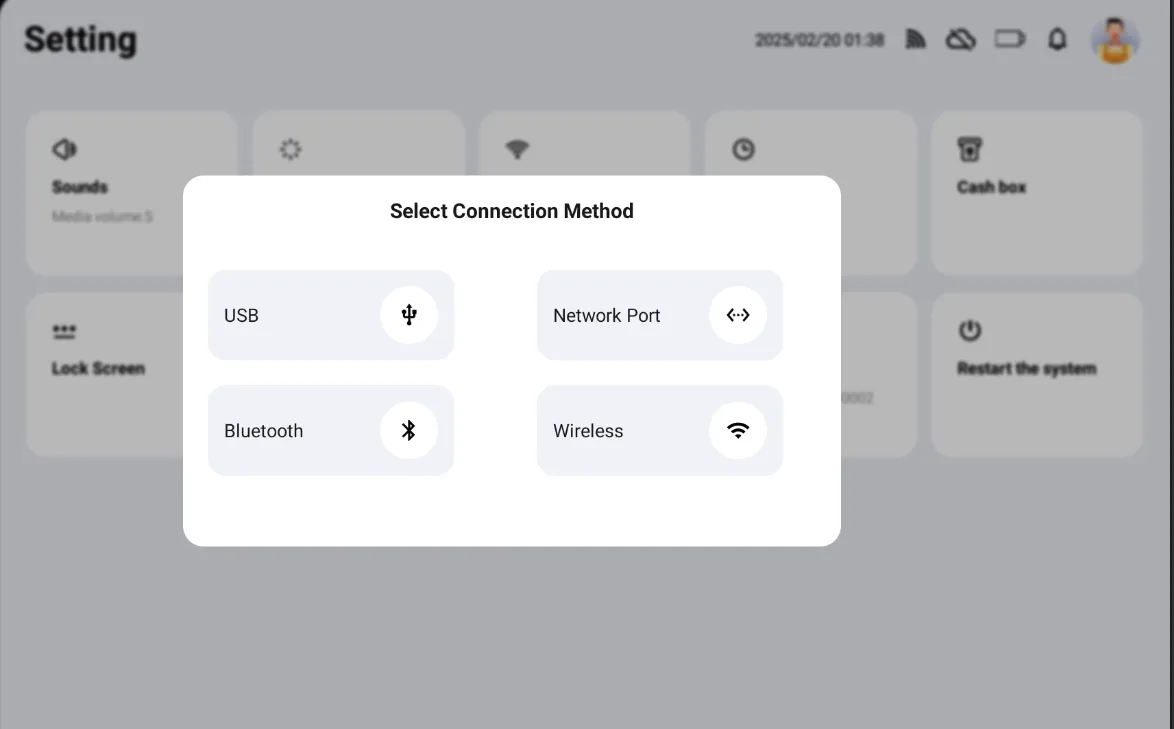
- For USB, connect the printer directly to the device with a USB cable.
- For network port, connect the printer to the same local network as the device.
- For Bluetooth, make sure Bluetooth is enabled on the printer.
- For wireless, make sure the printer's wireless function is turned on.
After selecting the connection method, configure the connection details.
- Set a printer name that is easy to recognize.
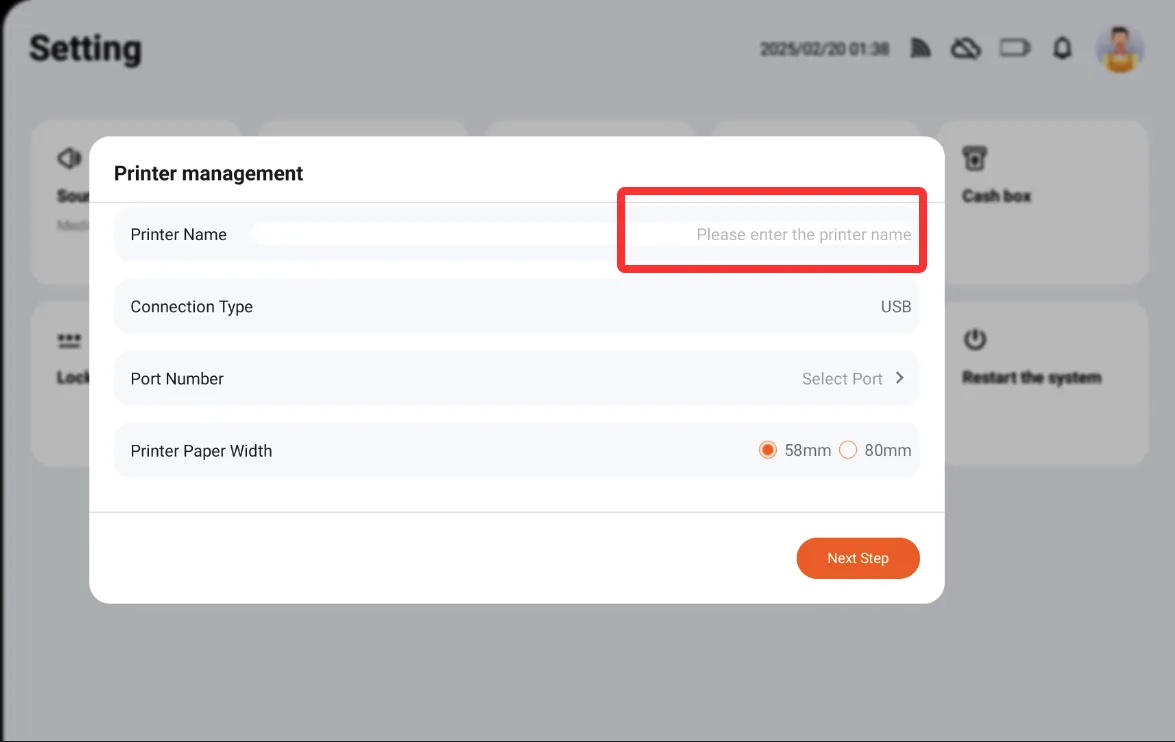
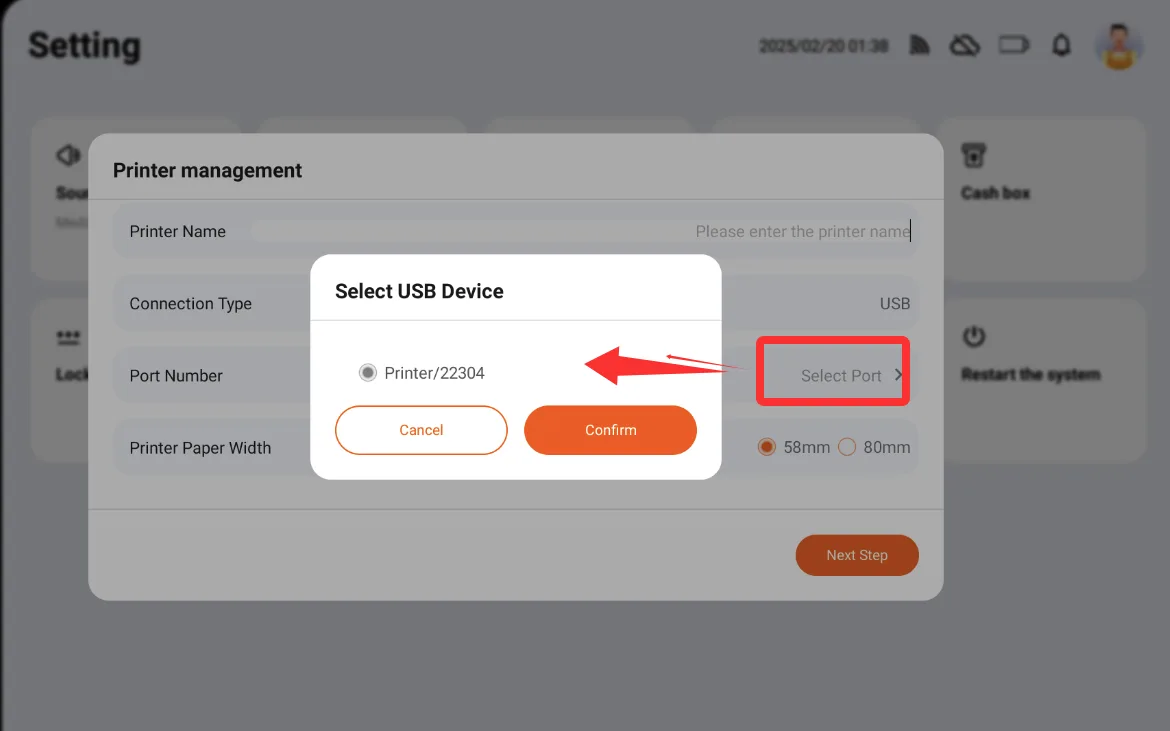
- For USB connection, select the corresponding USB device from the list.
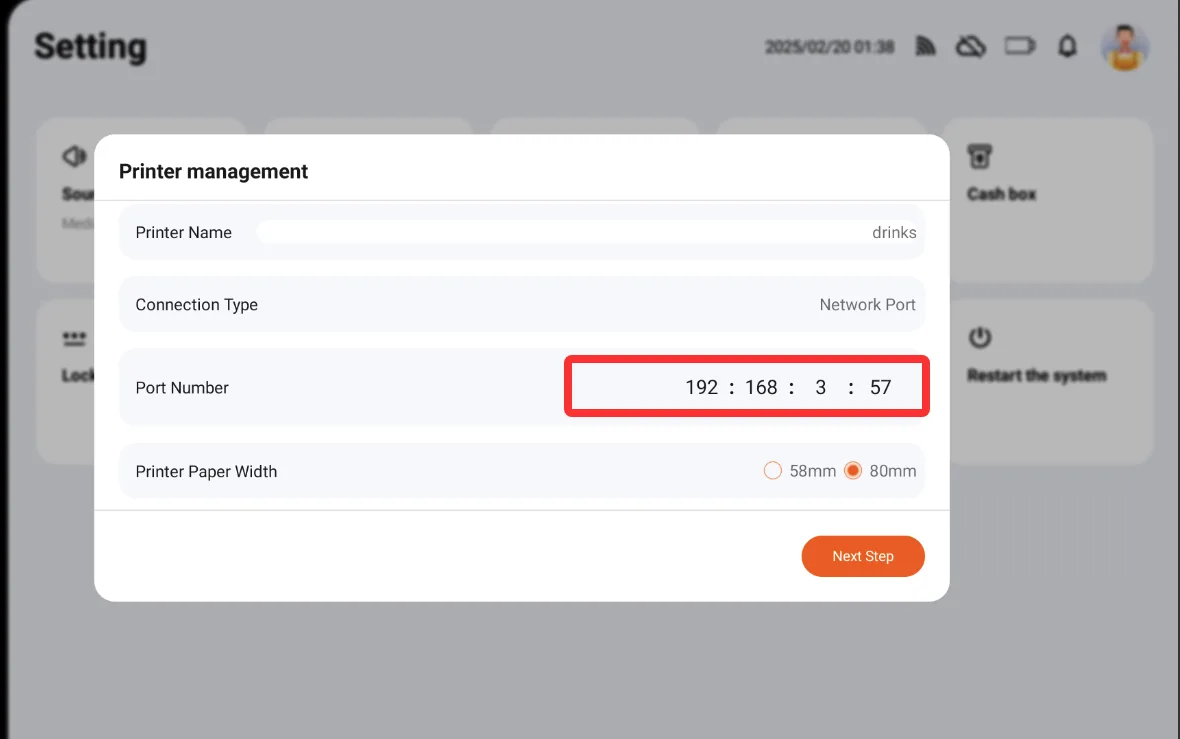
- For network or wireless connection, enter the printer IP address. Some printers print this information on a self-test page after the network cable is connected. If not, hold FEED while powering on the printer to print a self-test page.
If the IP address is not in the same network segment as the current network, or no IP address is shown, try enabling DHCP:
- Enable DHCP: Connect the device to the router with an Ethernet cable, open the paper compartment, insert paper, hold FEED while powering on, wait until the red light stops flashing, press FEED three times, and close the paper compartment. The printer should print a message.
- Get the fixed IP for the current network segment: After enabling DHCP, keep the device powered on, open the paper compartment, press FEED once, and close the compartment. The printer should print the acquired IP information.
These steps apply to some printer models. For details, refer to the printer's official manual.
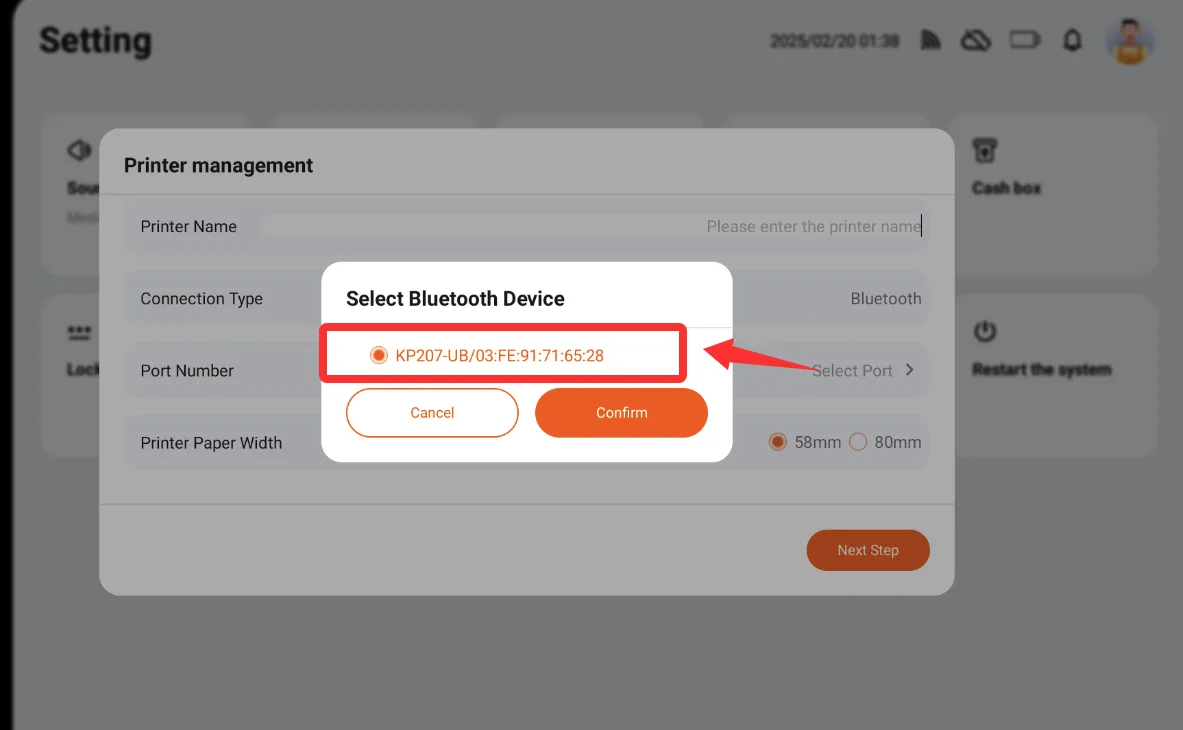
- For Bluetooth connection, select the printer from the available devices. A default pairing code such as 0000 or 1234 may be required.
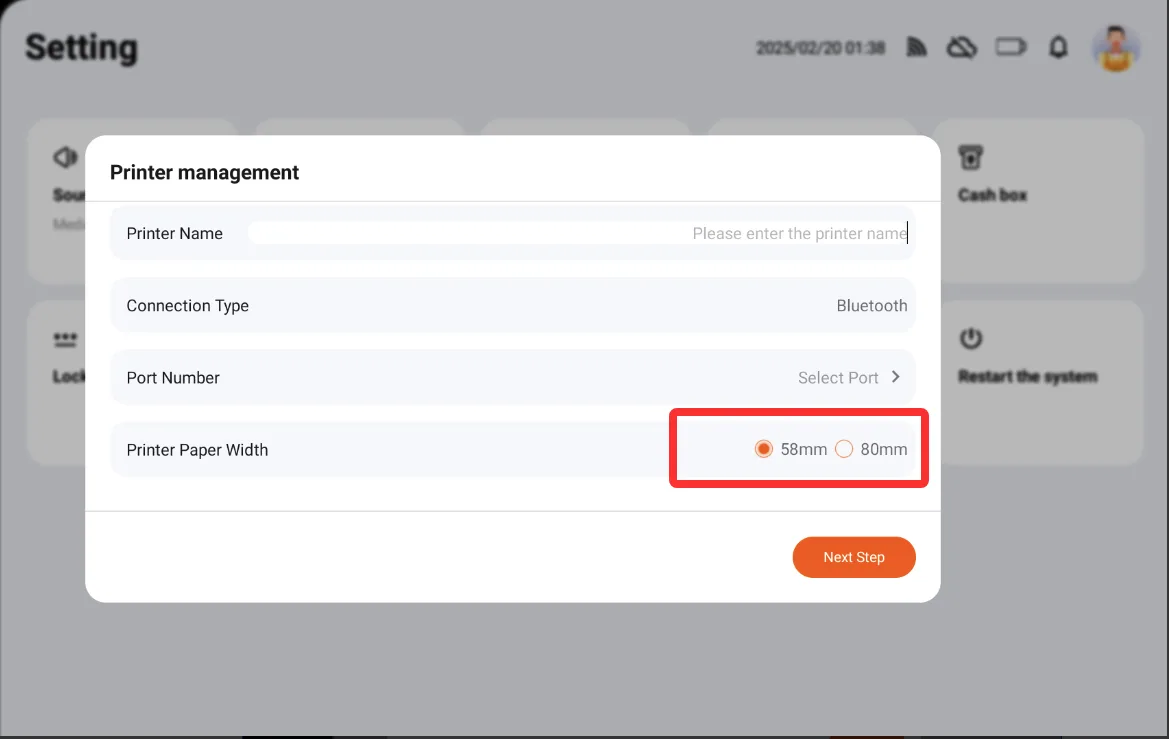
- Select the paper width.
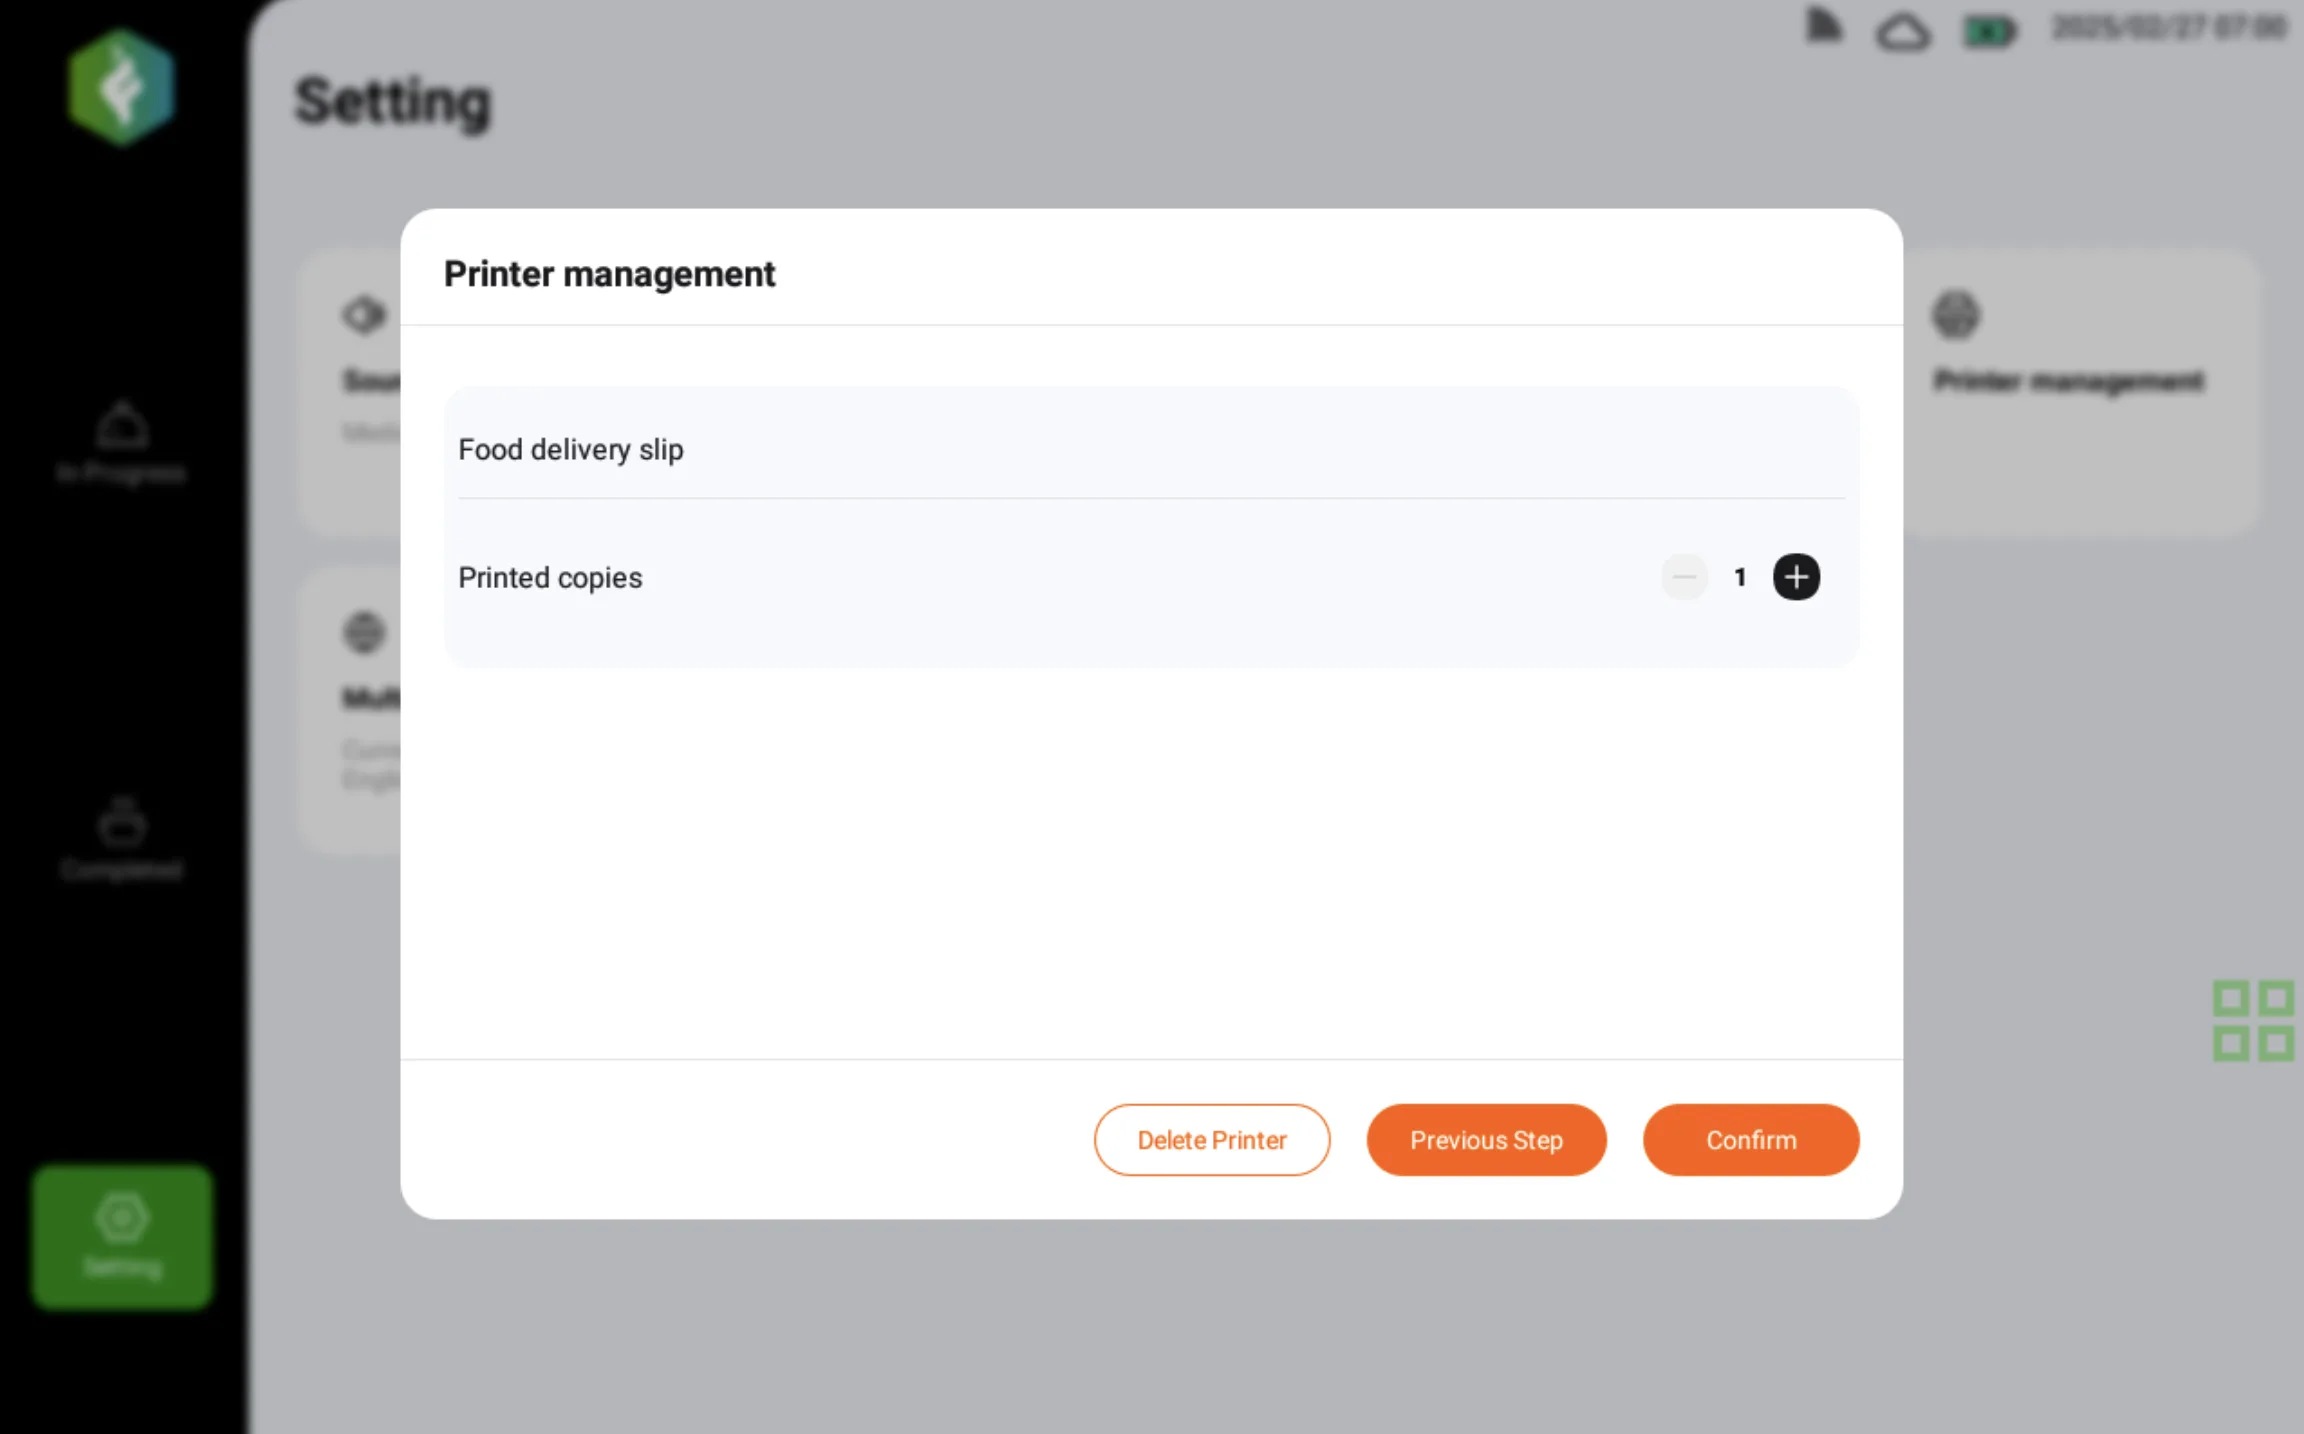
- Tap Next, set the print quantity, and tap Complete to finish.
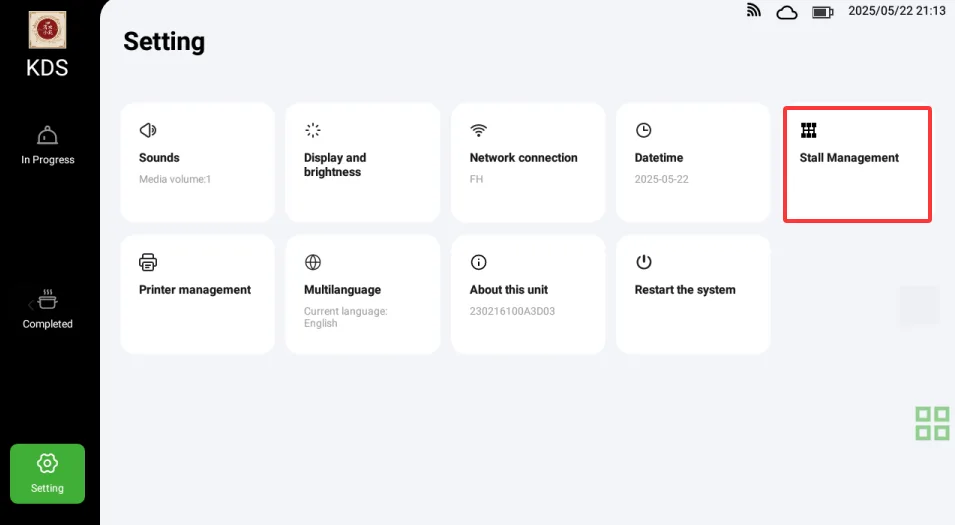
Station Settings
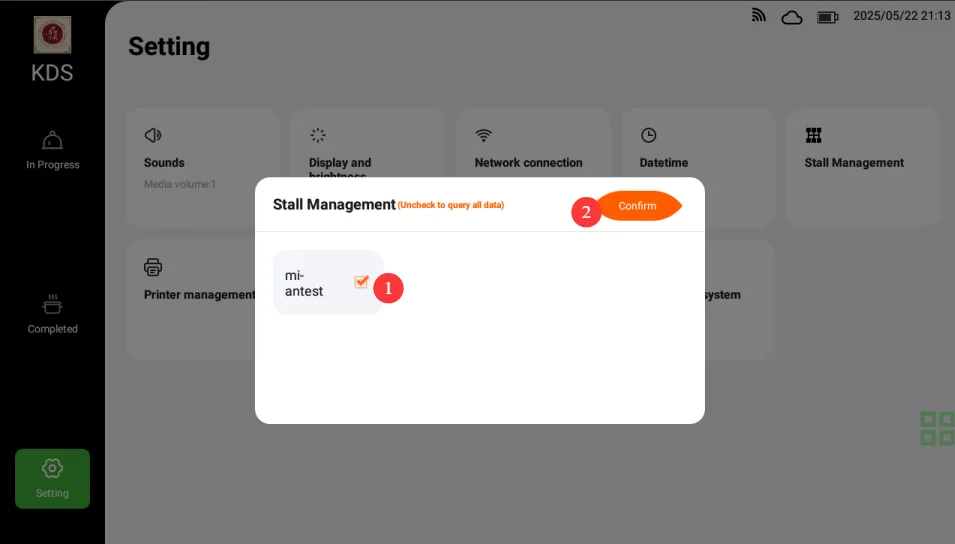
- Stations are not selected by default, so all items are displayed. The kitchen can select one or more stations; KDS then displays only the items linked to the selected stations. Items not linked to selected stations are hidden. If stations are not needed, clear the station selection and confirm.
Timeout Reminders
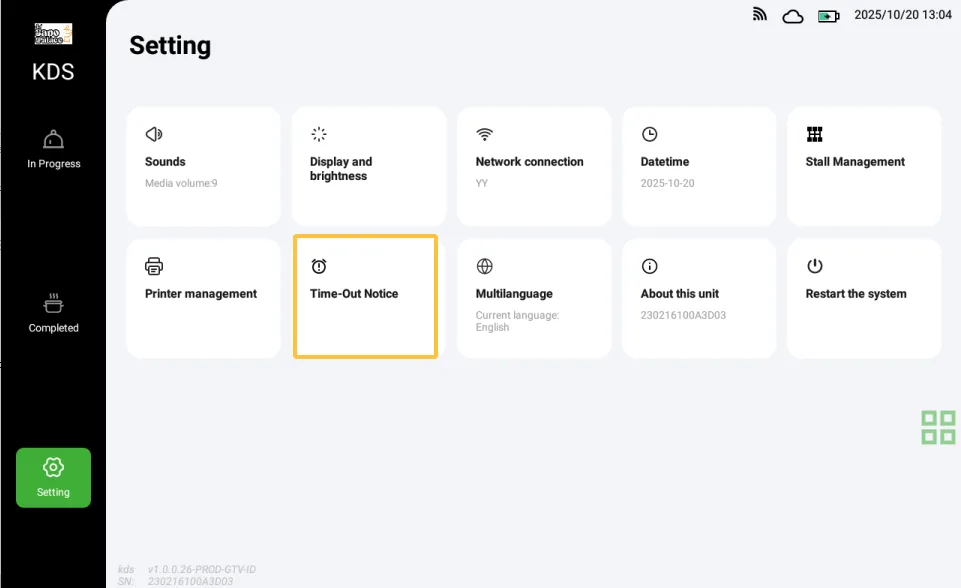
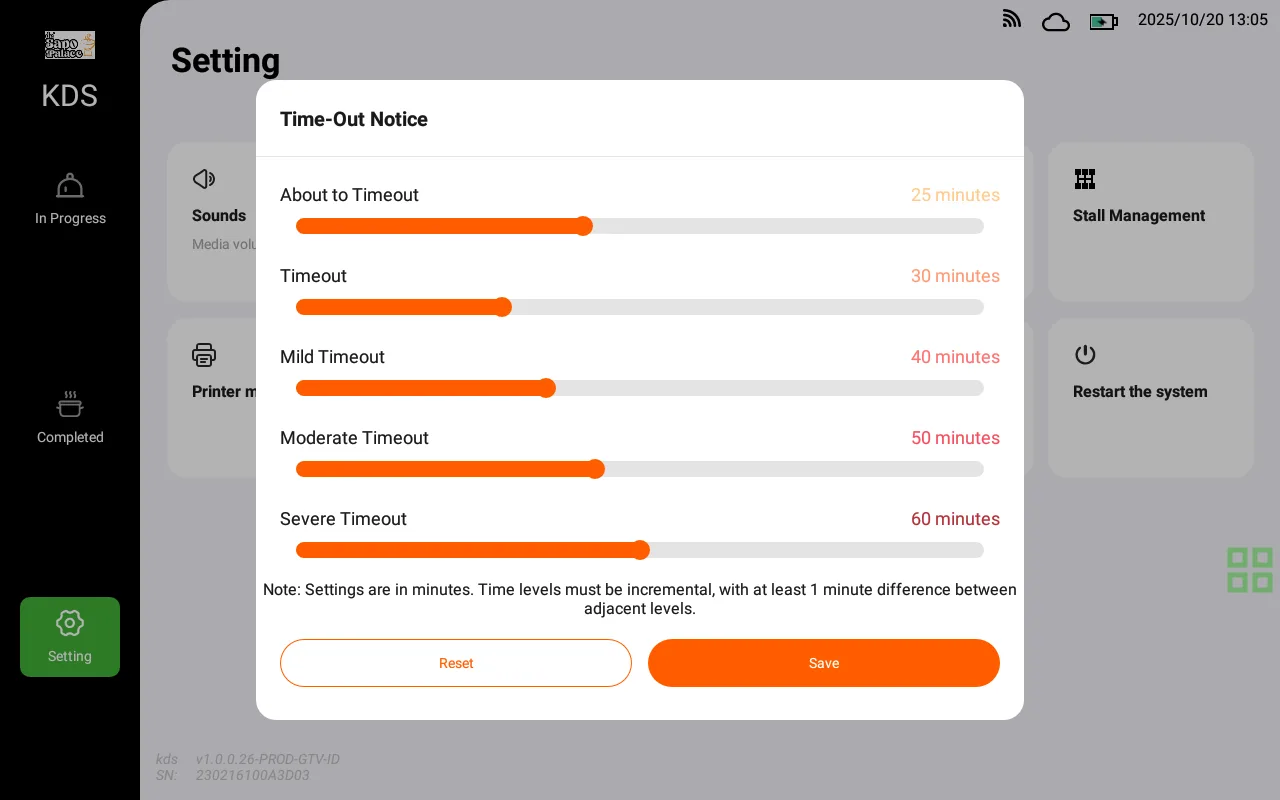
- In the Settings module, open custom timeout settings. The store can set order timeout reminders by dragging the time slider.
In Progress Module
Overview
The In Progress module helps the kitchen process front-of-house orders efficiently and keep preparation work organized.
Receive Front-of-House Orders
- Order receiving: The system receives front-of-house orders in real time and uses voice reminders to notify kitchen staff.
- View modes:
- Order mode: Shows complete order information, including table number, takeout information, and item list.
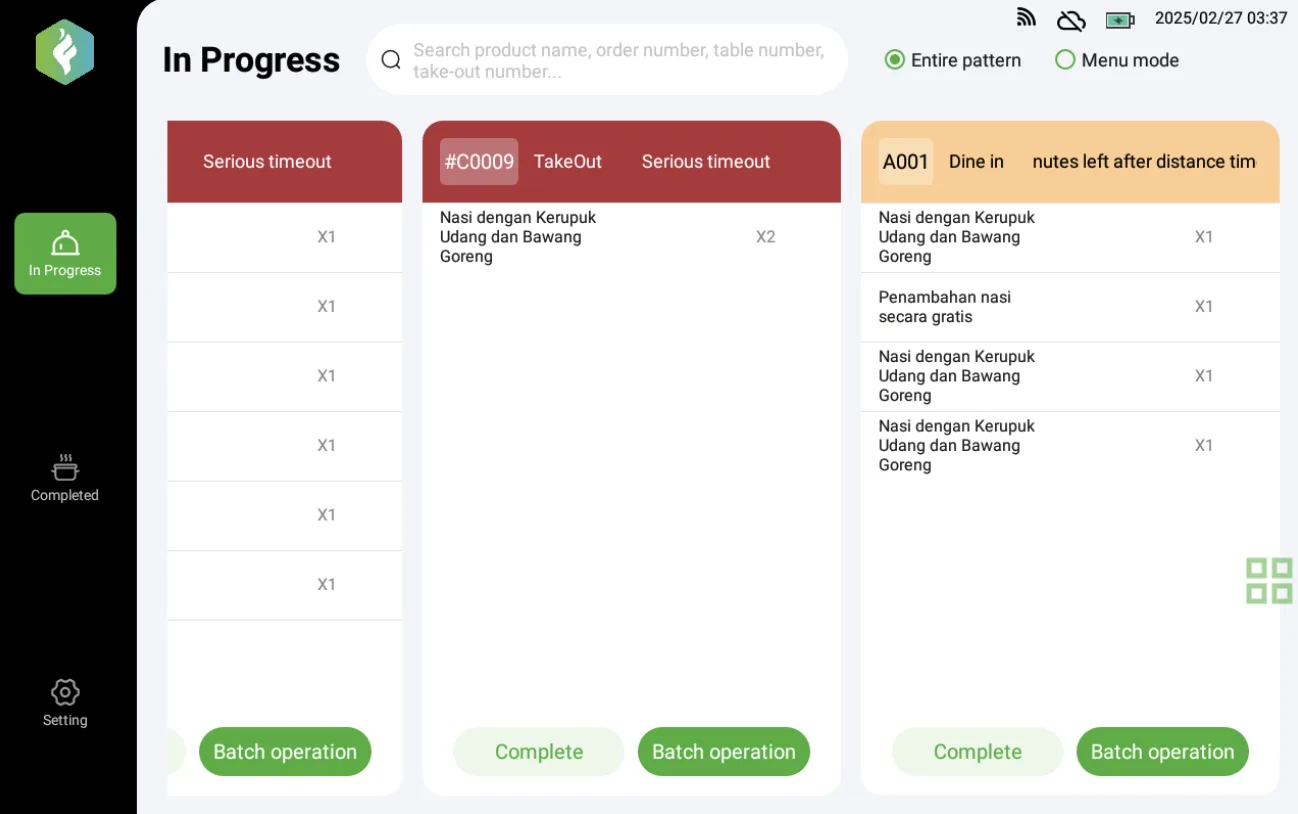
- Item mode: Groups orders by item so the kitchen can batch similar items.
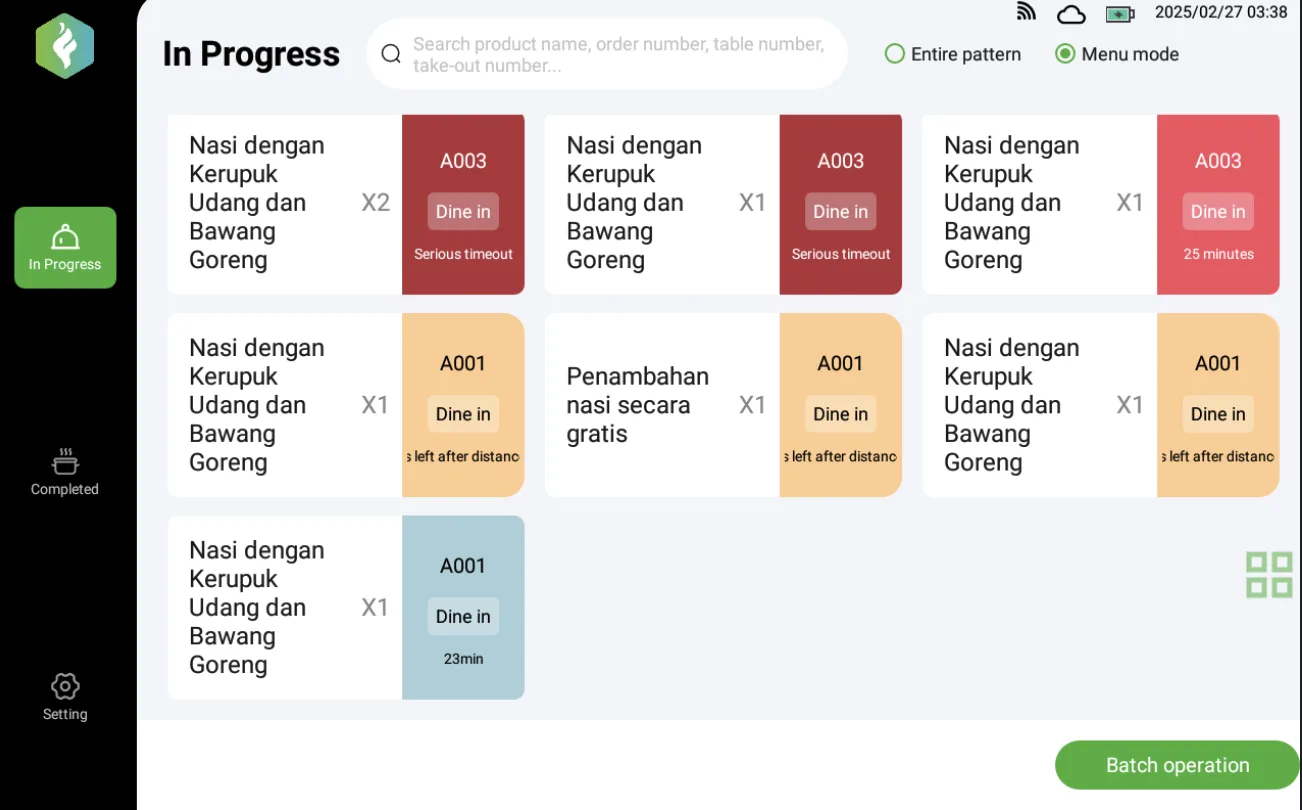
- Search: Use the search box to find orders by item name, order number, table number, or pickup number.
Prepare Items
- Order details: Review item names, quantities, and requirements such as spice level.
- Preparation: Prepare each item accurately according to the order.
- Notifications: Rush requests, returned items, and cancelled orders trigger messages and sound alerts.
Complete Items
- Single item: Tap Complete on an item card when the item is ready.
- Batch completion: Tap Batch operation, select items, and confirm. The system can print a serving ticket automatically.
- Serving print: When configured, the printer prints a transfer ticket for service staff.
Messages and History
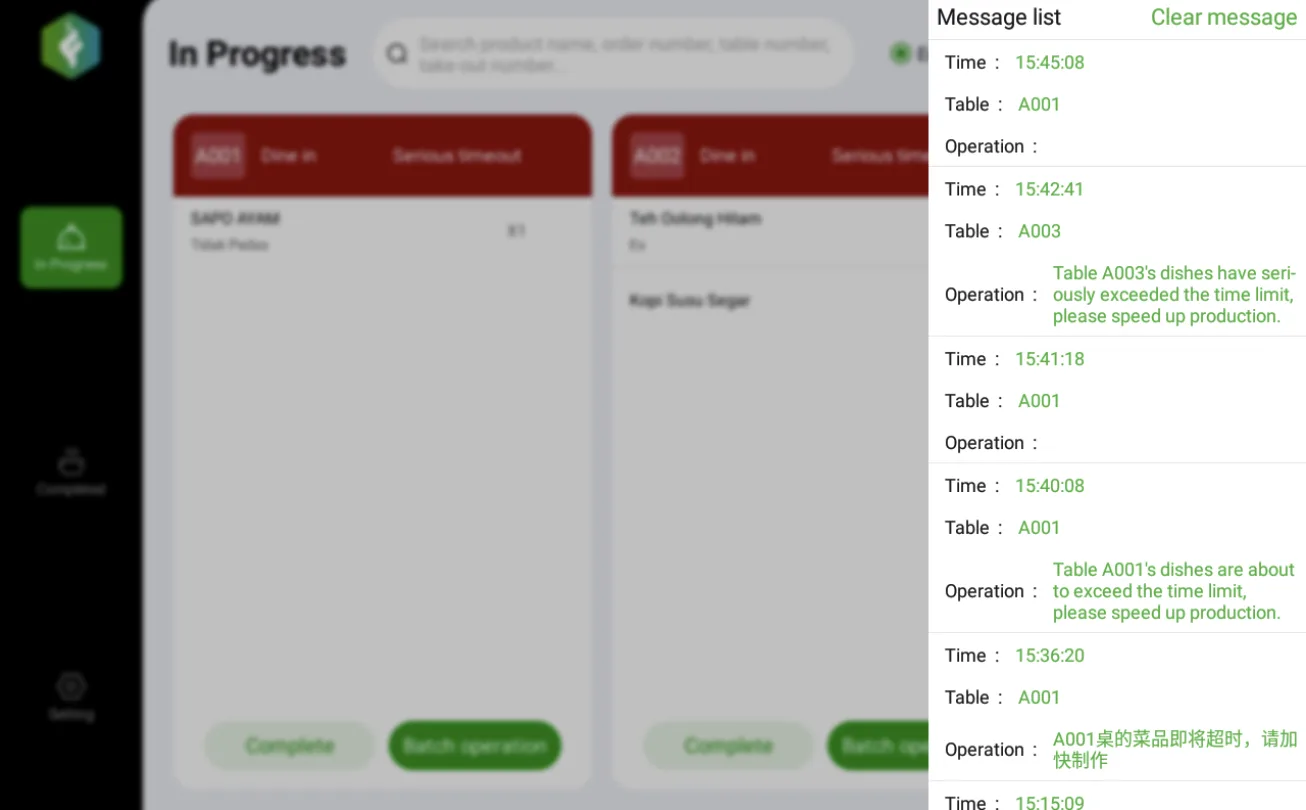
- Message reminders: Rush requests, returns, and timeouts trigger message and sound reminders.
- Message history: Tap the lower-right button to view historical messages.
Timeout Reminders
- Default timeout: Items not completed within 30 minutes are treated as timed out.
- Reminder stages:
- 25 minutes: almost timed out.
- 30 minutes: timed out.
- 40 minutes: timed out by 10 minutes.
- 50 minutes: timed out by 20 minutes.
- 60 minutes: serious timeout.
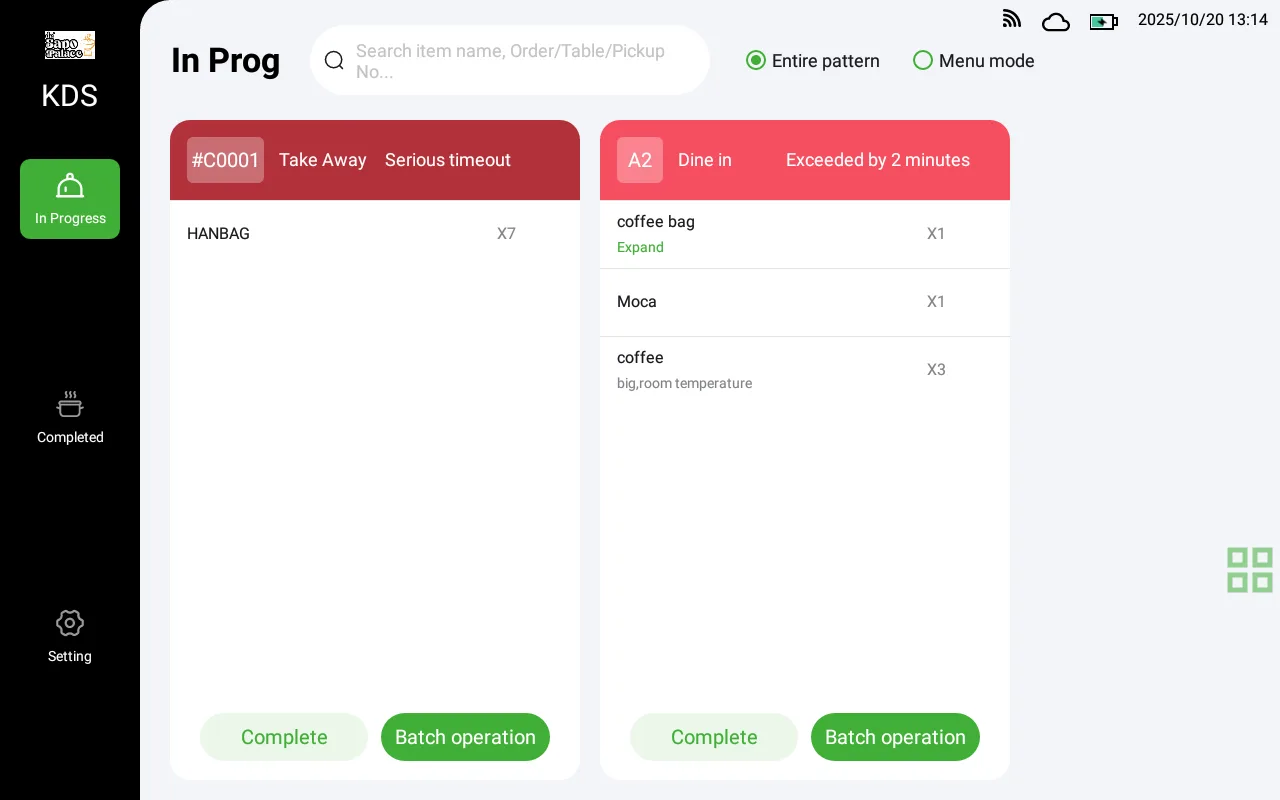
- Visual reminder: Timeout cards change color over time and play sound alerts.
Completed Module
Overview
The Completed module shows items that have already been finished. It supports order mode and item mode, and allows staff to undo a completion if needed.
View Completed Items
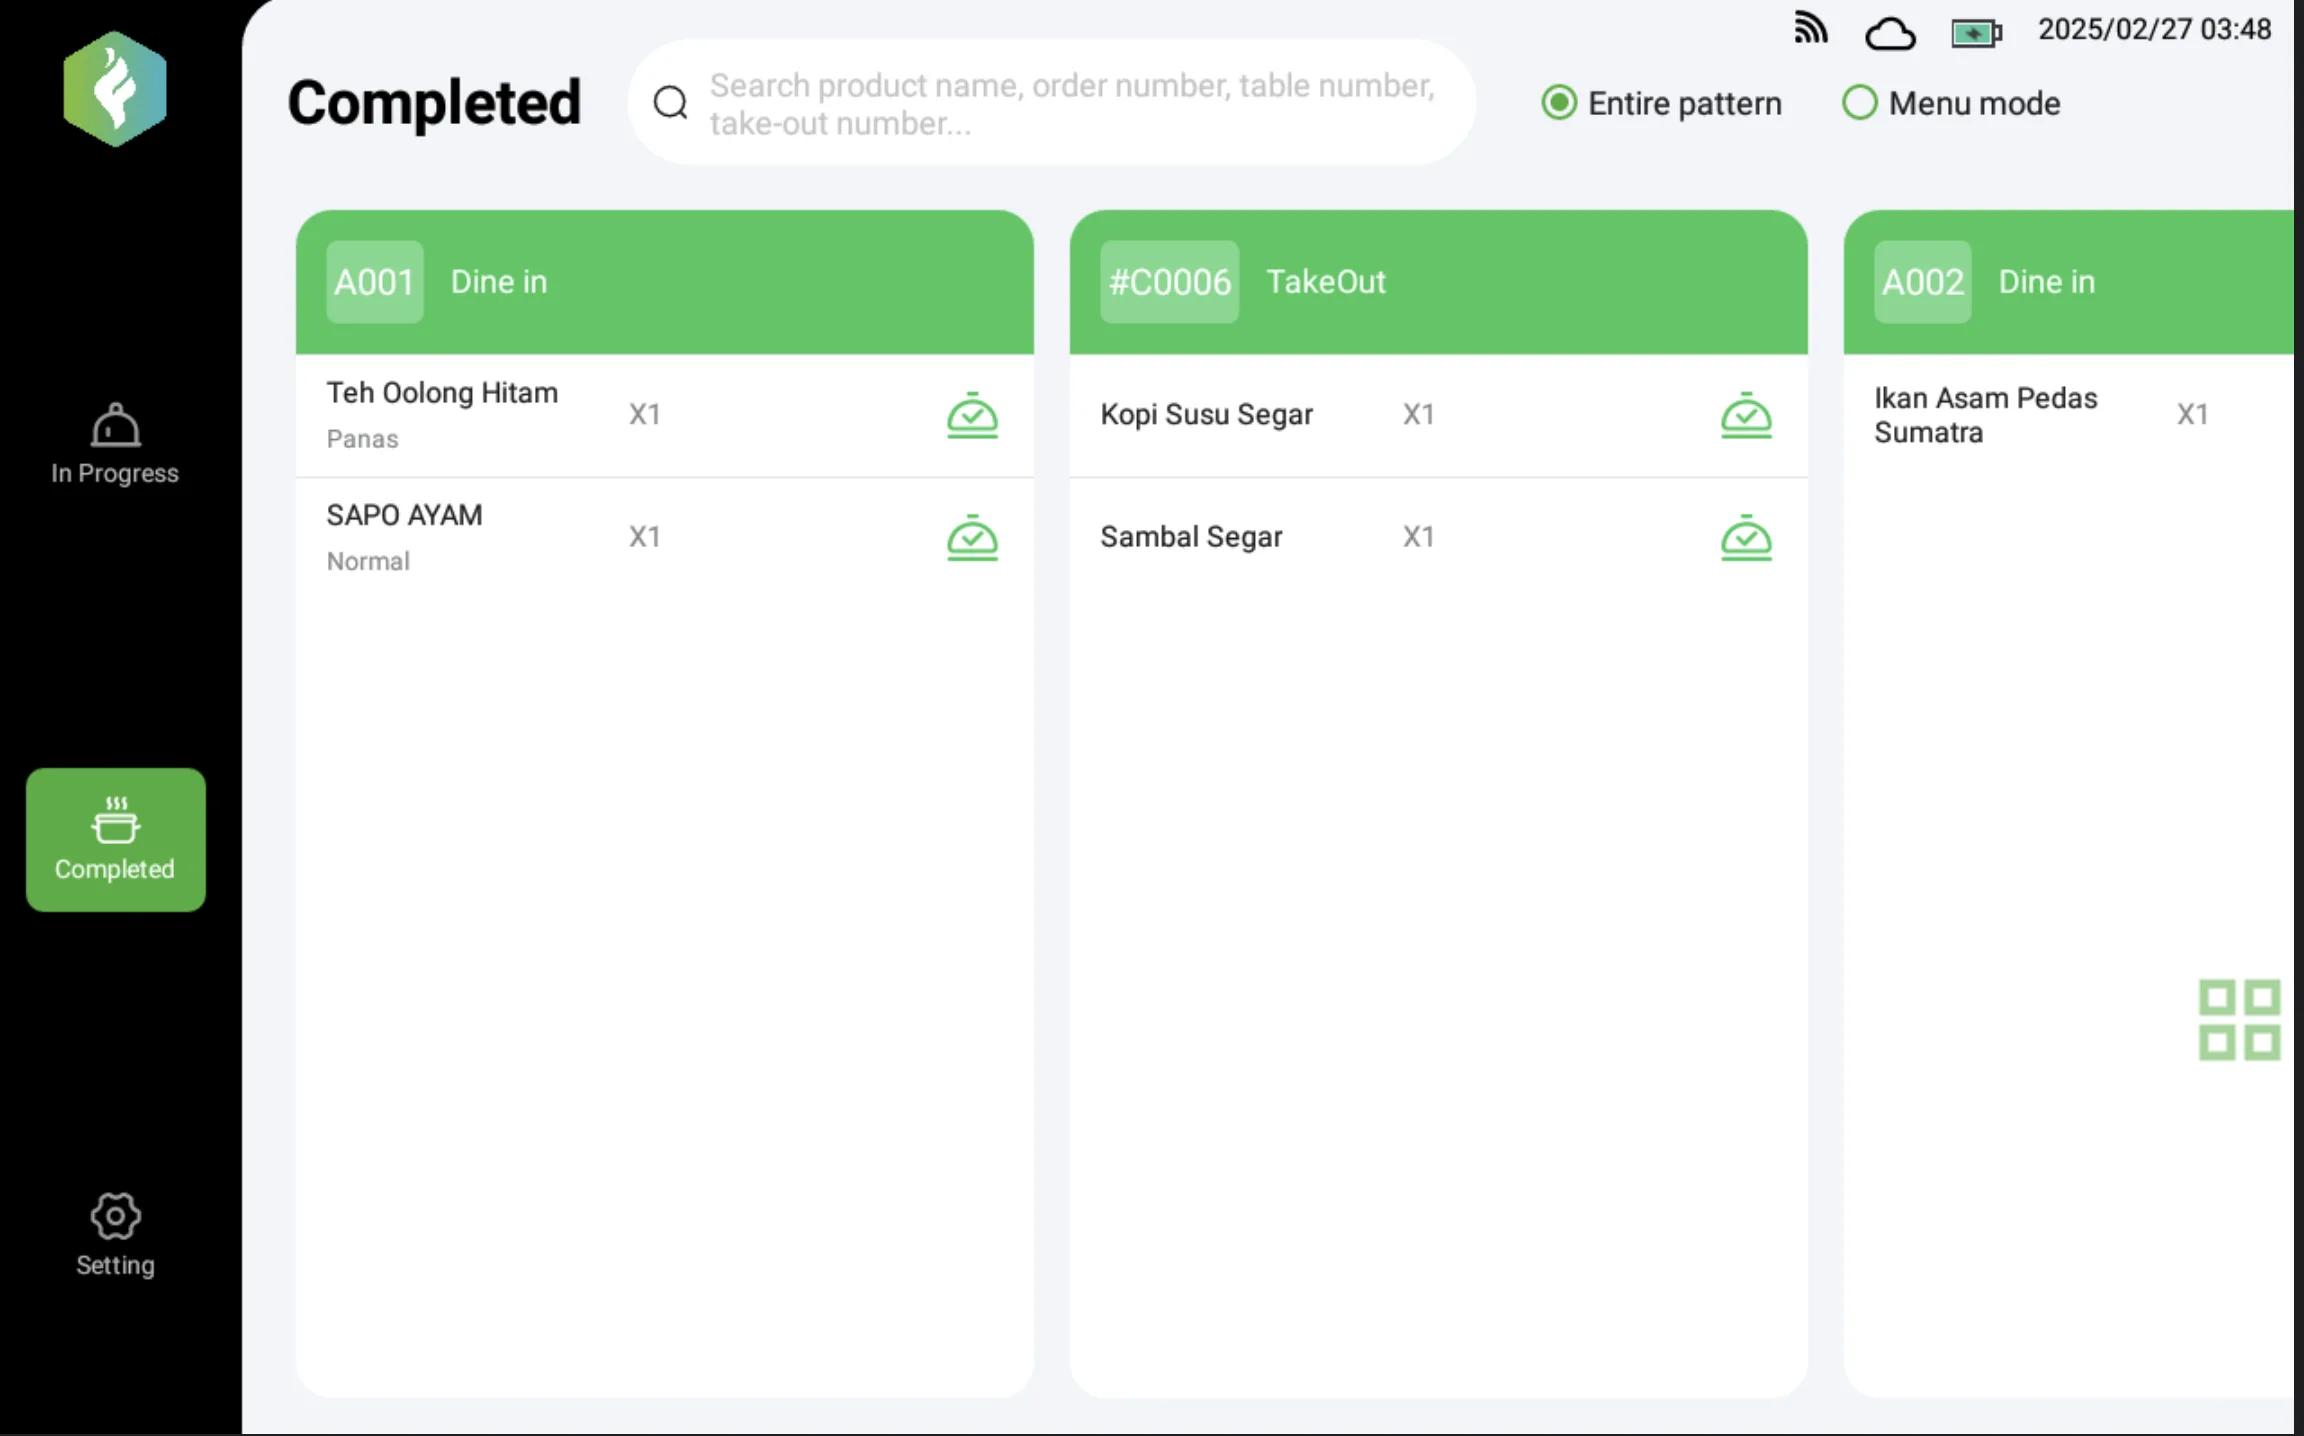
- Order mode: View completed items by order, including table number, order number, and item list.
- Item mode: View completed items by item for easier quantity checking.
- Search: Find completed items by item name, order number, table number, or takeout pickup number.
Undo Completion
- If an item was marked complete by mistake, tap the item card to undo the completion.
- Confirm the dialog. The item returns to In Progress and re-enters the preparation workflow.
The Completed module helps the kitchen manage finished items and correct mistakes without losing order accuracy.