
Appearance
Staff, POS & Devices
With the back-office data saved, prepare staff access, the primary POS, the local network and printers.
Staff access
Open Operations management → Organizations and Accounts → Staff management → Role management and create a role with the required POS permissions. Then open Employee Account and create and enable the staff account with that role. Set a six-digit PIN from the account's More menu. POS sign-in uses the PIN; the back-office password is separate.
Accounts without POS access do not appear in its sign-in list. See Staff access and devices.
Primary and secondary POS devices
The first POS enabled for the store becomes the primary POS by default. Connect it to power, turn it on and sign in to the POS system. Connect it to the internet to download the saved setup, then connect other POS devices to the same local store network. While trading, keep the primary POS powered on, the POS system running and the local network connected.
Previously downloaded data can support local operation during an internet outage, but the local network must remain connected. QR ordering requires the primary POS to stay online. Back-office changes also need an internet connection to reach the primary POS.
Printing and opening checks
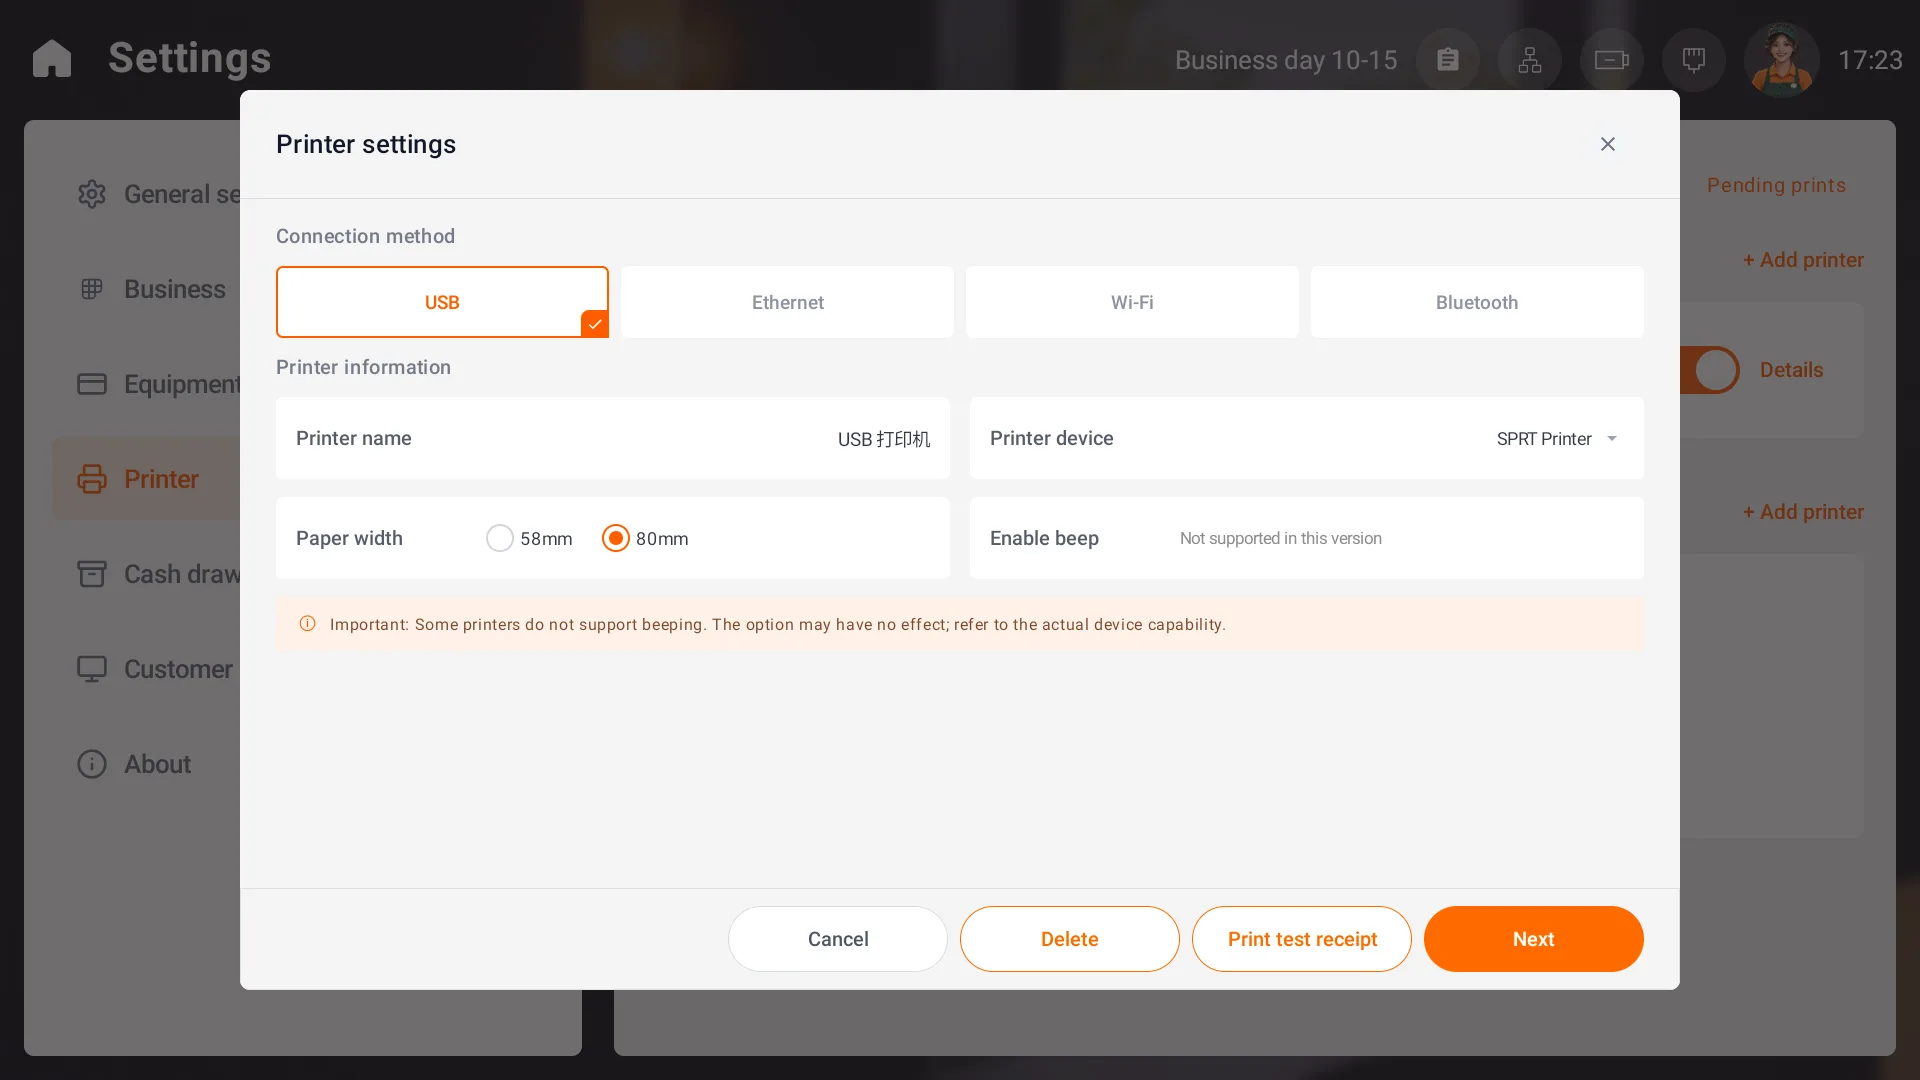
On the POS, choose Printers → Add printer and select the actual connection and paper width. For a USB receipt printer, print a test page, set its front-counter purpose and copy counts, and check the paper output.
Sign in with the cashier's own account and check the menu, tables, final charges, payment channels and receipt header. After collecting payment, check that the order has completed checkout.
Continue with Sign-in, Printers and peripherals and Store device and language settings.
Set up KDS
For kitchen devices, continue with KDS setup to check the local connection, work roles and receiving stations.